Our last article dealt with editing Supply Order Statuses. However, you may have noticed there is very little to edit when you attempted to do so. If you are looking to edit any settings for a status other than the name and display color, you will simply need to create a new one. This article will guide you on creating a new Supply Order Status in PrestaShop 1.5
How to add a new supply order status in PrestaShop 1.5
- Log into your PrestaShop 1.5 dashboard.
- Using the top menu bar, hover over the Stock tab and click on the Configuration option from the menu.
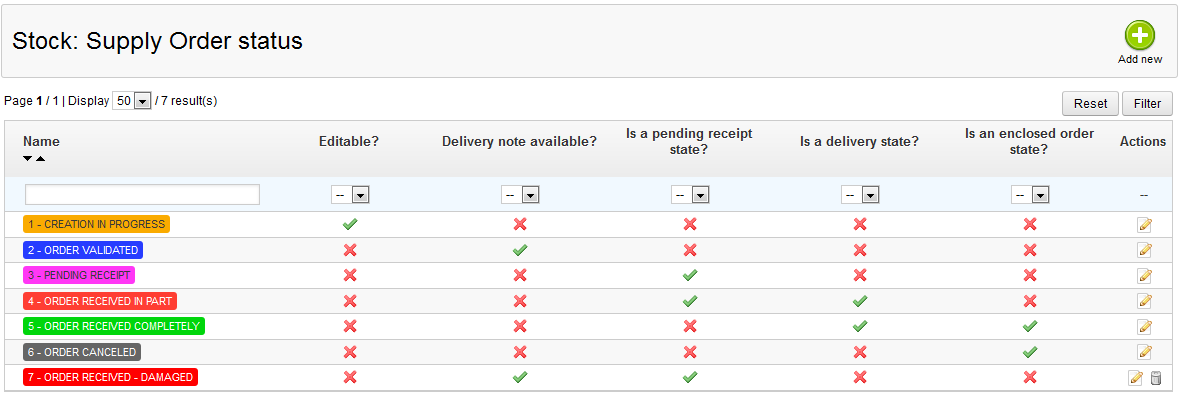
- This brings you to the Configuration page where there are various settings for Advanced Stock Management. Look for the Supply Order Status section, which is located at the top of the page. You will see a list of the existing supply order statuses as below.

- To add a new Supply Order Status, you need to go to the creation page. Click on the green Add New button found in the upper right corner of the page to do so..
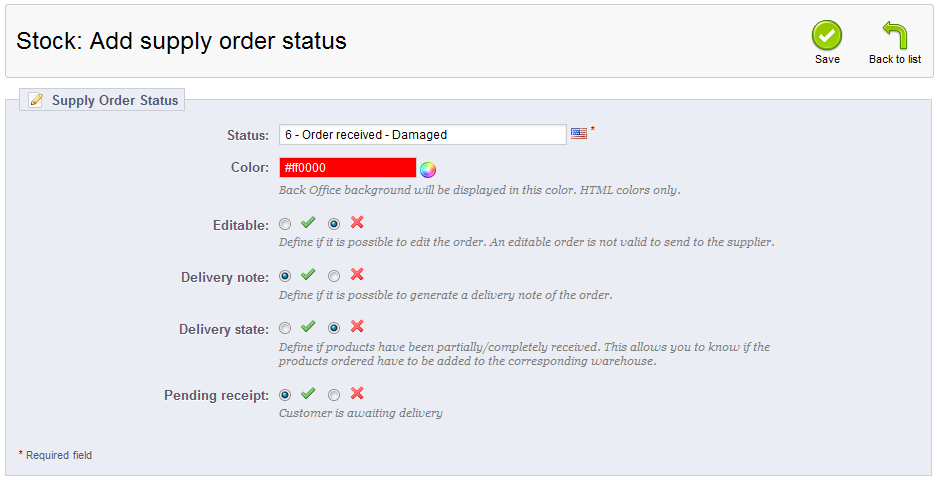
- This new page is where you will create the Supply Order Status. Fill in the appropriate data for the status you are creating. There are six fields to consider:
Status This is the name of the status that displays in the list. Color The background color for display in the back office. Editable Whether the order is editable or not. Delivery Note Set if you can generate a delivery note for the order. Delivery State Set if products have been received to the warehouse. Pending Receipt If customer is awaiting delivery. - Once completed, simply click on the green Save button in the upper right corner of the screen. This will finalize your new Supply Order Status and take you back to the list screen. Below is a before and after shot of adding a new Supply Order Status.
Before After 


