When adding blocks throughout a Moodle site, occasionally a block may need to be removed completely throughout the entire site. The Manage blocks section within the Site administration of Moodle 2.3 will allow blocks to be deleted or hidden or shown. In the block manager, the number of instances of a block is also shown, where the administrator can see how many times the block was used through out the site. This makes the block removal or deletion quicker when the Blocks data is out of date
An example of a block that may need to be removed is the Upcoming Events block. When upcoming events are passed throughout multiple courses, the administrator can remove all instances of the upcoming events block throughout the Moodle Site. Lets get started removing a block.
Deleting a block throughout a Moodle site
- Log into the Moodle Dashboard

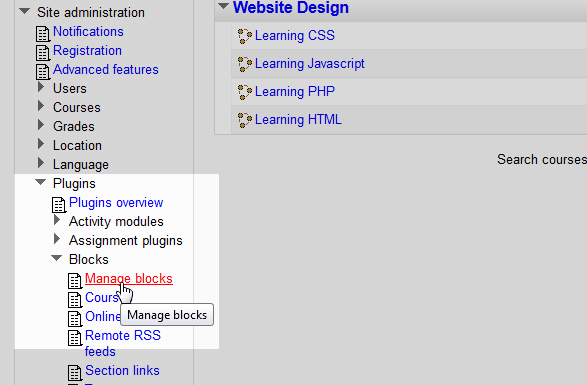
Navigate to the Site administration > Plugins > Blocks > Manage blocks.

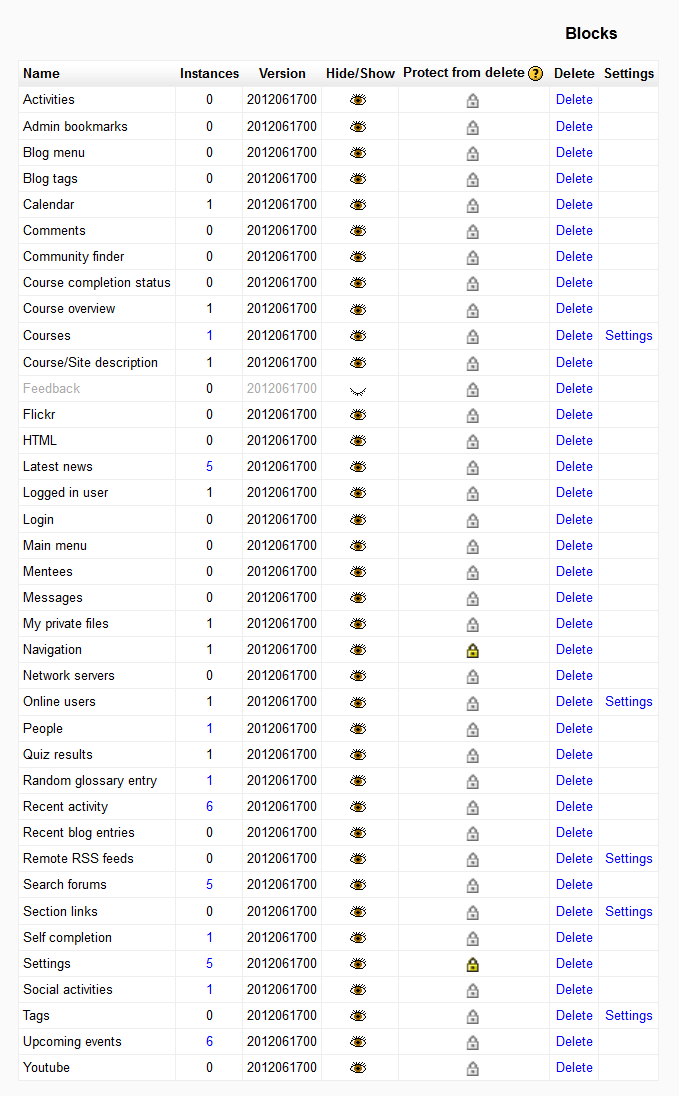
Next the list of blocks to manage will load. The following table will show what blocks can be deleted, hidden, or shown.
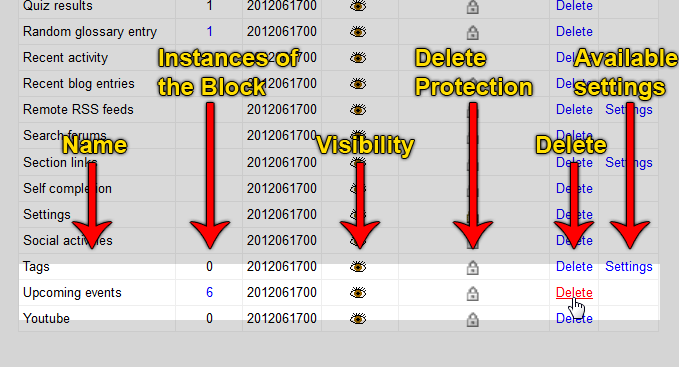
Managing blocks Name Lists the name of the Block. Instances Shows how many pages the block has been added to throughout the entire site. Version Shows the plugin version number. Hide/Show Hides or Shows the plugin throughout the Moodle site. Protect from delete Prevents a Block from being deleted from the Moodle site. Delete Deletes the plugin. Note: In order to completely remove a Block from the moodle software completely, the folder will need to be removed or deleted from the moodle/blocks folder. If the folder is not removed, Moodle will reinstall the block the next time the site administration is accessed.
Settings Block settings can be accessed from the settings link. For this instance, click the Delete link.

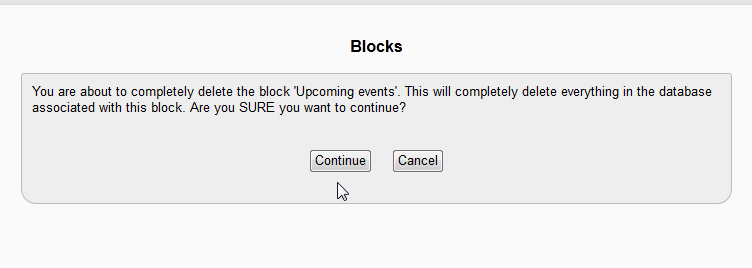
On the Blocks page the following will display:
You are about to completely delete the block ’Upcoming Events’. This will completely delete everything in the database associated with this block. Are you SURE you want to continue.
Click continue. (As long as the folder is still on the server the Block will reinstall.)
Log out of Moodle and then back in as an administrator.

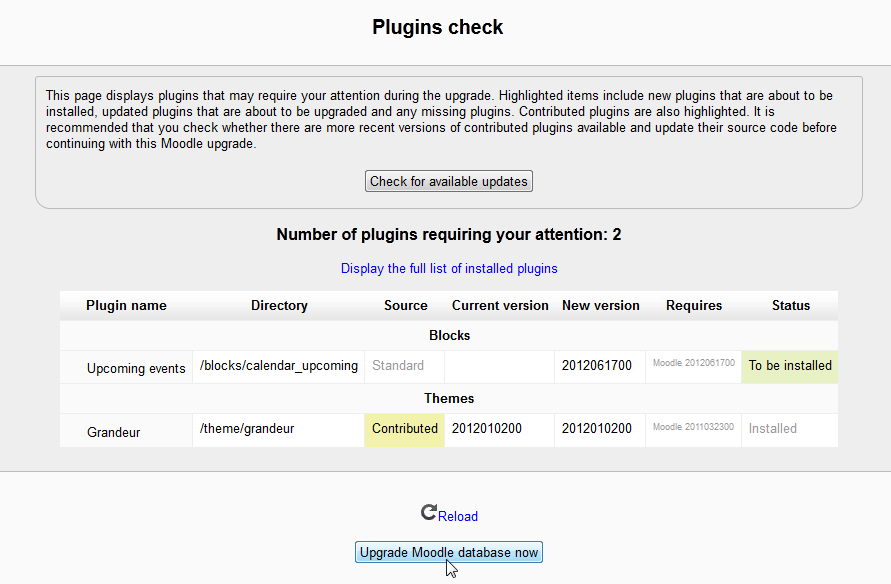
Once logged in as administrator the Plugins Check page will load. Here Moodle gives the opportunity to reinstall the Block.
Be sure you have a backup of your database before clicking Upgrade Moodle database now. For more information on backing up your database please click here.
Click Upgrade Moodle database now.
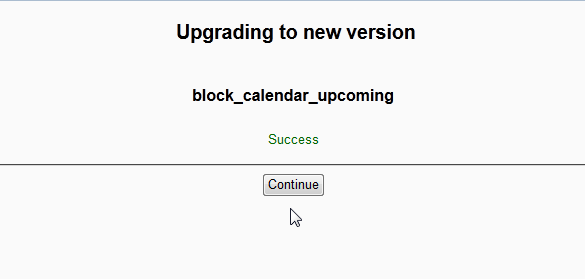
On the Upgrading to new version page the plugin re-installation should say Success. Click Continue.

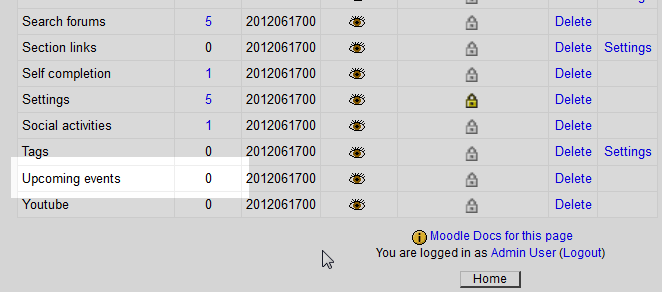
Now when navigating to the Manage blocks section, the Block should show 0 instances on any page in the Moodle site.
This concludes the article for managing blocks in Moodle. If you missed the last article, please visit Comments block configuration in Moodle For more information about articles with a similar topic, please visit Changing the Appearance of Moodle.
