One of the many image settings you can use to tailor the look and feel of your site is that of size. You can set a maximum and minimum image size, in pixels, that can be uploaded y by you or your node creators when building your pages. This will help in not allowing images that are too large, or even too small, if you wish. Below are the instructions for setting this limitation for your images in Drupal 8.
How to set image size limits
- Log into your Drupal 8 admin interface.

First click on the Menu option from the top menu bar. Next click on the Structure option from the second drop down.

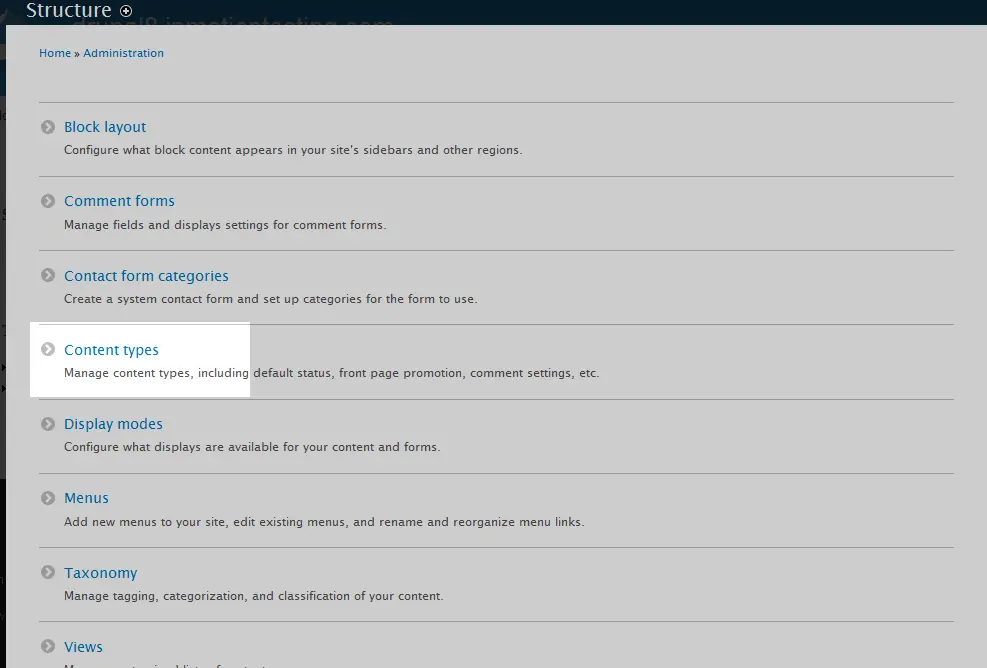
This leads you to the Structure listing page. From here, click on the Content Types option.
-

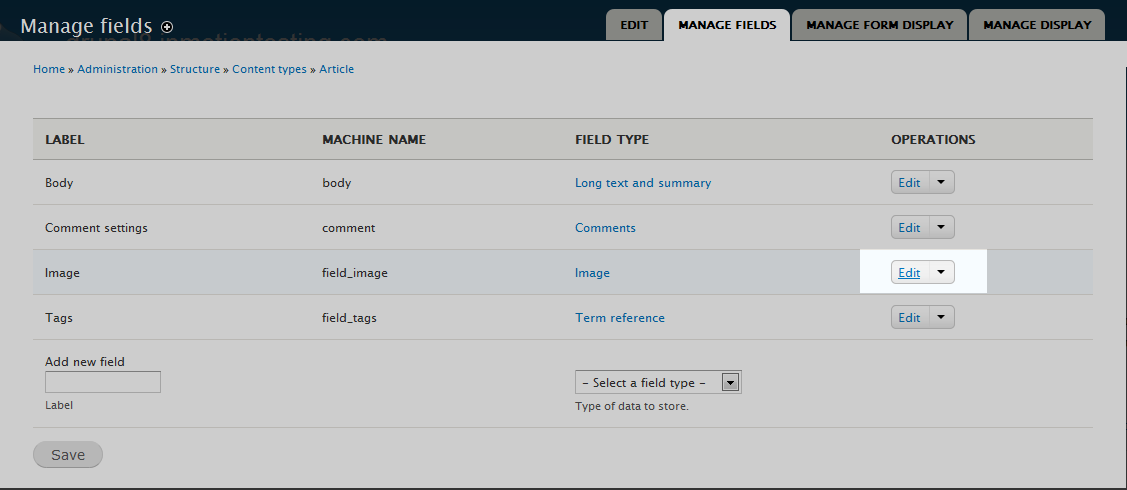
Once on the Content Types page, you select the content type you want to change the image settings for. In this case, we will work with the Article content type. Click on the Manage Fields option from the dropdown on the right side of the row.

This is the Manage Fields page, where you see a list of all the fields for this Article content type. Find the Image row and click on the Edit link in the dropdown to the right.

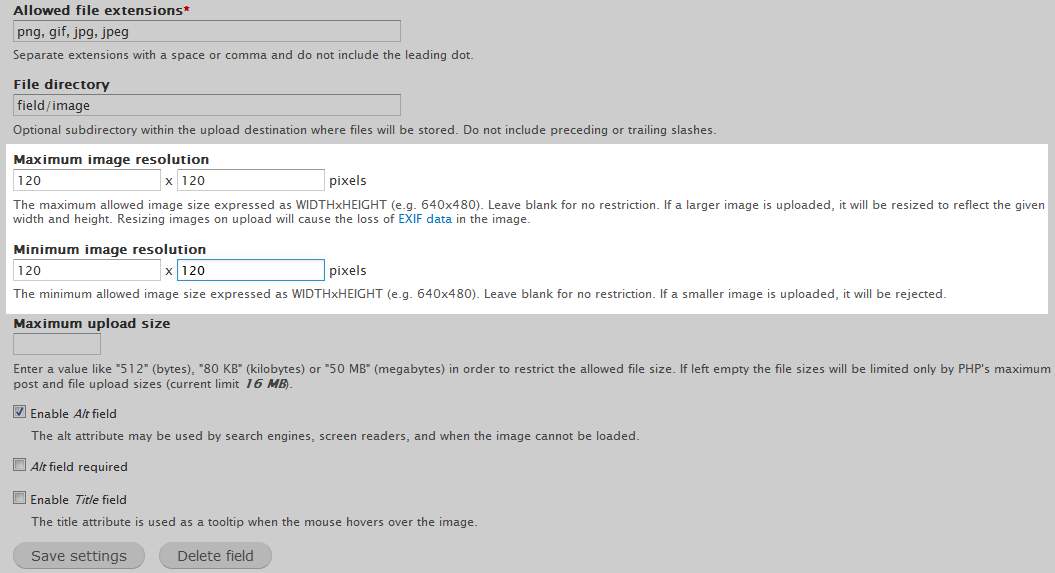
You have arrived on the Image Settings page. Scroll down the page until you locate the two fields involved, Maximum image resolution and Minimum image resolution. Here you can enter the sizes to limit the image uploads. In our instance, we are being very restrictive and forcing the image to be exactly 120×120. This would be indicative of using a logo where we want a uniform size.
- Once you have entered your size restrictions for either one or both fields, click on the Save Settings button. This will put your changes into effect.


