In this tutorial:
When you are developing a website, Google Tag Manager can help you handle the many tags you are using. Tags are javascript files (typically used for tracking) that pull from separate 3rd party services, such as Google Analytics, DoubleClick Floodlight Counter, or Adwords. This can slow down site load times since it must wait for a response from the 3rd party scripts before it can completely load your page.
A container tag is placed on each page of your website, and it pulls all the tags that you set up from Google Tag Manager. This simplifies the process for adding or removing scripts from your website, but it can also improve the load times. Google tag manager is helpful for marketing a website since it allows you to quickly add tags to a container without having to access/edit the code of the website. In this tutorial, we will show you how to set up a Google Tag Manager account, which consists of 2 main steps: Creating a Google Tag Manager account (this will create a container), then Adding the container to your web pages.
Create Google Tag Manager Account:
- Go to the Google Tag Manager site, this is the address:
https://www.google.com/tagmanager/
- Click the Sign up now button.

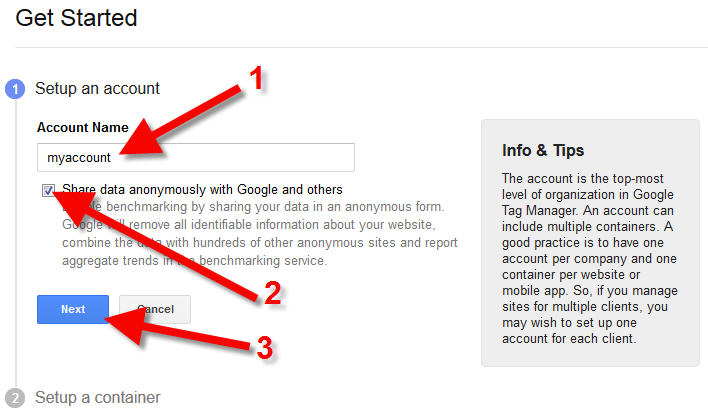
- Enter an Account Name, choose if you want to share your data with Google, then click the Next button.

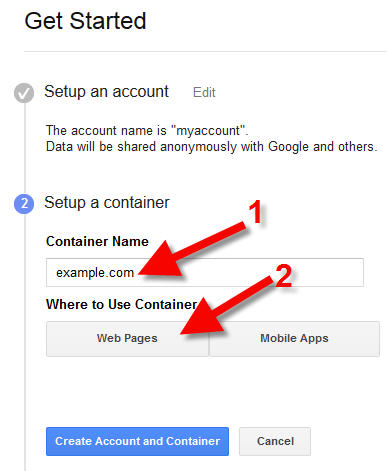
- On the next screen enter a Container Name. Google suggests that you “name the container after the website.”
- Choose if you are going to use the Container on Web Pages, or Mobile Apps. For this article I chose Web Pages.

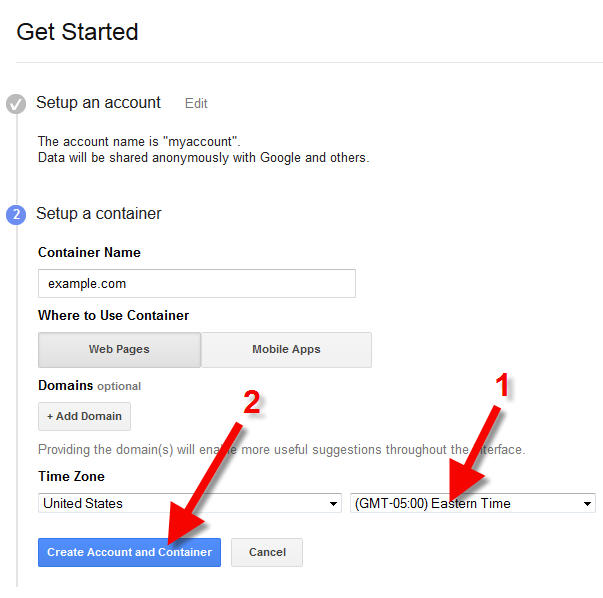
- It will drop down with additional options, choose your Time Zone, and click the Create Account and Container button.

- The Google Tag Manager Terms of Service Agreement will then be displayed, click the I ACCEPT button to proceed. You will then see the code for your Container, in the next section we will show you how to add it to your website.
How to Add the Container to your Site:
There are several ways to add this code to your website; in this tutorial, I am using the File Manager in cPanel. If you are not familiar with your file structure, see our article titled “Find the Document Root of your Website.”
- Log in to the Google Tag Manager.
- Click Accounts, then click the account you want to set up.

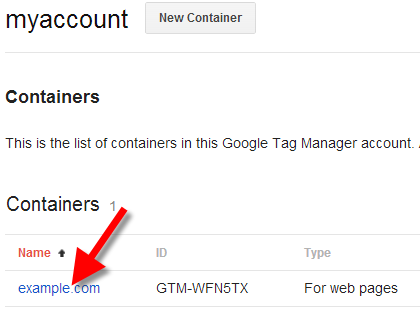
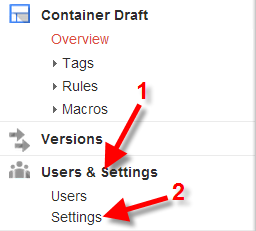
- Select your container from the Containers section. Now, click Users & Settings, then Settings.

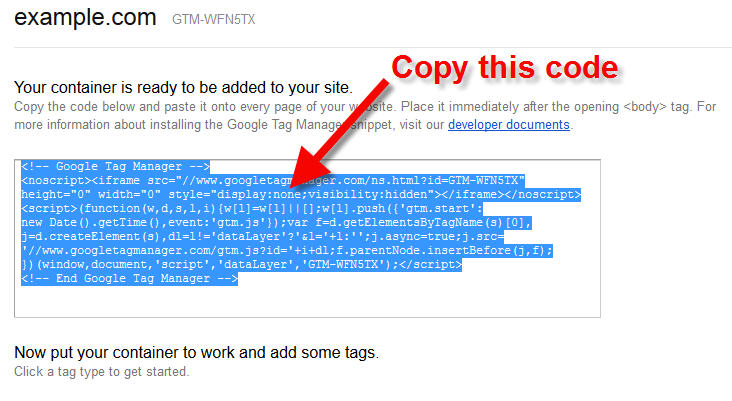
- Copy the provided code, it must be pasted into each page of your website. It will look similar to this:

- Login to cPanel.
- Click the File Manager button in the Files section. If the Directory Selection window pops up, choose Web Root, then click Go.
- Navigate to where your website files are located. Now, click the site file you want to add the container to and click the Edit button. (If the Text Editor window pops up, click the Edit button)
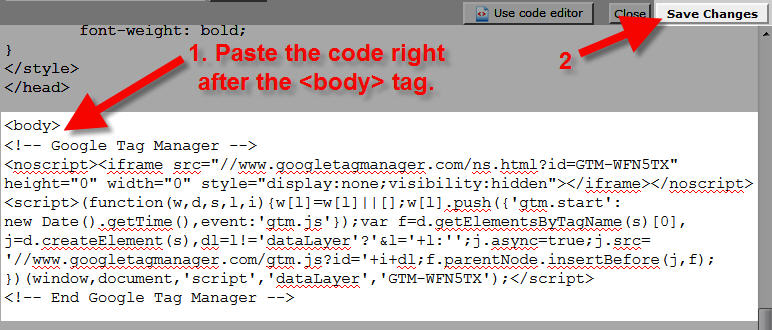
- Paste the code immediately after the <body> tag.

Repeat Step 5, and Step 6 for each page of your site.
Congratulations, now you know how to set up Google Tag Manager! The next article will show you how to add tags to your container via Google Tag Manager.

I am getting the same error, and I believe it caused because of an issue between gtm cookies and apache security, it think the cookie has malisious code in it and so throw the 406 error. I don’t know how to fix it. Help anyone… 🙂
You can try disabling mod_security (in the Modsec Manager, if you use cPanel) and seeing if that has an effect. Then at least we can isolate that as a possible cause.
getting 406 errors now
Bernie, can you elaborate a little more. Are you getting 406 errors after you followed the tutorial? Can you provide us a link to the URL so we can test it?