In this tutorial:
Installing VirtueMart 3 Enabling Database Update Tools Setting the Safe Path
In this tutorial we will show you how to install VirtueMart 3 in Joomla 3. After installing VirtueMart 3 we will complete the setup by enabling Database Update Tools, and setting up a Safe folder path. You can then begin creating an e-commerce website, using this powerful shopping cart software.
Installing VirtueMart 3
- Install Joomla 3 using Softaculous.
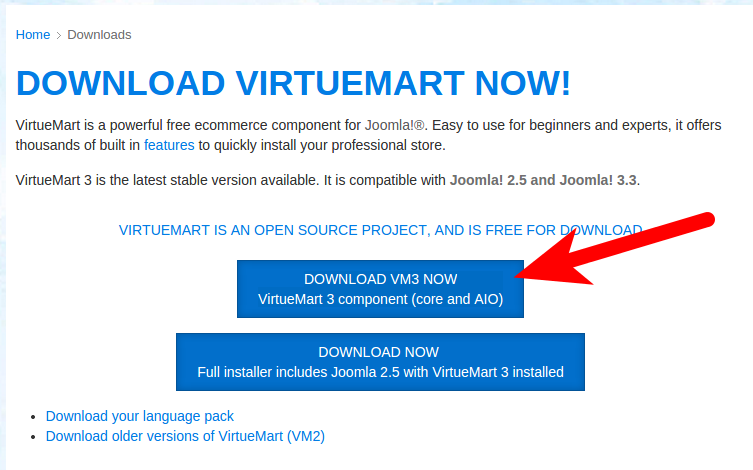
- Download the VirtueMart 3 core and AIO file. At the time this article was written, the file is titled com_virtuemart.3.0.0_extract_first.zip.

- Extract the file you downloaded in Step 1 to your computer, it will contain 2 files.
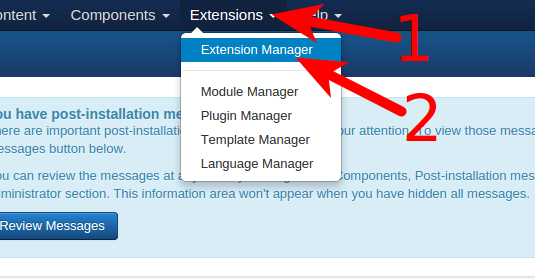
- Login to the Joomla 3 Dashboard. Click Extensions, then Extension Manager.

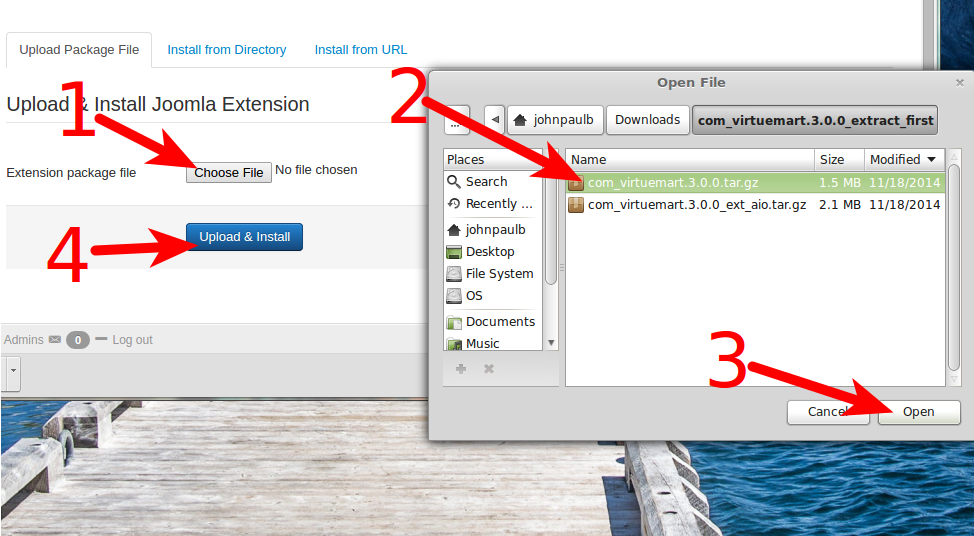
- You will then be on the Upload & Install Joomla Extension page. Click the Choose File button, select the core file (com_virtuemart.3.0.0.tar.gz), then click the Upload & Install button. See the steps in the screenshot below:

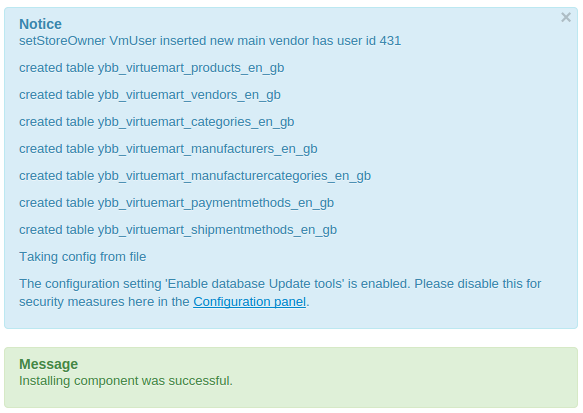
You will then see a Notice, with a summary of what was done. There will also be a message stating “Installing component was successful.”

- Scroll down and click the Choose File button again. This time select the aio file (com_virtuemart.3.0.0_ext_aio.tar.gz), then click the Upload & Install button. The image below shows you the steps to take.

You are finished when you see a message stating “Installing component was successful.”
- Optional: Click the Install Sample Data button, to include example products and store information. This can be helpful when you are learning to use VirtueMart 3 for the first time.
How to Enable Database Update tools in VirtueMart 3
After installing VirtueMart 3, you will want to Enable database Update tools, which allows you to utilize the tools included with VirtueMart 3. We will now show you how to Enable Database update tools in VirtueMart.
- Login to the Joomla 3 Admin Dashboard.
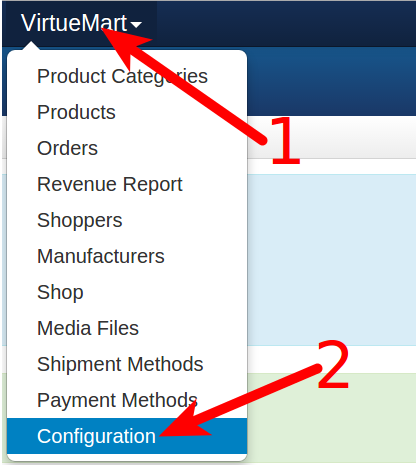
- In the navigation menu click VirtueMart, then Configuration.

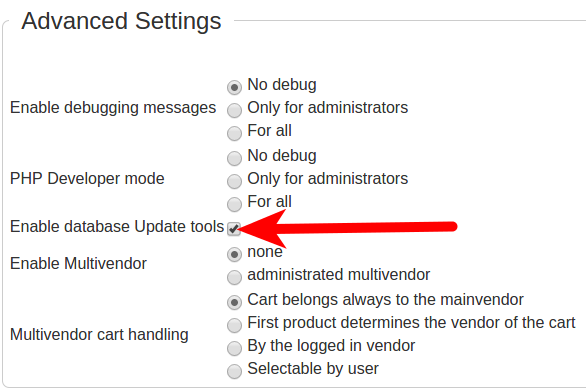
- Scroll down to the Advanced Settings section, and click the box next to Enable database Update tools.

- Click the Save button to complete the setup.
Setting the Safe Path in VirtueMart 3
After installing VirtueMart 3, you will see the following message: “Warning, the Safe Path is empty, for safety reasons it is very important to create a folder in a path not accessible by an URL, create also a folder invoices in it to store your sensitive data secure.” We will now show you how to set the Safe Path in VirtueMart 3.
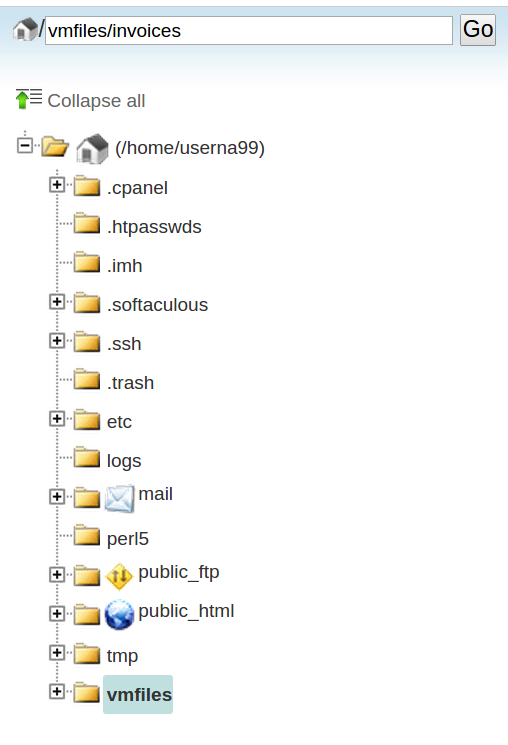
- Create a folder titled vmfiles in the /home directory. Make sure the permissions on the vmfiles folder is set to 777. Then, create another folder titled invoices inside the vmfiles folder. When you are finished, it should be structured like this: home/userna99/vmfiles/invoices/

- Login to the Joomla 3 Admin Dashboard.
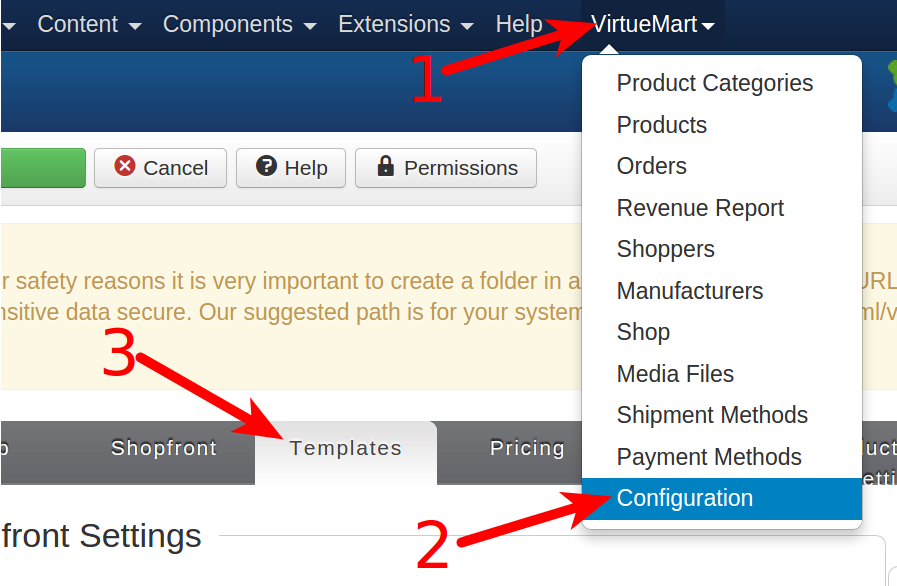
- In the navigation menu click VirtueMart, then Configuration.
- On the next page, click the Templates tab. The following images show the steps in order.

- Scroll down to the Safe Path field, and enter the path to files we created. For example: home/userna99/vmfiles/invoices/

- Click the Save button. You are finished when you see a “Configuration Saved” message.
Congratulations, now you know how to successfully install VirtueMart 3 for Joomla 3! Now you can begin building your e-commerce store.


Note that it starts and ends with a “/”.
Safe Path: /home/userna99/vmfiles/invoices/