In this tutorial, we will show you how perform a manual installation of Joomla 3.5. This allows you to setup and begin building your website with the latest version of Joomla.
Manually Installing Joomla 3.5
- Download Joomla 3.5 from the official download page.
- Create a MySQL database in your Control Panel (cPanel). Be sure to save the database name for later use.
- Create a database user, and attach the user to the database you just created. Save the database username and password you setup in this step.
- Upload the .zip file to your server.
- Uncompress the zip file to the location you want your Joomla 3.5 site to be installed. For more information of your file structure, see our full guide How to find the Document Root for your website / What directory should I put my files in?.
- In a browser navigate to the location of the Joomla files. In my test I am going to example.com since I uploaded the files to the “public_html” folder. You should see the “Main Configuration” page for Joomla.

- Fill in the fields with your information, then click the Next button. Below is is a description of the available fields provided by Joomla:
Field Description Select Language Click the drop-down box to select a language for your Joomla installation. Site Name Enter the name of your Joomla! site. Description Enter a description of the overall Web site that is to be used by search engines. Generally, a maximum of 20 words is optimal. Admin Email Enter an email address. This will be the email address of the Web site Super Administrator. Admin Username Set the username for your Super Administrator account. Admin Password Set the password for your Super Administrator account and confirm it in the field below. Confirm Admin Password Enter your Admin Password again here. Site Offline Set the site frontend offline when installation is completed. The site can be set online later on through the Global Configuration. - You will then be on the Database Configuration page. Fill in the fields with your Database information. Below is a description of the available fields along with the recommended settings:
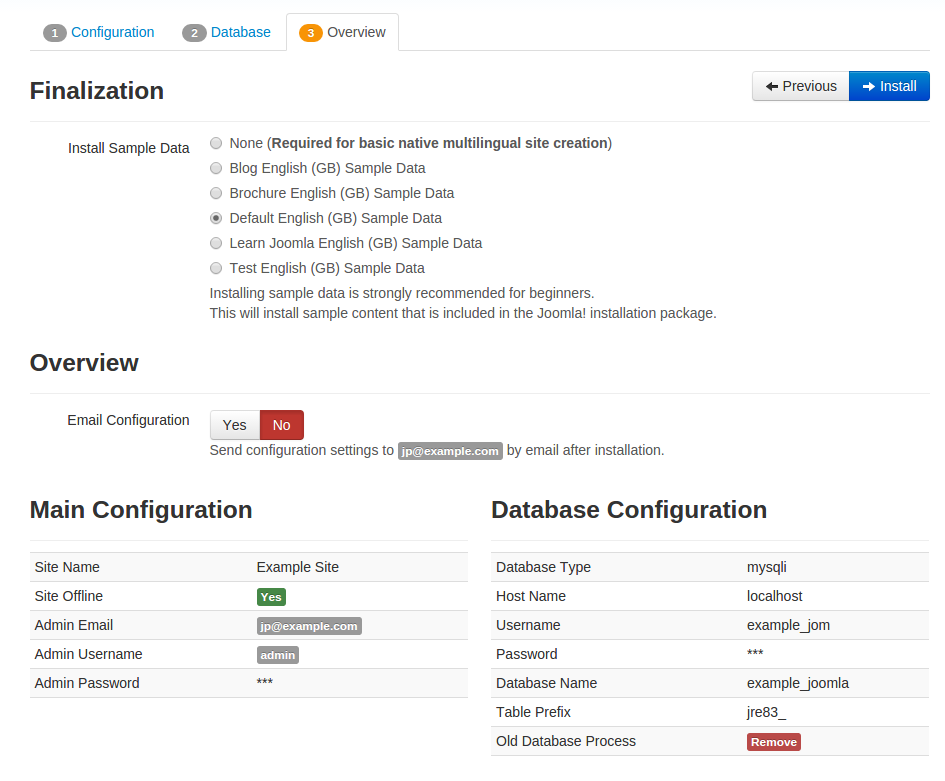
Option Description Recommended Setting Database Type This is probably “MySQLi”. MySQLi Host Name This is usually “localhost” localhost Username Either something as “root” or a username given by the host. Enter your database username here. Such as: example_jom Password For site security using a password for the database account is mandatory. fdsaf Database Name Some hosts allow only a certain DB name per site. Use table prefix in this case for distinct Joomla! sites. Enter your Database password, be sure it is strong. Table Prefix Choose a table prefix or use the randomly generated. Ideally, three or four characters long, contain only alphanumeric characters, and MUST end in an underscore. Make sure that the prefix chosen is not used by other tables. There will be a prefix randomly generated, such as this: jre83_ Old DatabaseProcess Any existing backup tables from former Joomla! installations will be replaced. Choose if you want to backup, or remove backup tables from older Joomla installations. Since this is a new installation, I chose Remove. - You will then be on the Finalization page.

Choose if you want Sample Data installed. Options are: None, Blog, Brochure, Default, Learn Joomla, or Test.
- Next to Email Configuration select Yes to send the configuration settings to your Admin Email address, or No if you do not need the email.
- Click the Install button.
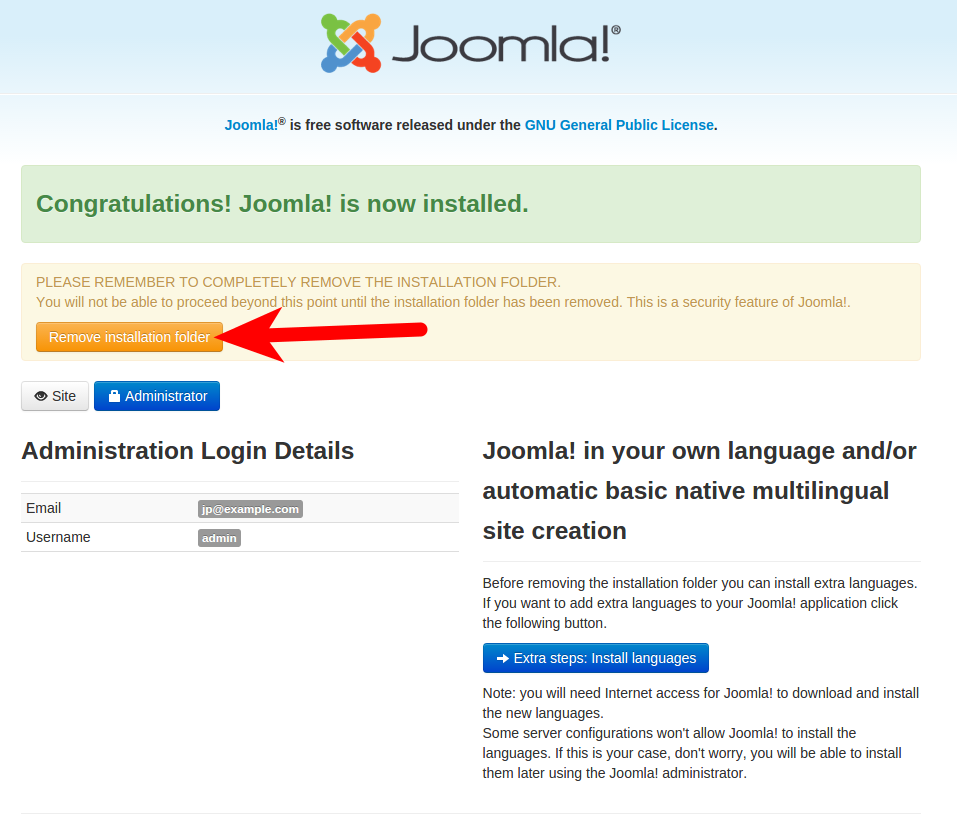
- When you see a “Congratulations! Joomla! is now installed” message, click the Remove installation folder button.

Congratulations, you have successfully completed a manual installation of Joomla 3.5! Now you can login to your Administrator Dashboard and begin building your website.


