There are a number of email notifications that you often receive from WordPress after an action has been completed. For example, it’s common to get a new user notification when you get a new user registered to your WordPress site. Using plugins, you can control the notifications, customize them and, create notifications for many WordPress actions. This tutorial introduces you to Better Notifications. This tutorial walks you through configuring, creating, and managing notifications.
In this article:
- Setting up the Better Notifications Plugin
- Creating Notifications
- Better Notifications plugin settings
Looking for a new home for your WordPress site? Check out InMotion’s WordPress Hosting solutions for optimized and managed servers that can meet your budget and performance needs.
Setting up the Better Notifications Plugin
In order to use this plugin, you will need administrator access to your WordPress Administrator Dashboard. Follow the steps below to install the plugin on your WordPress site.
- Log in to the WordPress Administrator Dashboard.
- Go to Plugins.
- Click on Add New.
- In the search field labeled “Search plugins…” type Better Notifications for WP.
- Click on Install Now.
- When it finishes installing, click on Activate. This will enable the plugin.
Once the installation is complete and active you will see Notifications added to the main menu.
Creating Notifications
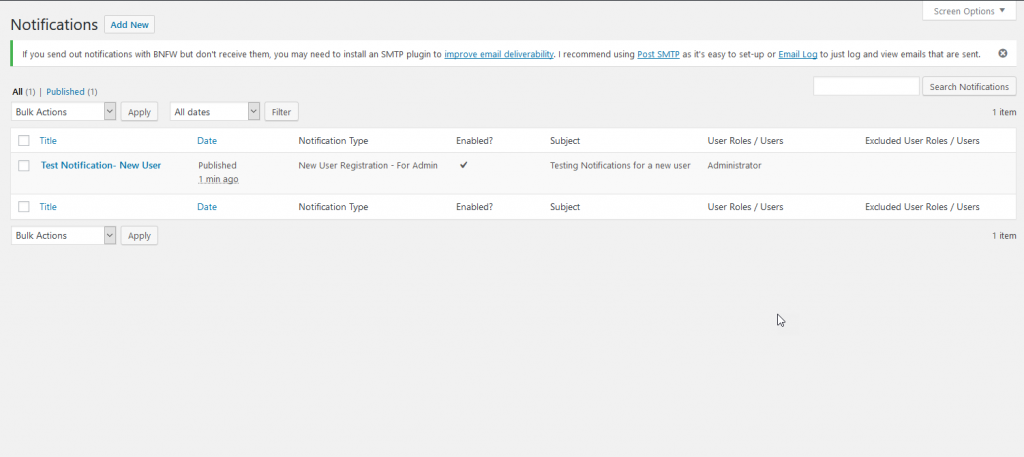
Better Notifications uses the WordPress system of tracking items. Like posts and pages when you create a new entry you’ll see a table listing them. Here’s an example of what it looks like:
Adding a new notification is a snap! But, if you’re having problems with your recipients not getting their notifications, then you may need to set up SMTP. This can be done through a plugin like Post SMTP. You will see a pop-up note at the top of the screen (until you clear it) when you first start using the plugin.
To add a new notification follow these steps:
- In the main menu of the WordPress Administrator Dashboard, hover over Notifications. You’ll see a pop-up menu.
- Click on Add New.
- You will then see the form for creating the notification. You will need to give it a title first.

For information on each setting, you can hover over the blue circled question icon. - The next section is the Notification settings. It starts with the Notification For. Click on the drop-down arrow in order to select the action for which the notification will be created. For example, if you want to send a notification for any new user created, then you would select that option from the list.
- Select the email formatting you wish to use: HTML or Plain Text. If you know that your recipients can’t view HTML formatting, then select Plain text for your notifications.
- Select the Additional Email Fields you want to use with this notification.
- The next option is labeled “Do not send this Notification to the User that triggered it.” Select this option in order to stop the notification from being sent to the user that created the action.
- You can then determine who gets the notification in the Send To field. The drop-down menu lets you select users on the WordPress site or roles.
- After you select who gets the notification, you can then select who is excepted from the Send To list with the Except For option.
- The next field is the Subject field. Click on the field and type in a subject for the notification.
- The meat of the notification is added in the next section- the Message Body. The editor in this section can be used to compose and format your custom notification message.

- After you have completed creating the notification you can select if the notification is enabled or disabled in the top right-hand corner.
- Click on Save to save your work to the server.
This completes the creation of your notification. Additional documentation, support, and a link for premium add-ons can be found in the Notifications menu.
Settings
The Better Notifications plugin includes the following:
| Suppress SPAM comment notification | Don’t send notifications for comments marked as SPAM |
|---|---|
| Default Mail Format | HTML Formatting or Plain Text |
| Enable Content Shortcodes | Enable shortcode output in the page/post content |
| Allow Usage Tracking? | Allow Better Notifications for WP to anonymously track how this plugin is used and help make the plugin better. |
Congratulations! You can now use the Better Notifications plugin to customize your plugins for your WordPress site. To learn more about WordPress, check out Connecting a Stock Image Gallery to your WordPress site.


