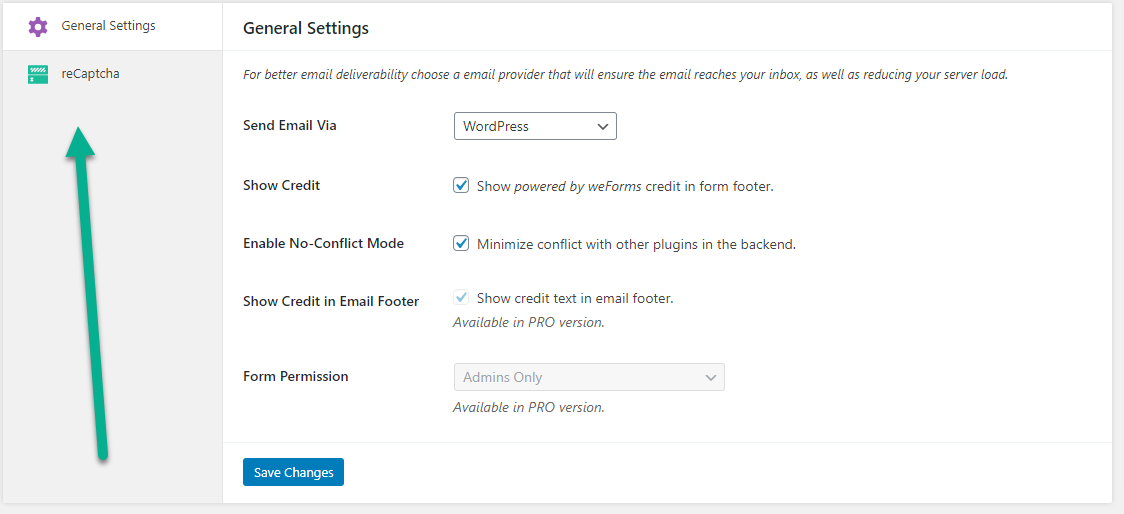
weForms is a versatile form plugin. Every forms plugin requires some initial setup. weForms settings let you adjust the plugin to work correctly with your site. The default settings are fine for most users, but it’s always a good idea to review the general settings.
In this article:
- Send Email
- Show Credit
- Enable No-Conflict Mode
- Show Credit in Email Footer
- Form Permission
- Upgrade Link
- Setup reCaptcha
Configuring weForms Settings

Send Email
By default, weForms sends email using your site’s current email configuration. If you go this route, remember to use a plugin like WordPress Easy SMTP to make sure your email goes through. With premium versions of weForms, you can connect to other services.
Show Credit
This allows you to toggle the ‘powered by weForms’ message on the form itself. Leave the box checked if you want to keep the message on the form itself. Uncheck it to remove.
Enable No-Conflict Mode
Plugin conflicts are a constant concern when building WordPress sites. If your forms run into trouble, enable ‘No-Conflict Mode’. This mode overrides other plugins blocking your form submissions. This is a great workaround if you’re in the middle of troubleshooting your WordPress plugins.
Show Credit in Email Footer
By default, email sent by with weForms displays a weForms credit in the footer. You’ll need to upgrade to the premium version of weForms to deactivate this.
Form Permission
Only Administrator level users can edit weForms configurations. Premium versions of weForms can let other users setup forms.
Upgrade Link
Users can follow an upgrade link directly to the weForms site. Upgrading unlocks features analytics and more premium modules.

Set up reCAPTCHA
Lastly, the settings page is where you’ll go if you want to add reCAPTCHA to the forms you make with weForms. Please visit our guide on setting up reCAPTCHA in weForms to add this functionality to your site!

To learn more about weForms, please see our weForms Product Guide.
