When you’re working in WordPress you will often add images to your content. These images can be added as inline images or using the Image block. You can also add galleries or slideshows, but in this tutorial, we will be focusing on the difference between using inline images and the image block. You will learn how to add both in the steps below.
- How to add an inline image
- How to add an image block
- Differences between the inline image and image block
Find a new home for your WordPress site by going to InMotion’s WordPress Hosting.
Adding an Inline Image
In order to follow the steps below, please log in to the WordPress Administrator Dashboard.
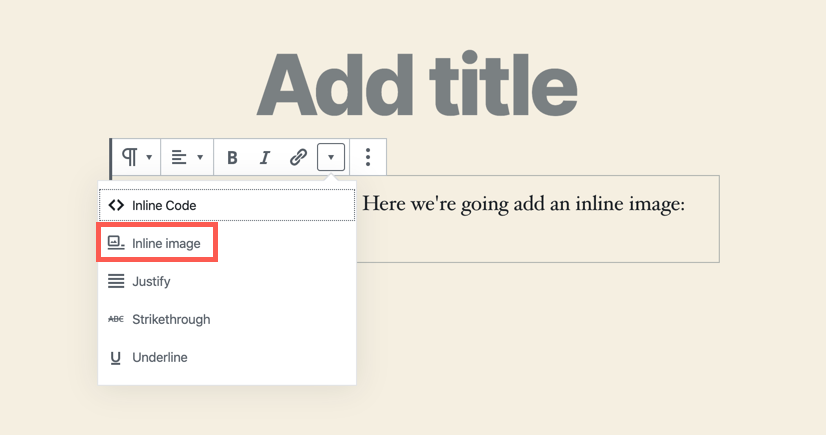
- An inline image is most often used after a line or paragraph of text. You will find the option by adding text, then going to the block menu for the text paragraph and clicking on the drop-down arrow.
- You will then be prompted to upload or use the media library to choose the image to be used.
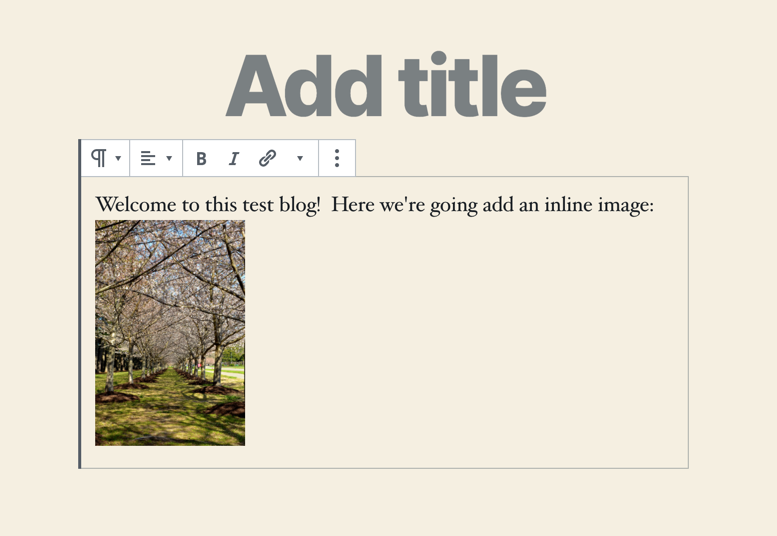
- Once the image is added, it will appear where your cursor was located within the paragraph block.
- You can change only the width of an inline image by clicking on the image.
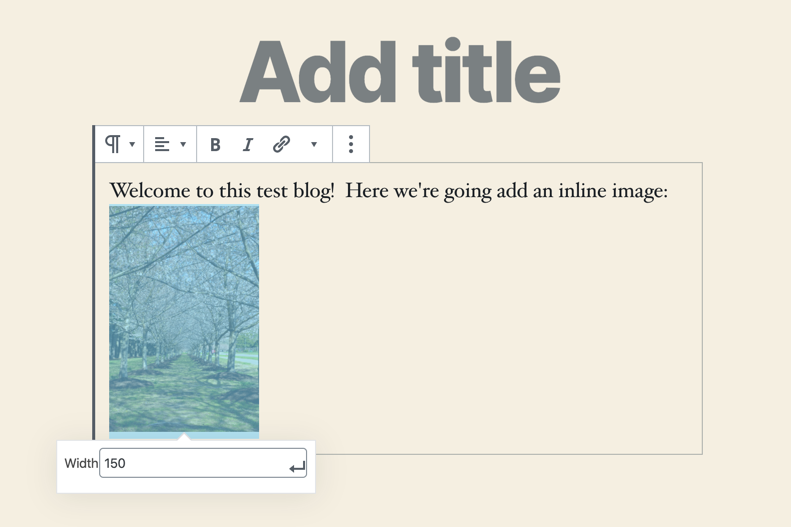
The inline image can be used as a thumbnail for steps, but it does not link or have a way to be linked to another element.
Adding an Image Block
The most common way to add an image in the new Gutenberg editor of WordPress is to use an image block. The image block allows you some flexibility with the image in allowing you to edit the alt text, change the image size, and even set its specific size in pixels or using set percentages. Like all of the blocks in the WordPress editor, you can also add CSS classes to the block. Like the inline image, you will need to be logged into the WordPress Administrator Dashboard to follow the steps below.
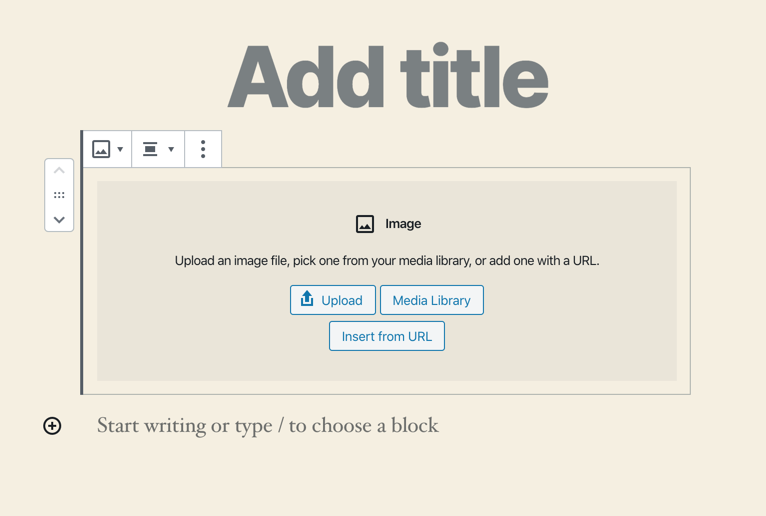
- Click on the + sign to add a block, then select the image block.
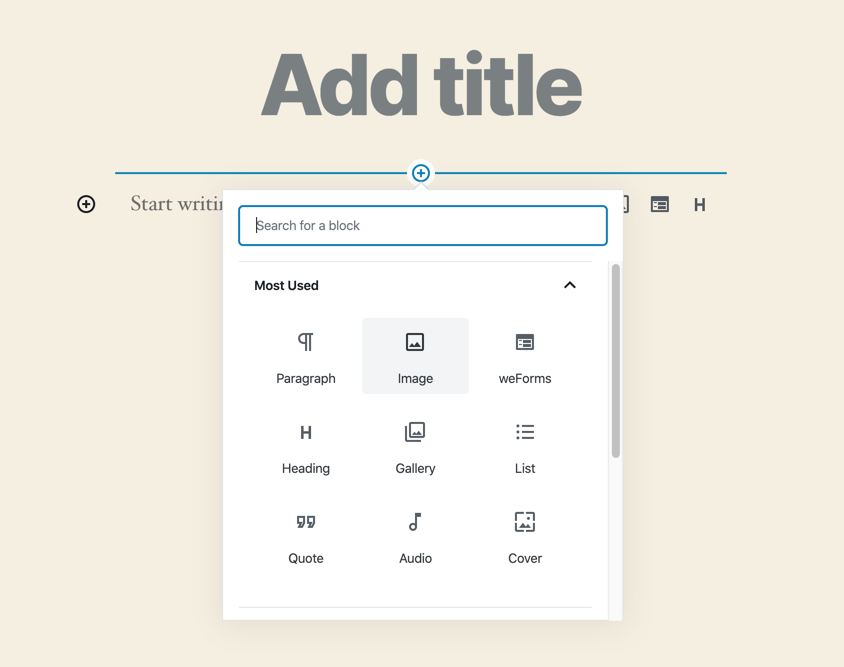
- You will then prompted to either upload or select an image within the media library.
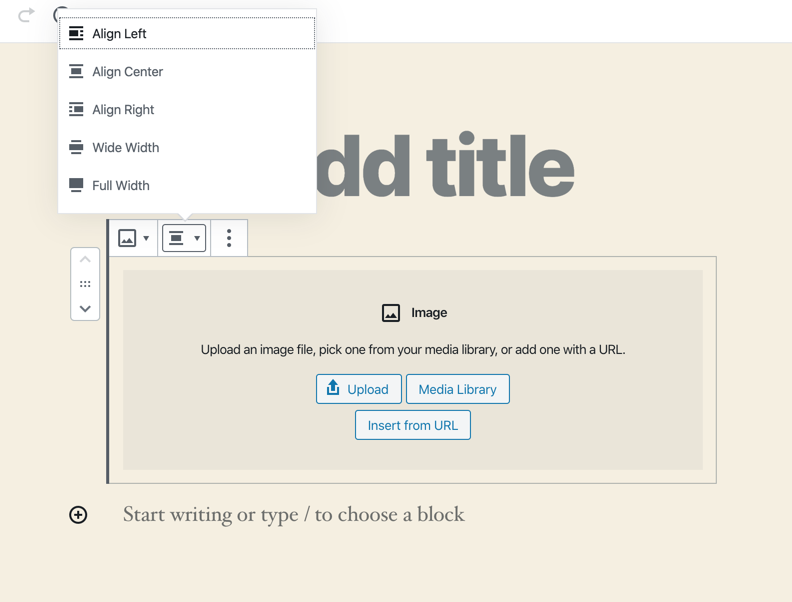
- Once you have uploaded or selected an image from the image library, you will be able to click on the drop-down arrow in the block menu and select how to align the image. You can also select Wide width (for a wide template), or Full Width fills the screen based on the largest image size.
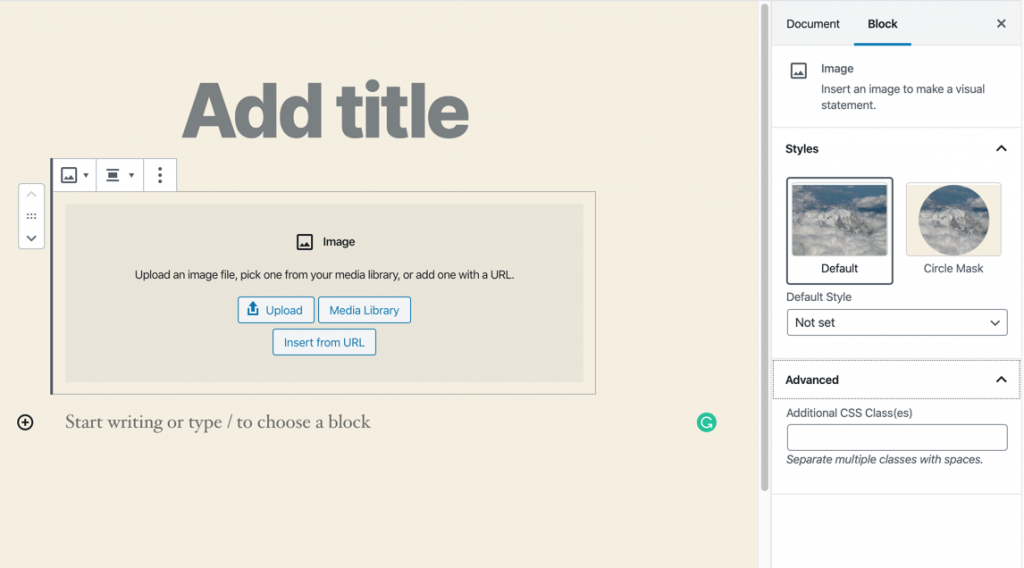
- You can also adjust the block properties in the right-hand column of the screen. These options may include the Alt text, Image size, width, height, and preset percentage options. These will differ based on the theme that you selected. Like any Gutenberg block, there is also the option to add CSS classes to the block. The screenshot below shows how you can make changes to the style as the theme allows.
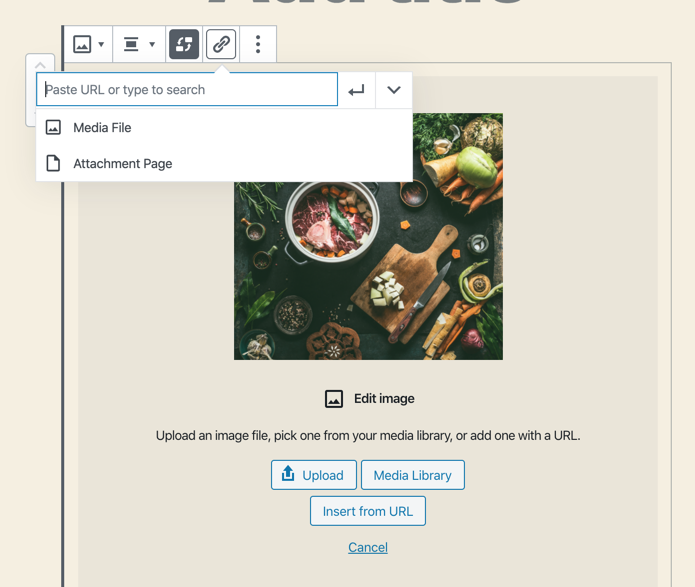
- You can also click on the drop-down arrow for the image and you’ll be able to link the image to the attachment page or the media file for the image created within WordPress.
Differences Between an Inline Image and Image Block
There are a few differences between inline images and blockages. Inline images cannot be enlarged when being displayed. You also have none of the options provided to the image block. You have much more flexibility when using the image block. The main advantage of the inline image is that it can be used near the text.
The inline image and the block image are different, but each has a strength and weakness that you can use when you add an image to your WordPress post or page.
Learn more about the new WordPress editor, Gutenberg, and the capabilities of the separate Gutenberg plugin with our helpful Gutenberg tutorials.
