If you’re an Apple computer user, one of the more frustrating things you might deal with is the Apple Mail application. Depending on your mail host, you may need to manually change ports. Currently, when you run the Mail application, it defaults to automatically setting the ports for you. So, you don’t even see the settings. Follow the steps below to quickly and easily change these settings as needed.
This article is based on using Apple OS Catalina version 10.15.4.
Looking for dependable and affordable Business shared hosting servers? Look no further than InMotion’s Shared Hosting solutions.
How to Manually Change the Ports
In order to make changes to an Apple Mail account, you will need to be logged into your Apple computer as an Administrator-level user.
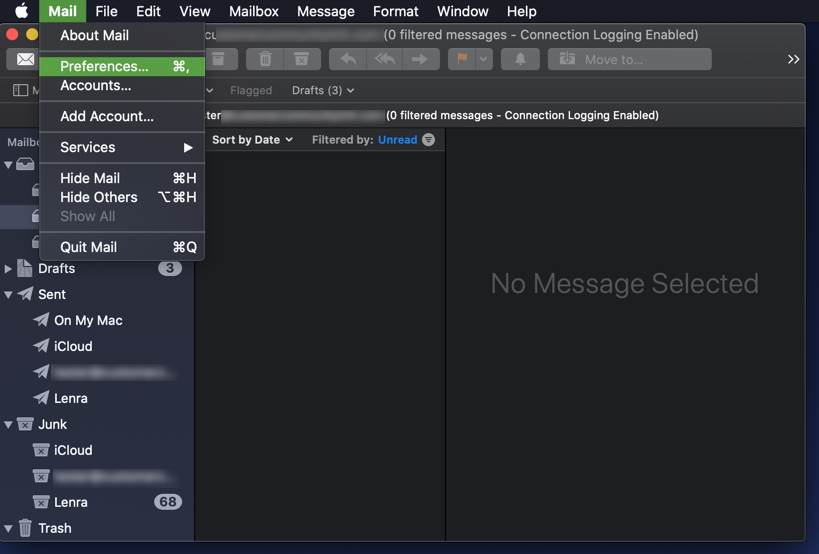
- Launch Apple Mail.
- In the menu at the top of the screen, click on Mail.
- Click on Preferences.

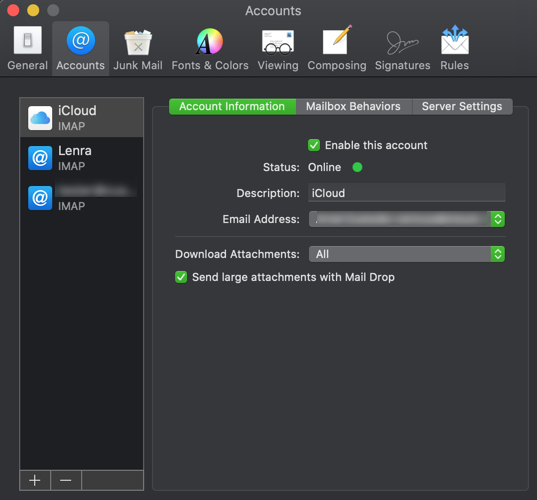
- You will see a window pop up labeled Accounts. Select the mail account that you want to change.
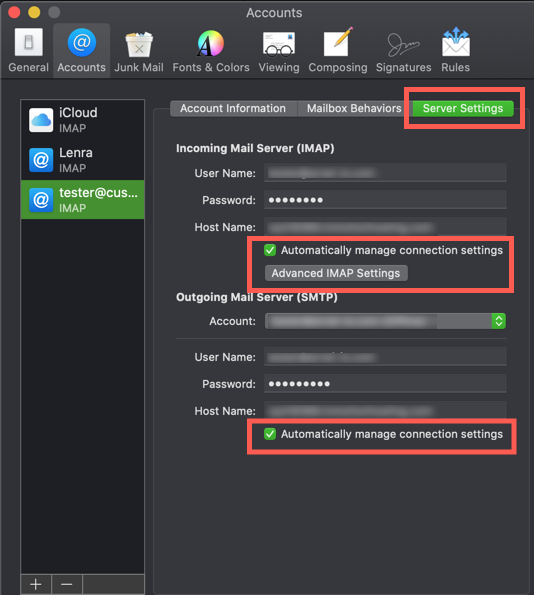
- Click on the Server Setting tab.
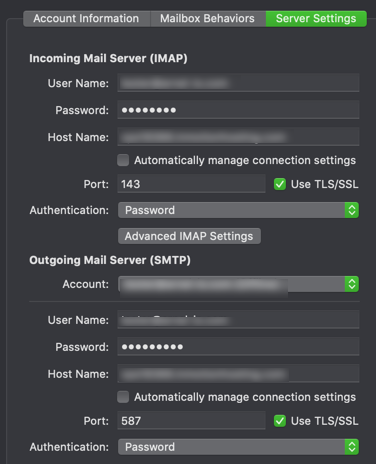
- You will see “Automatically manage connection settings” in two places on the screen that appears. Uncheck both checkboxes for this option both the Incoming and Outgoing mail servers.

- Click on the Port for Incoming Mail Server. The setting secure setting for an account using IMAP is 993. For POP3, it is 995. The non-secure settings are 143 for IMAP and 110 for POP3.
- Click on the Port of Outgoing Mail Server (SMTP). The secure port setting is 465. The non-secure port is 587.
- If you are using the secure settings then the checkbox for Use TLS/SSL should be checked. Once you have all the ports correctly set, click on the Save button in the bottom right of the screen in order to save your changes. It will ask to confirm your changes
You now know how to manually change the ports for Apple Mail. Since these ports are often automatically handled, they are a regular cause of Mail connection issues. Use the port information provided above to properly set ports and connect to your mail server for all incoming and outgoing mail. To learn more about email or troubleshoot other issues, please go to our Email Knowledgebase page.

