Nextcloud Mail is a pre-installed application that allows you to manage email from your Nextcloud application. You can also encrypt emails with Mailvelope for better email security. (Get root access, great performance, and security customized to your needs with the best VPS hosting.)
Below we cover:
- Adding an Email Account in Nextcloud
- Managing Email Accounts in Nextcloud
- Configure Email Accounts
- Email Server Settings
Add an Email Account in Nextcloud
- Log into Nextcloud
- At the top, select Email
To add an additional email account, select Settings in the lower-left corner, and Add mail account.
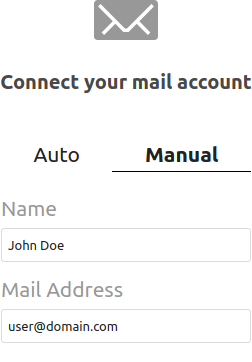
- Select Manual
- Add your Name (to show beside your email address in emails), Mail Address, and IMAP host(name) from your email settings
- Under IMAP Security, select SSL/TLS
We recommend using IMAP with SSL encryption.
- The IMAP Port should be 993
- For your IMAP user, add your email address and password
- Under SMTP Settings, the SMTP host should match your IMAP host
- For your SMTP user, add your email address and email password again
- Select Connect
If successful, you’ll be redirected to your inbox.
Multiple Email Accounts
- To remove email accounts, select the 3-dot button to the right of the email address, then Delete account
- To change the order of email accounts, select the 3-dot button to the right of an email address, then Move Down/Up
Manage Email in Nextcloud
- Select Inbox to see received email
- Select the 3-dot button to the right of Inbox to Mark all [new emails] as read or Add subfolder to your email account
- Select the arrow to the left of Inbox to see other folders – Drafts, Sent, etc.
- Select + New message in the upper-left to create a new email
Configure Email Account Settings
- On the left, select your email address to edit email account settings
- Add a signature, then Save signature
- Change your Mail server settings if desired
To protect your email communications, learn how to strengthen email authentication.
Email Server Settings
Below we cover how to configure Nextcloud to send email notifications. First, ensure you have an email address for your profile:
- In the upper-right corner, select your user icon, then Settings
- Ensure your Email is filled in (changes are saved immediately)
- On the left, under Administration, select Basic settings
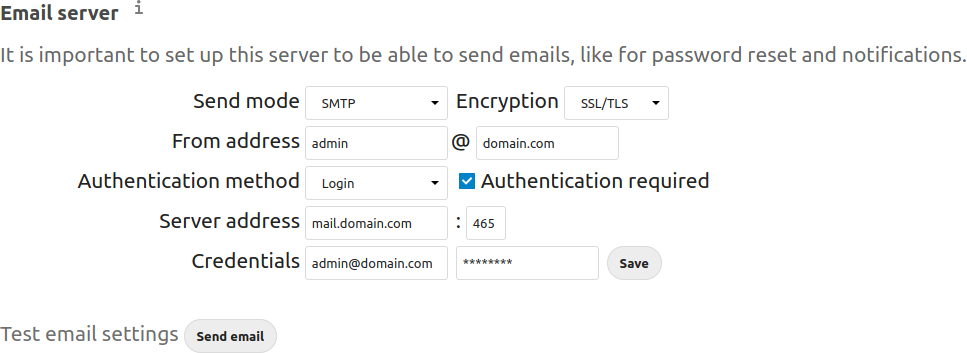
- Under Email server, change Encryption to SSL/TLS
- Type your password and select Confirm if prompted
- Type the From address
- For Authentication method, select Login
- Add the Server address and SMTP port (465) from your email settings
- For Credentials, add the full From address and email account password
- Save your changes
- Select Send email to send a test email
- Check the email account inbox for an email with the subject “Email setting test”

For more customized environments, check out official Nextcloud documentation.

