In a collaborative session, we reviewed some example graphics and images and discussed as a group what would be the best format to save each as for choosing the best image format. Below is a list of the best image formats.
Image Formats for Websites
- JPG
- GIF
- PNG
- SVG
XnConvert is a freeware batch image converter that can make quick work of resizing, rotating, and even normalizing image sizes. In this Post, I will cover basic info and tips for using this program. Please keep in mind that we are only scraping the surface of what this program is capable of, and I strongly encourage everyone to do your own testing and practicing to really get a feel for all the possibilities. We will explore optimizing your images using this free software.
A modern, user-friendly website can boost your online engagement and help build your business. Contact our professional web design team today for a beautiful, custom WordPress website.
Optimizing Your Images with XnConvert
We are going to focus on the most common tasks we will need, which are resizing and placing images on a canvas so that images that start out with different aspect ratios end up the same size.
The screenshots included below are from a Mac, and the interface may differ slightly on PCs.
The most common size for images is 800px x 800px, and is used in this example, but may vary from site to site. Review images submitted by the customer and adjust this size as needed.
Some images may need to be smaller so there isn’t as much blank space around the original image, or even a different aspect ratio. If you are in doubt, reach out to the customer to find out what works best for their site.
- Start by downloading and installing XnConvert. If you have any questions about how to install the program on your computer, please reach out to Corporate Support for further assistance.
- Once you have installed XnConvert, open the program, which will start you out on the Input tab.
- Here, you will have two options for adding images you want to modify: Add files or Add folder. Use Add files if you only want to add some of the images from one or more folders. Use Add folder if you want to add the entire contents of one or more folders.
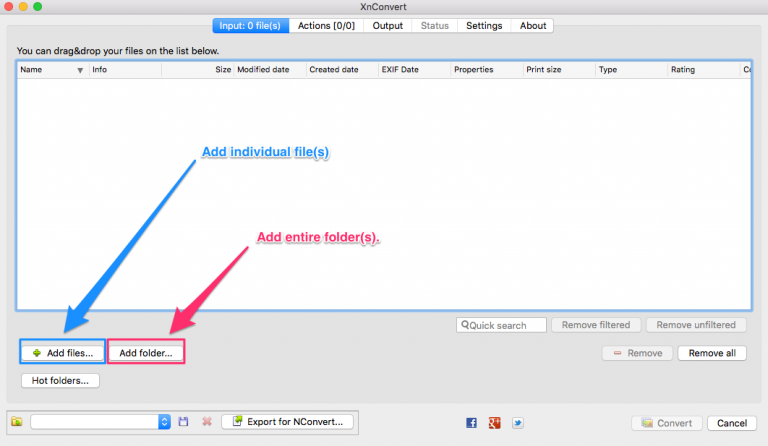
- Once you have added your desired images, click on the Actions tab. Actions are performed in the order they are added. If you add actions out of order, you can drag and drop them into a different order, or remove and re-add them as needed.
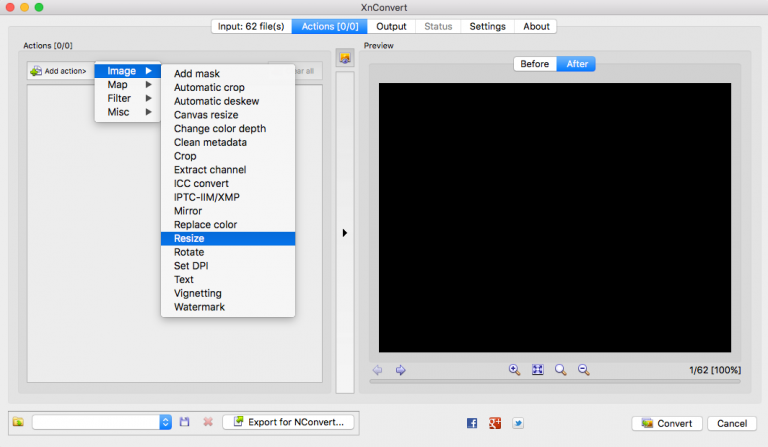
- The first action to add is resize. Go to Add Action > Image and click on Resize to add this action.
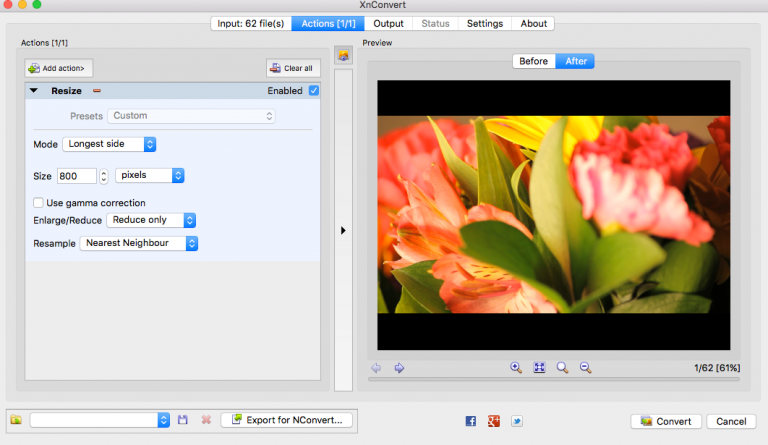
- Change Mode to Longest side, Size to desired size – 800px in this example, Enlarge/Reduce to Reduce only, and Resample to Nearest Neighbor. The Enlarge/Reduce setting is important, to keep from accidentally enlarging images which can cause fuzzy and/or pixelated images.
- Next, to place all of our images on a canvas that is the same size, go to Add Action > Image > Canvas resize.
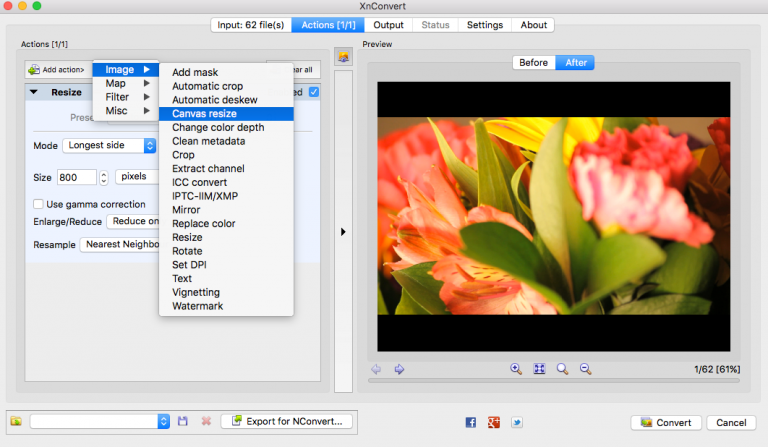
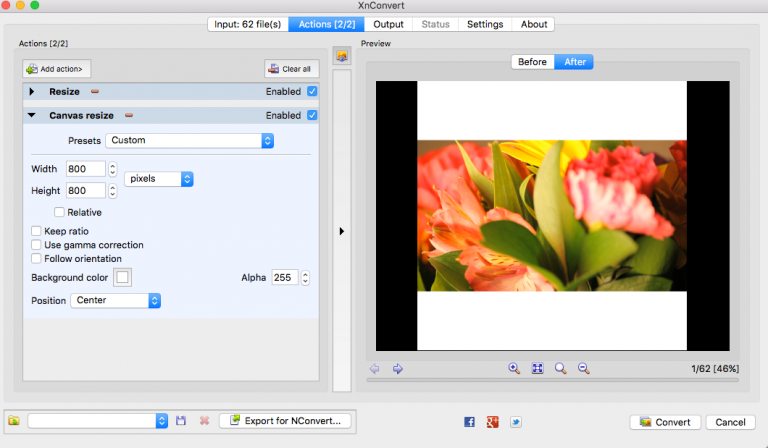
- Change width and height to the desired size – 800 x 800 in this example, select pixels in the drop down next to those fields, and Position set to Center.
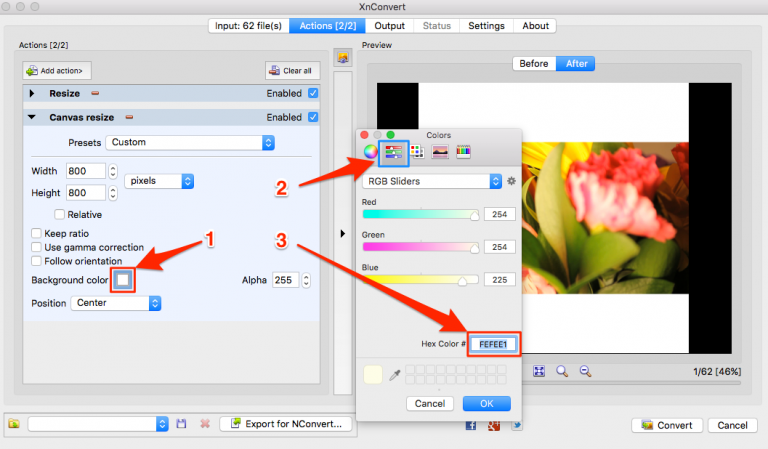
- For most sites, the default canvas background color of white will look good. But, if you want to change this to another color you can, by clicking on the square next to Background color. This will open a Colors pop-up where you can choose from different color picker options. The second tab in that pop-up offers RGB Sliders as an option, where you can input a hex code for your desired color.
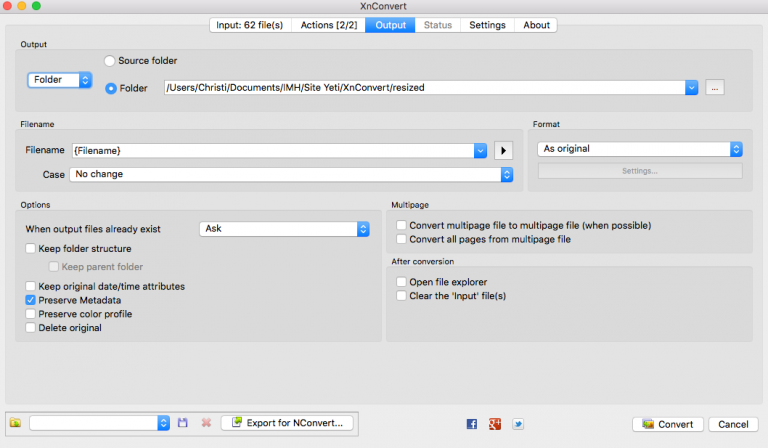
- Once you have the resize and canvas resize settings configured, click on the Output tab. On this tab, you will select the folder where you want the new images saved to. So that you can keep a copy of the original images (in case you need to work with them again in the future) choose a different folder other than the original. For example, you can create a subfolder named resized to put the resized images into.
- In the Filename section, remove any suffixes like “_result” so the filename is the same as the original. Unless you need to change the format, keep this the same as the original as well.
- When you are ready to start the process, click Convert. You will be taken to the Status tab where you will see a log of each image change. When the process is complete, you will see 0 images remaining to be processed and a recap of the number of images input and processed.
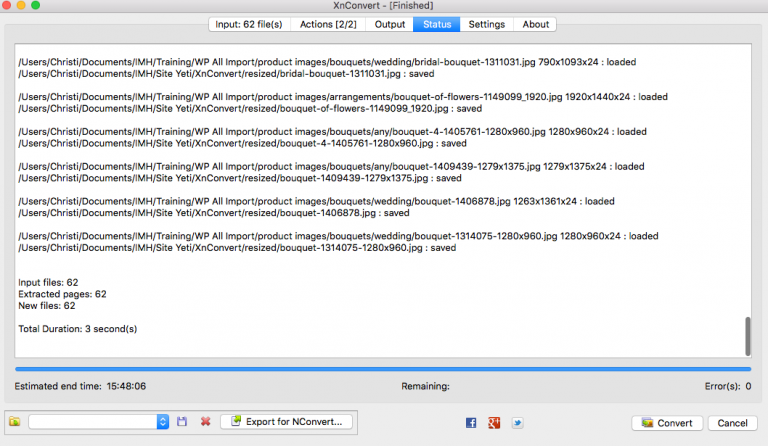
- Once all the images are processed, be sure to spot-check several resized images to make sure you achieved the desired results. If not, delete those images, adjust your settings as necessary, and rerun the process.
For more tutorials and information on how to customize your website or get started with the design process, please check our Web Design Services channel!
