Windows 7 operating system comes with Windows Live Mail, which can be set up to check your webmail account. Windows Live Mail is a free email client that you can use to send and receive emails from an email account you have set up in cPanel. If you have not set up an email account yet, please read our article on setting up an email account in cPanel.
Setup Windows Live Mail
- Open Windows Live Mail on your local computer.
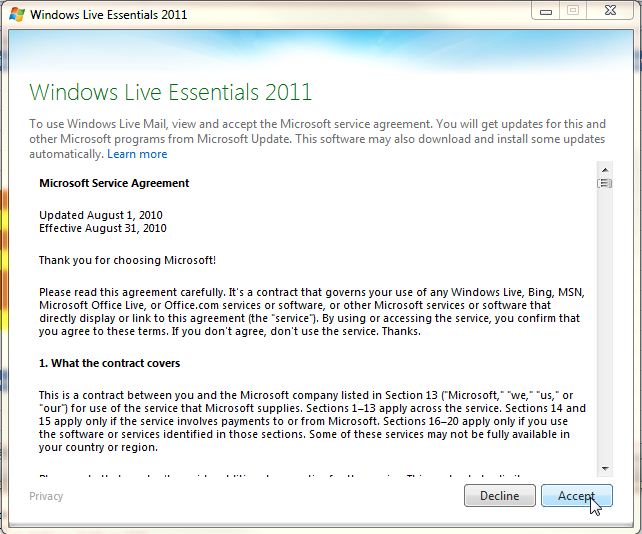
- If Windows Live mail was never setup on your computer then you will see the Accept the agreement by clicking Accept.

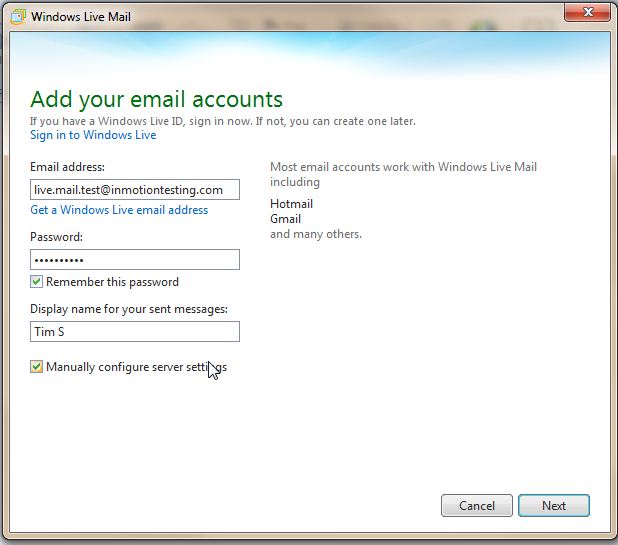
- Now, fill in your information for the email address, Password, and make sure to check manually configure server settings. Then click Next.

- Fill in the server settings. Below are the typical SSL/TLS settings, but you can view the email settings for your specific account in cPanel and Webmail.
Server Type: Choose POP3 or IMAP (if you are unsure of the difference between POP and IMAP please read our article)
Server Address: type in your domain name
POP Port: 995
IMAP Port: 993
Authenticate using: Select “Clear Text”
Login user name: Use your FULL email address with the @ symbol
Outgoing Server Address: Use your domain name
Port: 465 (this is default, however some ISPs block port 25 traffic, read more information here if you need to use a different port) - Click Next.
- Click Finish.
You’re finished setting up Windows Live Mail. You can now use it to check your email, send emails, and much more. You may want to send a test message from Windows Live Mail to be sure the set up was complete.
If you need further assistance please feel free to ask a question on our support center.


Any pointer for the correct setup for syncing IMAP folder in Windows Live Mail?
Hi Lauren,
Thank you for your question, we are happy to help! Can you describe the issue you’re currently experiencing in greater detail? Any error messages or warnings may assist us in troubleshooting this issue for you.
Thanks!
So helpful. Very clear instructions. Thanks for sharing this!!