If you have a web hosting account with InMotion Hosting, then you will most likely have access to a software installation program named Softaculous. The following tutorial will show you how to install Drupal using Softaculous.
If you have an older VPS account or a dedicated server, then you may need to purchase a Softaculous license in order to use it. Check with your salesperson or InMotion’s live technical support team for further assistance.
Installing Drupal with Softaculous
Before you begin the installation make sure that your server meets the requirements for running Drupal. You can find the requirements in Drupal’s requirement documentation.
Softaculous automates many of the steps required to perform a Drupal install in order to make the process as painless as possible.
- Log into cPanel.
- When you’re in cPanel scroll through the applications and find Softaculous. Click on it to open the application.
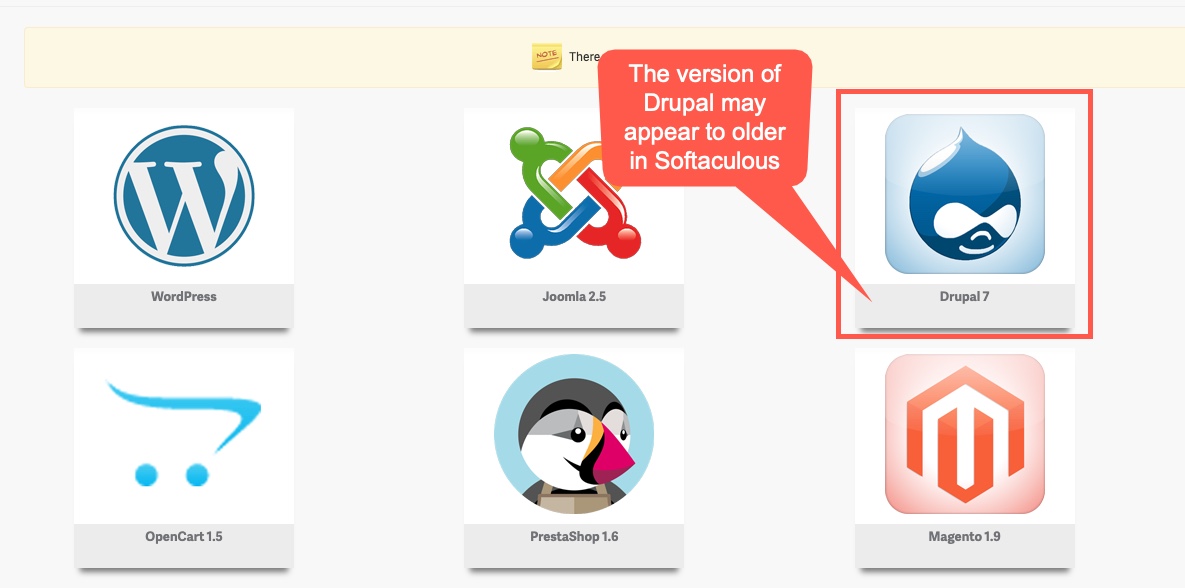
- In Softaculous, locate the installation shortcut for Drupal. Please note that sometimes Softaculous may not have the installation for the latest version for Drupal.

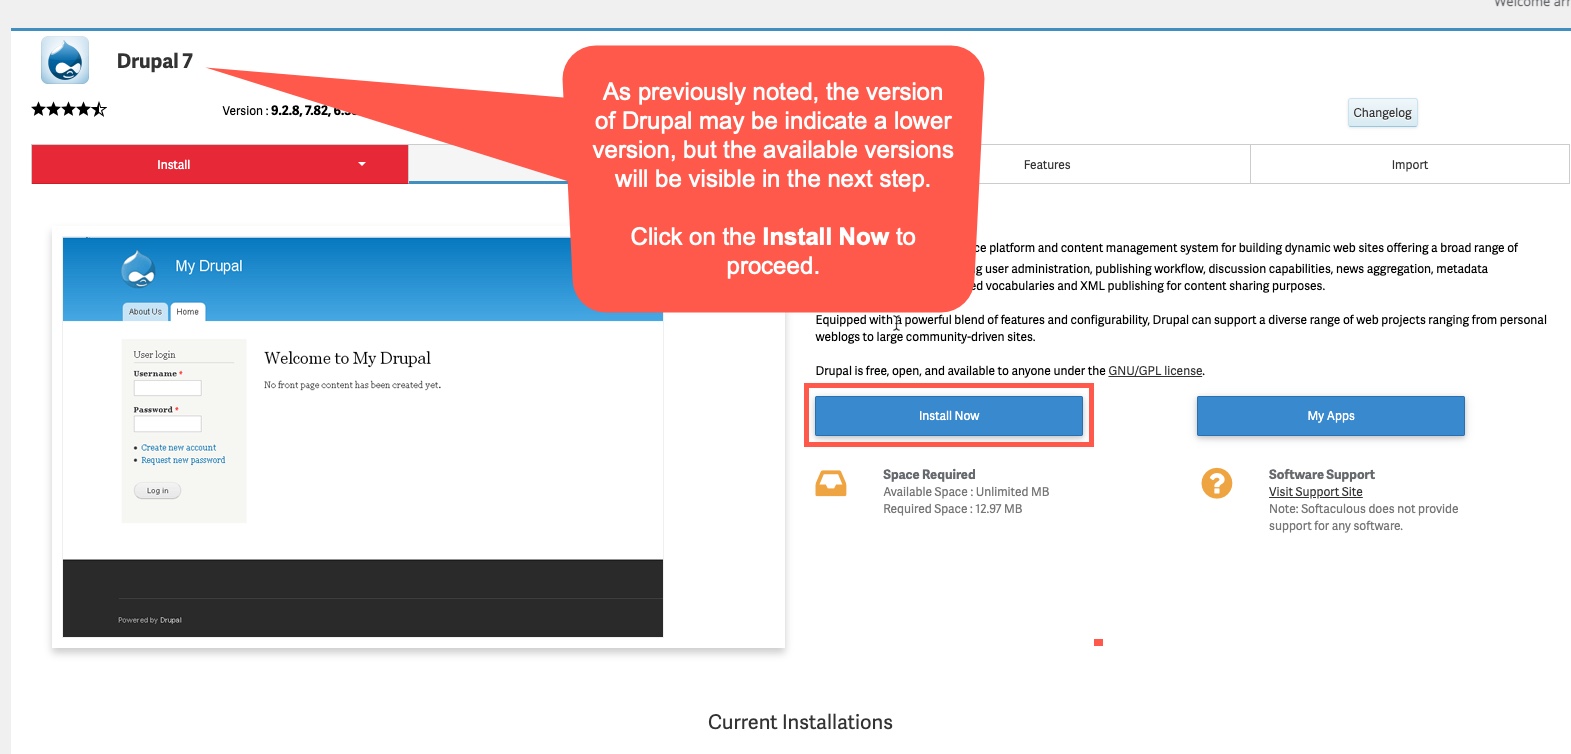
- When you get to the overview page for the Softaculous installation of Drupal click on the blue button labeled Install now to proceed.

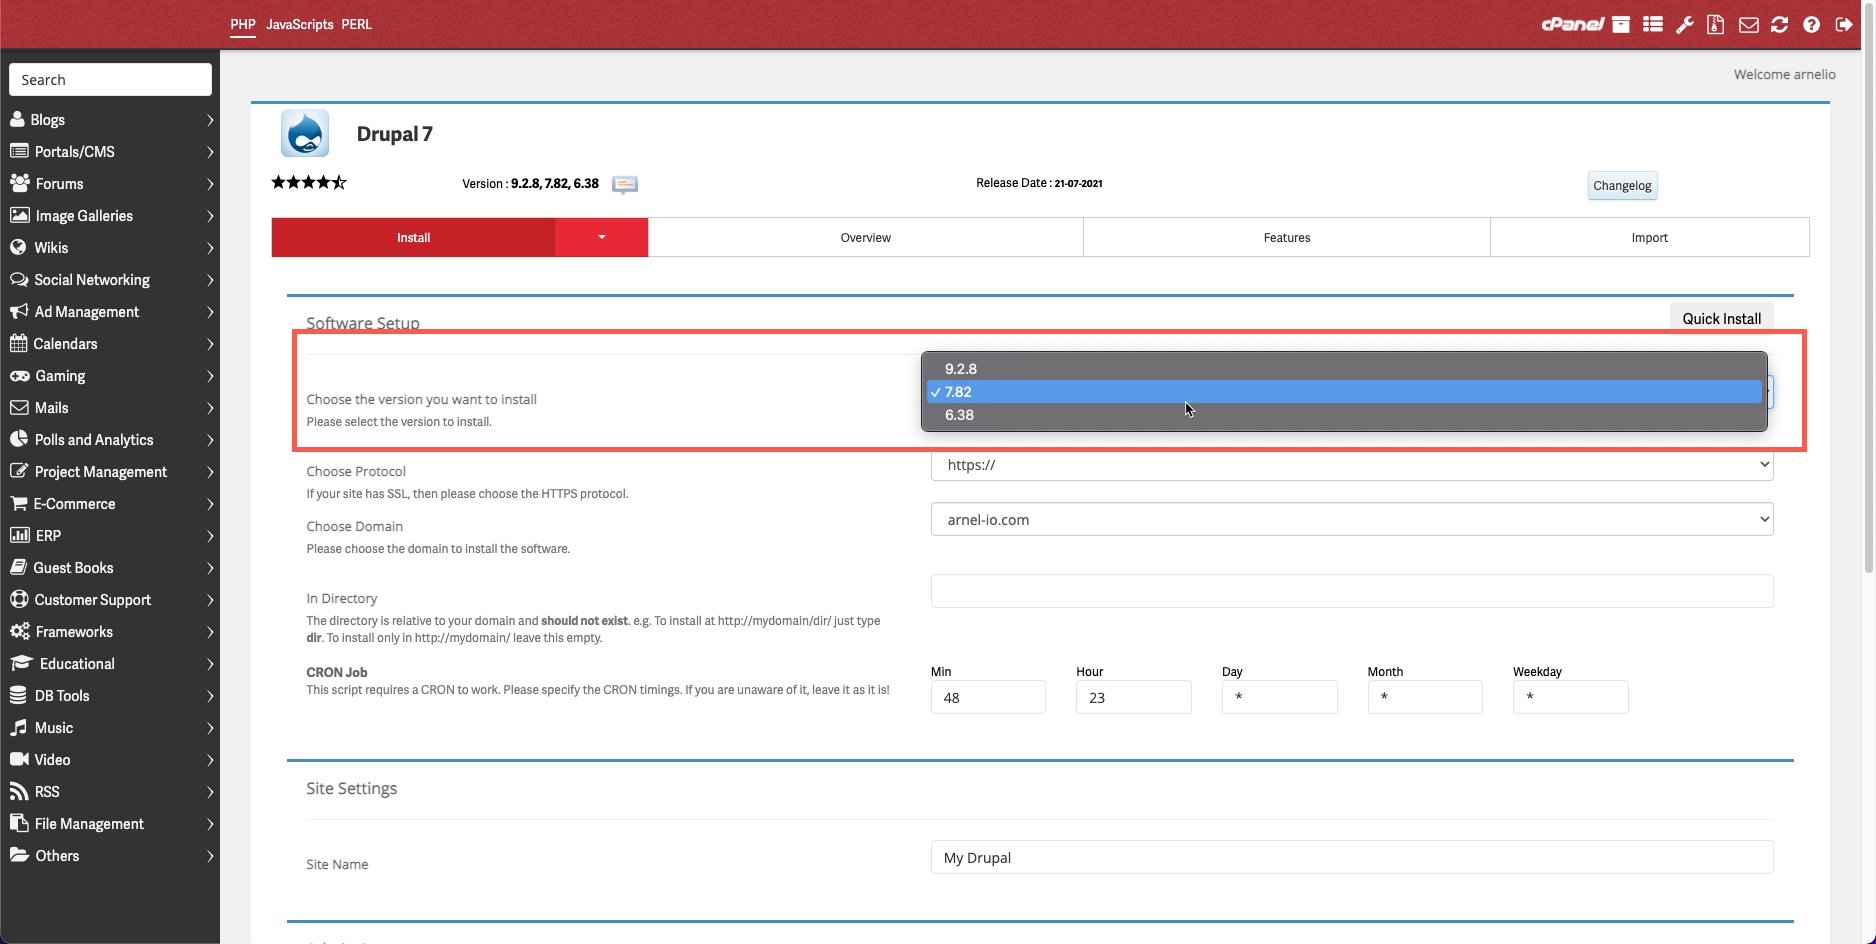
- The software installation page will appear next. Here you will see the install divided into several groups: Software Setup, Site Settings, Admin Account, and Advanced options. Note that there is a line at top that allows you to select the version. Click on the drop-down arrow and then select the version you wish to install.

- Once you have selected the version fill in the rest of the Software Setup section.
Choose protocol – Select if you are using HTTP or HTTPS (https requires a valid SSL certificate)
Choose domain – add the domain that you’ll using for this installation
In Directory – Type in the directory where the software will be installed. Note that the name cannot already exist.
CRON Job – The Softaculous installation script requires a CRON to work. Leave the current settings if you’re not familiar with changing CRON scripts. - The Site Settings section is next. Type in the site name for your installation.
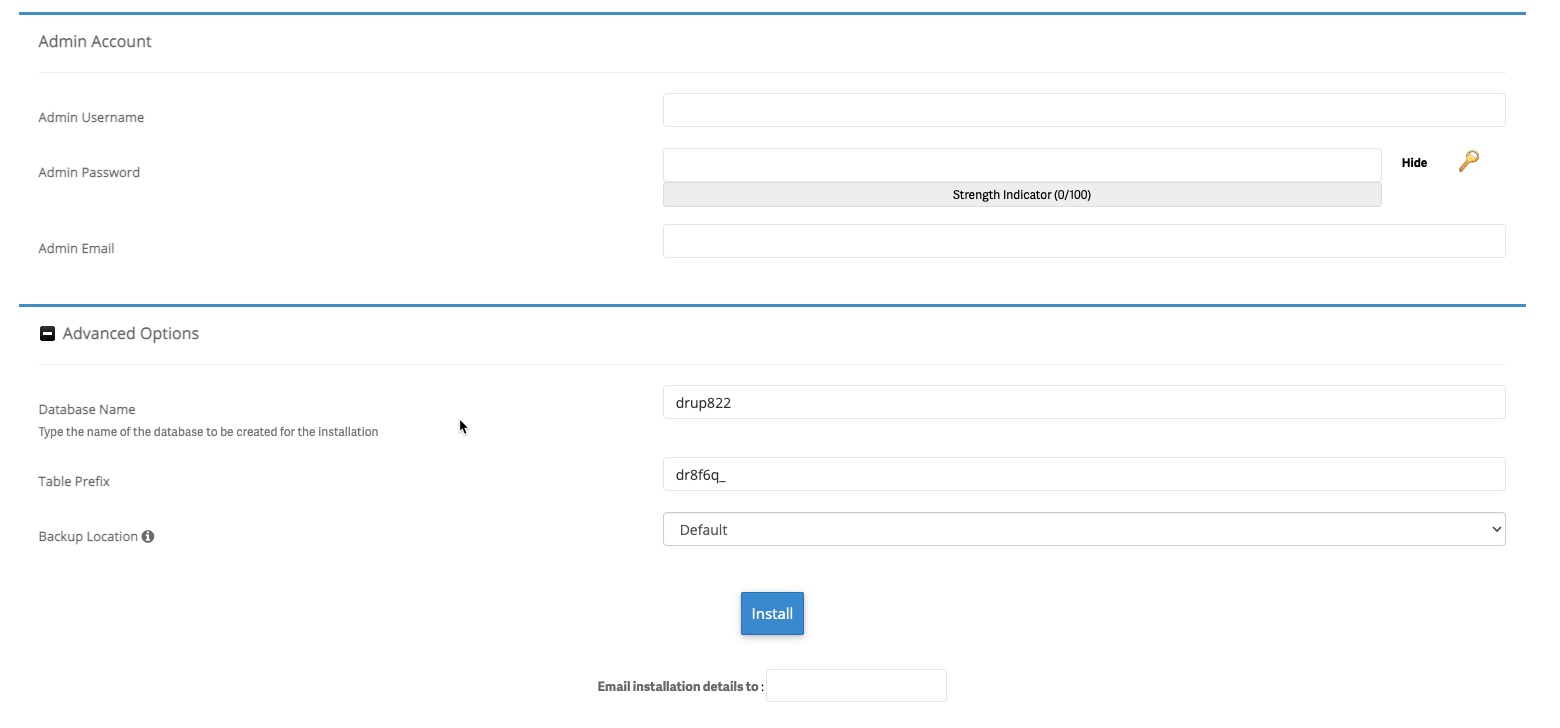
- Next, you’ll see the Admin Account section. This is the area where you will add your admin user name, password, and admin email address.

- The Advanced Options Section is normally hidden and must be expanded using the + button next to the section label.
You can use the auto-generated database name, or you can use a name you want by simply typing it in.
The table prefix is also auto-generated but can be changed. The letters in front of the “_” character can be changed to your preference.
The next option in Advanced is the location of the Softaculous backup. There is a default location based on the Softaculous settings. If you click on the drop-down then you specify a local file for the location of the backup.
The final option in the Advanced Options section is actually optional and located under the Install button. “Email installation details to:” provides a field where you can add an email address that Softaculous will send all of the installation details to. - Click on the Install button to complete the installation.
This completes our tutorial on how to install Drupal with Softaculous. For more step-by-step guides and practical tips, visit our Drupal education channel.
Discover the ultimate in Drupal Web Hosting. Elevate your website’s performance, scalability, and speed for an exceptional user experience.
