Table of Contents

Email filters are essential for managing incoming emails and ensuring your inbox remains organized and clutter-free. Control Web Panel (CWP) provides robust tools for creating and managing email filters, allowing you to automate email organization based on various criteria. This guide will walk you through setting up and managing email filters in CWP.
- Introduction
- Accessing the Emails Filters Section
- Creating a New Email Filter
- Managing Existing Filters
- Testing Your Filters
- Conclusion
Introduction
Email filters in CWP enable you to automatically sort incoming emails into specific folders, delete unwanted emails, or forward emails based on defined criteria. This functionality helps you keep your inbox organized and significantly reduces the time spent on manual email management.
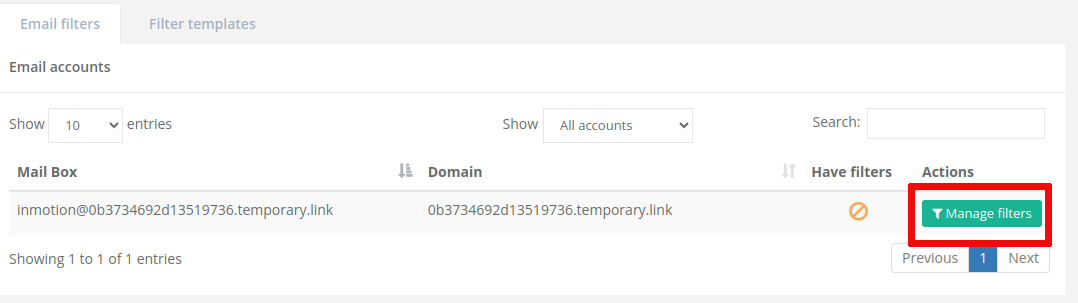
Accessing the Email Filters Section
- Log in to the CWP User Panel.
- Navigate to Email Accounts: Once logged in, locate the Email Accounts section from the left-hand menu.
- Open Email Filters: In the Email Accounts section, click Email Filters to open the email filter management interface.


Creating a New Email Filter
- Manage Filters: Next to the email account you want a filter created, click Manage Filters.

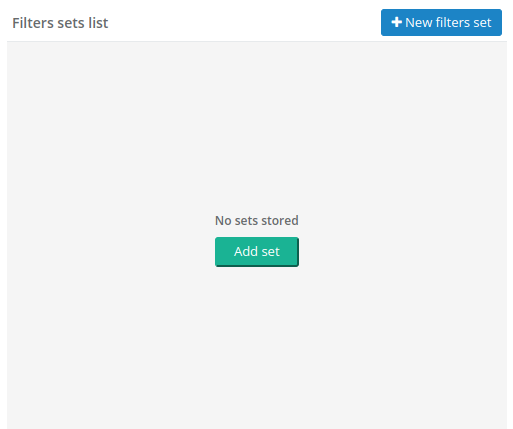
- Add Set: Click Add Set or New Filters Set to create a set to add email filters. Enter the Set name and click Save.

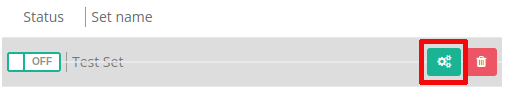
- Filter Set settings: To manage filters in the set you just created, click the settings button next to it.

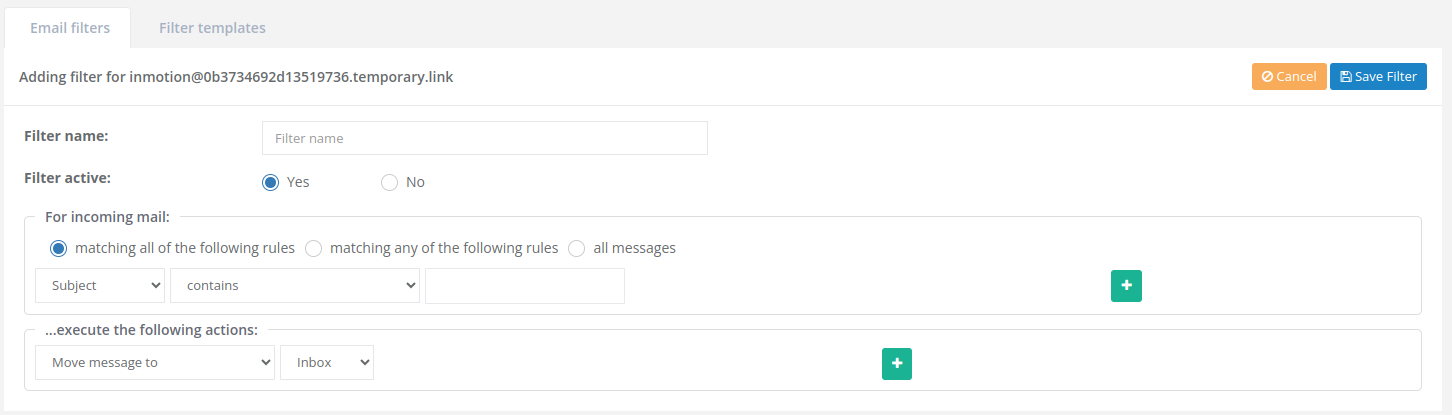
- Add New Filter: Click the
+sign then New Filter or Apply from template (more on Email Filter templates) to create an email filter to the filter set.
- Define Filter Criteria: Enter the necessary details for your filter:

- Filter Name: Provide a name for the filter that clearly describes its purpose.
- Criteria: Select the criteria for the filter (e.g., Subject, From, To, etc.). Enter the specific text or pattern by which you want to filter.
- Set Actions: Choose the actions to be performed when an email matches the criteria:
- Move to Folder: Select a folder where the email should be moved.
- Delete: Automatically delete the email.
- Forward to Email: Forward the email to another email address.
- Save Filter: Click the Save button to create the filter.
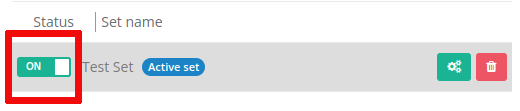
- Turn On Filter: Toggle the Status of the Filter Set to On.


Creating an Email Filter Template
Filter templates are useful if a specific set of filter rules and actions needs to be applied to multiple email accounts. By creating the template, you can quickly apply it when managing the email account filter settings.
IMPORTANT: Only one filter set can be active at a time. If the user wants to add a filter to an existing set, you will need to create the new filter in the existing active set.
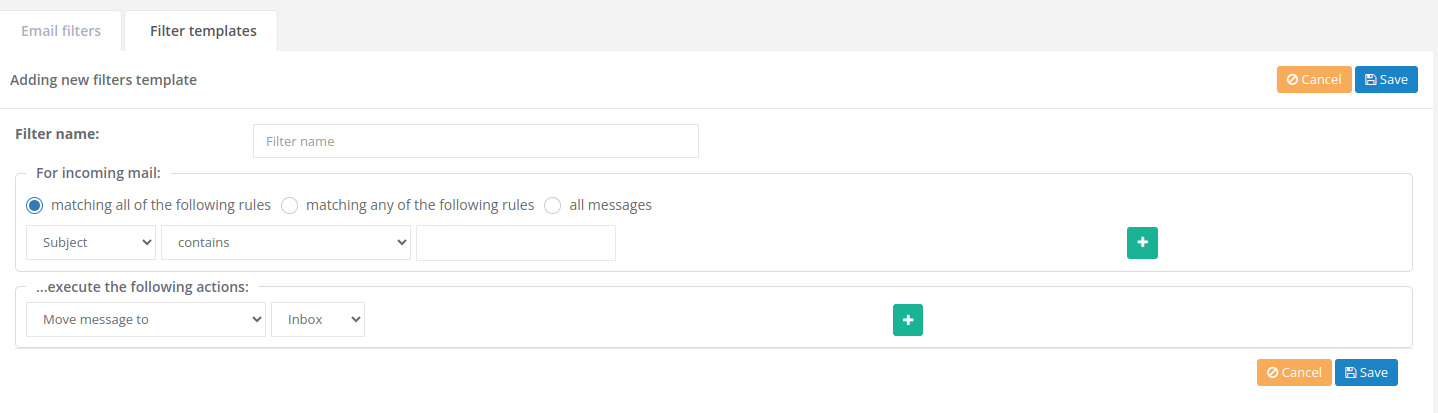
- Filter Templates: Click on the Filter Templates tab from the Email Filters page.

- Add New Filter Template: Click on the Add New Filter Template button.

- Create the Filter Template: Name the filter template and set the rules and actions for the filter.
- Save the Template: Create the template by clicking the Save button.

Managing Existing Filters


- View Filters: In the Email Filters section, you can see a list of all your existing filters.
- Edit Filters: To edit a filter, click the Edit button next to the filter you want to modify. Make the necessary changes and save the filter.
- Delete Filters: To delete a filter, click the Delete button next to the filter you want to remove. Confirm the deletion when prompted.
Testing Your Filters
- Send Test Emails: Send emails matching your filters’ criteria to your email account.
- Check Actions: Verify that the emails are sorted, deleted, or forwarded according to your filter rules.
- Adjust Filters if Necessary: If the filters are not working as expected, go back and edit them to refine the criteria and actions.
Conclusion
Setting up managed email filters in CWP helps you automate the organization of your emails, ensuring that your inbox remains clean and clutter-free. You can create and manage filters efficiently by following the steps outlined in this guide.
For more information on using CWP effectively, explore our other Support Center articles and documentation.
Upgrade to VPS Hosting for Peak Performance
Upgrade to InMotion VPS Hosting today for top-notch performance, security, and flexibility, and save up to $2,412 – a faster, stronger hosting solution is just a click away!
![]() SSD Storage
SSD Storage ![]() High-Availability
High-Availability ![]() Ironclad Security
Ironclad Security ![]() Premium Support
Premium Support