Django is a Python-based web framework focused on speed, security, and scalability. It is used for various applications including user authentication, administration panels, content management, and customer relationship management (CRM) systems. Many choose to install Django for its minimal prerequisites (Python) and ability to integrate with PostgreSQL, MongoDB, and many other niche software.
If using managed CWP Hosting instead of an unmanaged server, check with your hosting provider first to determine whether they have a special version of Django already available to save you time configuring your system.
Below we’ll cover how to set up the Django web framework in Control Web Panel (CWP). CWP Simple Terminal only uses the sh shell. If you follow the guide in the CWP terminal emulator, you’ll need to log into Secure Shell (SSH) to activate a Python or virtualenv environment.
How to Install Django on Control Web Panel
Before installing Django, you need to ensure you have the correct version of Python installed. Django 1.11 TLS is the latest version with Python 2.7 support. We will cover the latest version which requires Python 3.8 or higher.
- Log into CWP and open CWP Simple Terminal at the top. Alternatively, log into SSH as root.
- Check which Python version you have installed:
python3 --version
If the version is 3.8 or higher, skip to step 9. If it is less than 3.8, continue to the next step. - Install Python dependencies for your manual installation:
yum -y install openssl-devel bzip2-devel libffi-devel zlib-devel
- Download the latest stable Python version (3.10.5 at the time of writing this):
wget https://www.python.org/ftp/python/3.10.5/Python-3.10.5.tgz
- Extract the file:
tar -xvf Python-3.10.5.tgz
- Navigate to the new directory and prepare the build:
cd Python-3.10.5
./configure --enable-optimizations
- Complete the build:
make altinstall
- Verify the installation is completed:
python3.10 --version
- Continue to install Django with PIP (recommended), a virtual environment, or your system package manager.
Install Django with PIP
PIP (Python Installs Packages) is the recommended Django installation method for global system usage.
- Check which PIP version is already installed:
pip3 -V
- Unless you need a specific version of PIP for another application, upgrade PIP to the latest version:
python3 -m pip install --upgrade pip
- Install Django:
python3.10 -m pip install Django
- Ensure Django works.
Virtual Python environments
The virtualenv route is great for negating conflicts with other project’s requirements.
- Check which PIP version is already installed:
pip3 -V
- Unless you need a specific version of PIP for another application, upgrade PIP to the latest version:
python3 -m pip install --upgrade pip
- Install virtualenv:
sudo python3 -m pip install virtualenv
- Create a virtual environment to start a new project, replacing “djangoproject1” with your preferred title:
mkdir ~/djangoproject1
- Navigate to the new project directory:
cd ../djangoproject1
- Install an isolated version of Python and PIP in the project directory, replacing “packages” if desired:
virtualenv packages
- You’ll need to log into SSH as root to log into the virtual environment (replace “djangoproject1” and “packages”):
source /root/djangoproject1/packages/bin/activate
- The prompt will change to reflect that you’ve entered the virtual environment, showing your packages directory name from step 6 in parenthesis “()”. Use PIP to install Django in the virtual environment:
pip install django
- Check your installed version:
django-admin --version
- Once done with development, you can exit the virtual environment with either of the following commands:
deactivate
exit
You should stay logged into the environment to ensure it works.
Install Django from Distribution Packages
If you’d prefer not to use PIP, the following operating systems (OSs) have Django in their package management systems:
- AlmaLinux and other Enterprise-based distros (via https://RPMFind.net)
- Arch
- BSD (via https://pkgsrc.se)
- Debian
- Fedora
- macOS (via MacPorts)
- openSUSE
- Ubuntu
These packages are maintained by the community and may not be up to date. Before choosing this route, you should check what version would be installed and whether it is legitimate.
If you do install Django this way, ensure it works.
Ensure Django Works in the Python Environment
Log into SSH if you haven’t already and open a Python shell (this feature is unsupported in CWP Simple Terminal):
python3.10
Import and print Django’s current version:
import django
print(django.get_version())
You should receive the Django version installed: 4.0.X.
Access Django Admin Panel
Now we need to ensure the Django admin panel works.
- Ensure you’re in the root directory for your Django projects.
- Create the Django management script. If the project exists, navigate into that directory. Start the virtual environment if required. Then run the following command, replacing “projectname” with your project name (note the period at the end):
django-admin startproject projectname .
To create a new project:django-admin startproject djangoproject2
cd djangoproject2
- Create an SQLite database for your project:
python manage.py migrate
- Create an admin user for the dashboard:
python manage.py createsuperuser
You’ll be asked to enter an email address and password. - Now you can start the Django development server to preview projects:
python manage.py runserver 0.0.0.0:8000
- Open your project instance in the web browser. The URL will be “yourserverhostname:8000.” You should see a page stating the installation is successful.
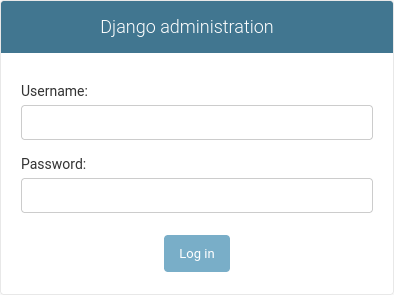
- Access the dashboard by adding “/admin” to the end of the URL (e.g. yourserverhostname:8000/admin).

- Login with your superuser name and password and you should be redirected to the admin dashboard.

- To stop the development server, type Ctrl + C in the terminal.
Troubleshoot Django Installation
If you’re having trouble after installing Django, try one of the following:
- Check your applications to see if a specific Python version is required
- Check for uninstalled dependencies
- Upgrade PIP
If you’re looking for project ideas, check out these Python training resources.
Learn more about how to manage your CWP server.
Upgrade to VPS Hosting for Peak Performance
Upgrade to InMotion VPS Hosting today for top-notch performance, security, and flexibility, and save up to $2,412 – a faster, stronger hosting solution is just a click away!
SSD Storage
High-Availability
Ironclad Security
Premium Support


