MySQL is the most popular open-source relational database management system (RDBMS) today. Many of the most popular LAMP-stack web applications depend on MySQL/MariaDB to manage large amounts of data. WordPress, PrestaShop, and Nextcloud are notable examples. This is likely why MySQL is natively included with a Control Web Panel installation.
Below we’ll cover how to create a MySQL database in CWP.
Create a MySQL Database
Since MySQL is already installed on CWP servers, you simply need to know how to access it in your web hosting control panel.
- Log into CWP.
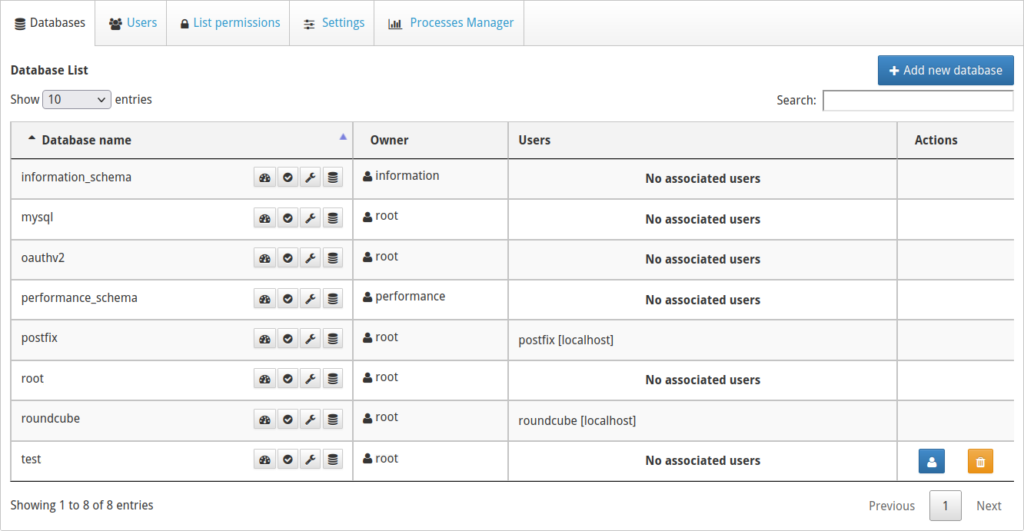
- On the left select MySQL Manager. End users will need to select Databases to see the MySQL Manager option. You’ll see all databases to which you have access. For admin users that includes mysql, oauthv2, performance_schema, postfix, root_cwp, and roundcube.

Regular users will see no databases unless any were manually created for that user.
Each row in the database list shows the database name, action buttons to modify and the database, owner, and system users. The buttons can optimize, check, repair, and backup the database.
Manually created databases will include an additional option to assign a database user and delete the database. - To create a MySQL database, admin users select Add new database from the top-right corner. End users, select Add database from the same location.
- Admin users must assign a CWP user to the database. End users can choose to assign a database user from their account.
- Type a name for the new database. It will be modified to include the database user as a prefix (e.g. “user_wp757”).
- Specify a character set (charset) if necessary. The most common ones are “utf8mb4_unicode_ci” and “utf8mb4_general_ci.”
- Select Save. The page will refresh and show your new MySQL database.
Create MySQL Users
There are two ways to create MySQL users in CWP. The first method is for an admin user to simply create a new CWP user. This automatically creates a MySQL database user of the same name.
The second is for an end user to create a database user under their account. We’ll cover the latter method below.
- From the MySQL Manager page, select Add User.

- Type a MySQL username.
- Specify the host if necessary.
- Create a strong password.
- Add the user to an existing database if necessary.
- Select Save.
MySQL Server Settings
Now that you know how to create MySQL databases and MySQL users in CWP, there are some related tasks you should be familiar with.
Remember, within the database list are options to check and repair MySQL databases in CWP. Within the database list, select the “check database” button, then the “repair database” button. Advanced users can do this in the MySQL command-line interface (CLI) as well.
Reset MySQL User Passwords
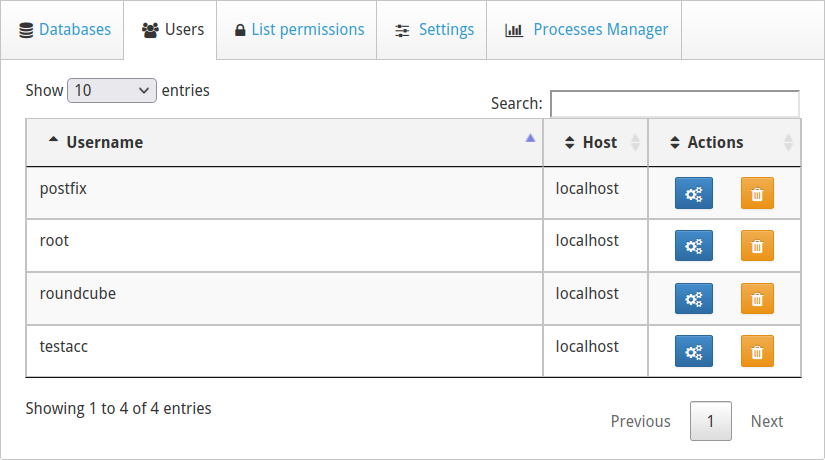
CWP server admin users can change database user passwords by selecting Users at the top the page. Then select the gears icon under the “Actions” column.

End users have a slightly different process.
- Select List Users.

- Select Change password beside the user you want to edit.
- Type a new password.
- Select Change password.
Remote Database Management

Admin users can change remote database connection settings from MySQL Manager > Settings.
The default listening port is 3306.
The default bind address is 0.0.0.0.
Don’t forget to select Save settings after any changes.
See what else you can do in CWP.


