Table of Contents
In this article we’ll discuss how you can finish the setup of your phpList installation that you did with Softaculous.
Now that you have successfully installed phpList onto your website using the Softaculous installer, there are still a few steps left in order to complete the setup and configuration of the software.
We’ll cover setting up the general system values, configuring a few attributes, creating your first mailing lists, and then a subscribe page for users to sign-up to those mailing lists from.
Login to phpList admin dashboard
-
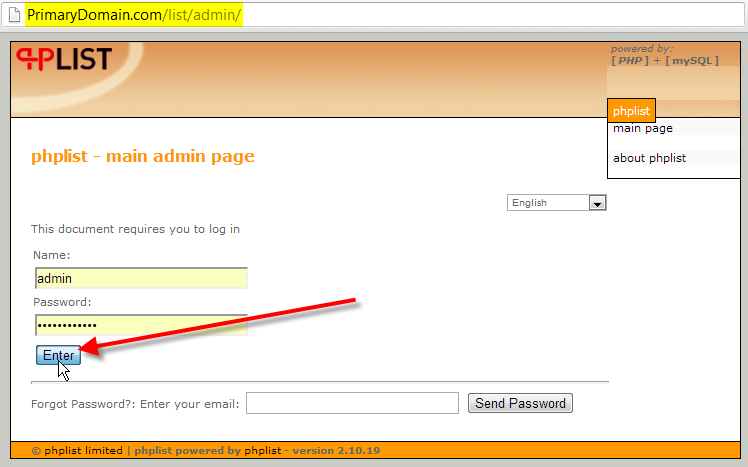
Access your phpList admin dashboard from your web-browser, for our example this would be:
https://PrimaryDomain.com/list/admin/
Fill in your admin credentials, then click Enter
Configure general system values
-

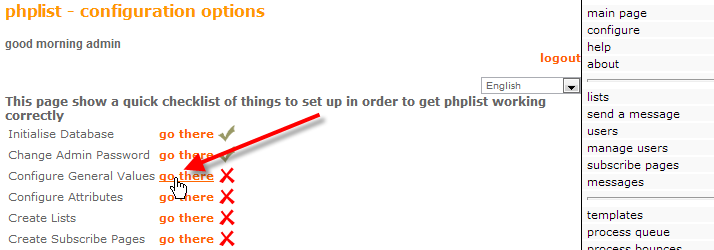
Under the System Functions section, click on setup.
-

Beside Configure General Values, click on go there.
-

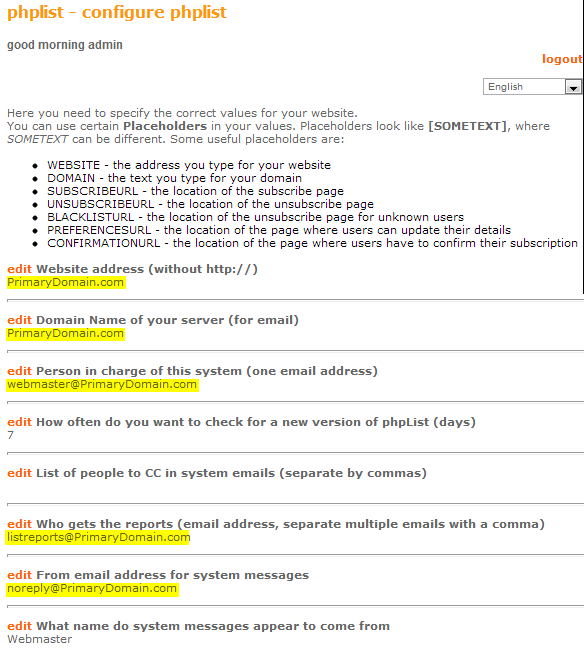
You will now be presented with a long list of configurable options that can change the default general settings of your phpList installation.
All of these settings should be self-explanatory as they each have a small description beside what each setting does. To modify any of your general system values, simply click on edit beside the option you’d like to change.
One important option to change is the Who gets the reports email address. It will default to listreports@PrimaryDomain.com, and this will be the address that mail reports are sent to. So it’s important that you’ve already created this email account, or set it to one you already have access to.
Configure attributes
phpList allows you to store more than just an email address for each user on your mailing list. These are referred to as attributes. In our example we are going to create 3 attributes, so that we can store our users fist and last name, and also provide them with a text box to relay their interests back to us with.
- In the phpList admin panel, from the right-hand menu click on the main pagelink at the top.Then under the System Functions section, click on setup.
-

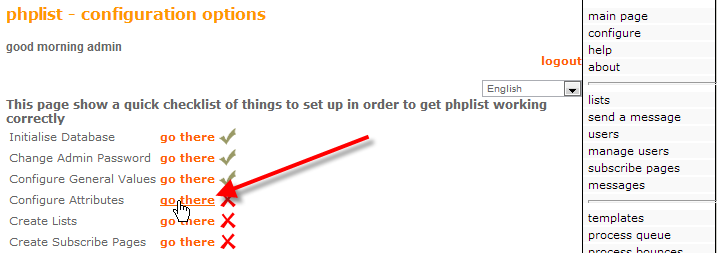
Beside Configure Attributes, click on go there.
-

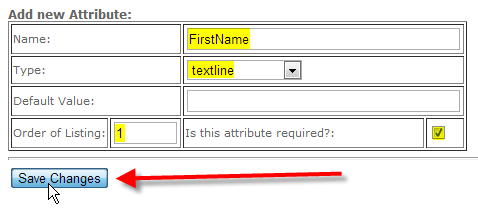
Under the Add new Attribute section enter in the values for your new attribute, then click Save Changes.
Here we are naming our attribute FirstName, selected textline as the type of attribute, put it as number 1 in our listing of attributes, and made it required.
-

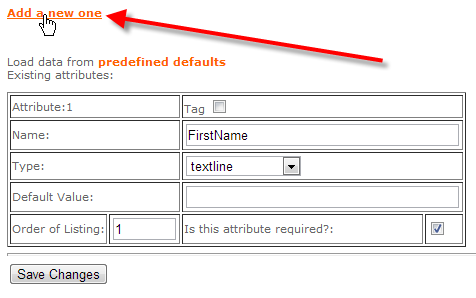
Above the new attribute that was just added, click on the Add a new one link.
-

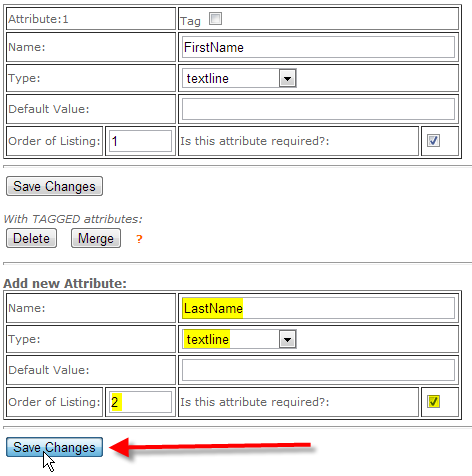
Fill in the details for this new attribute, then click Save Changes.
Here we are naming our attribute LastName, selected textline as the type of attribute, put it as number 2 in our listing of attributes, and made it required.
- Click on the Add a new onelink again, this time setup a textarea attribute.Here we named our attribute Interests, selected textarea as the type of attribute, put it as number 3 in our listing of attributes, and made it not required.
Create your first lists
Now that you have your phpList installation complete, and you have configured the general values and attributes for your installation you’ll want to create your first mailing lists.
- In the phpList admin panel, from the right-hand menu click on the main pagelink at the top.Then under the System Functions section, click on setup.
-

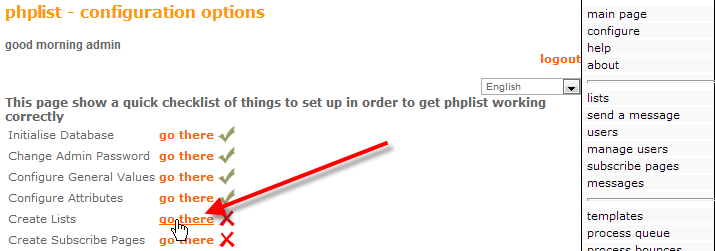
Beside Create Lists click on go there.
-

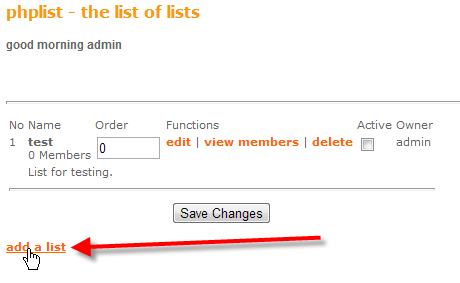
At the bottom of the page click on add a list.
-

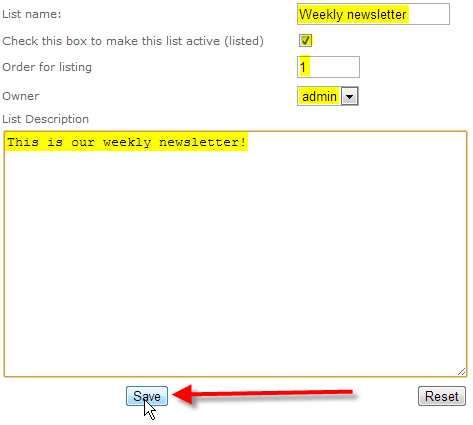
Here you will fill in the details for this particular mailing list.
In this case we’ve entered Weekly newsletter as our List name
Made the list active and listed (on the subscriber page we’ll talk about later)
Set the Order for listing to 1
Set the Owner to admin
Set our List Description to This is our weekly newsletter!
Finally click on Save at the bottom.
- At the bottom of the lists page now, click on add a list again.
-

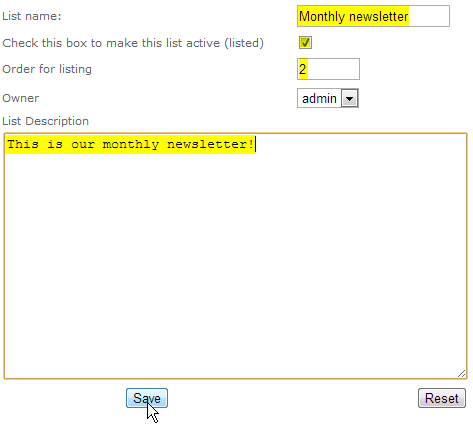
Again fill in the details for this particular mailing list.
In this case we’ve entered Monthly newsletter as our List name
Made the list active and listed (on the subscriber page we’ll talk about later)
Set the Order for listing to 2
Set the Owner to admin
Set our List Description to This is our monthly newsletter!
Finally click on Save at the bottom.
Create a subscribe page
Now that you have all your settings configured, and you’ve created a couple mailing lists. We’ll want to create a page for people to be able to subscribe to those lists from.
The attributes that you setup earlier will be presented to the user on these pages, so that you can gather specific details about them that you need for your mailings. Any attributes or mailing lists that you’d like available will need to be created first, prior to creating the subscribe page.
- In the phpList admin panel, from the right-hand menu click on the main pagelink at the top.Then under the System Functions section, click on setup.
-

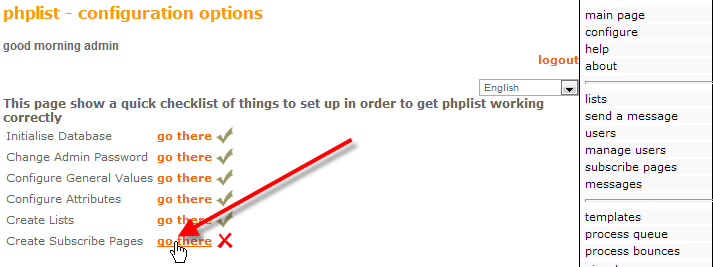
Beside Create Subscribe Pages, click on go there
- On the subscribe pages page, click on add a new one.
- Now you’ll be presented with a long page where you can setup all of the general information for your subscribe page. Most of this is self-explanatory such as the Title, Intro, Header, Footer, and Thank you pagethat you’d like the user to be displayed when looking at the subscribe page.The only main thing that we’ve changed in our example is setting the Title to Newsletters.
After you fill in all of that information, the first option you’ll probably want to look at is the HTML Email choice setting. It defaults to the setting of Offer checkbox for HTML, which will allow users to place a checkmark inside the box if they’d like to receive your mailings in HTML format.
Some of your users might not be using an HTML capable email client, so giving them the option to decide if they just receive plain text emails can typically be a good option. However if your mailings are for a catalog of products or something that isn’t represented very well by just text you might want to think about having all your mailings default to HTML.
- The next option would be for Display Email confirmation, by default it is displayed. This means that a user will need to type in their email address twice to confirm they are typing it in proper.
- Your next two options should again be self-explanatory as they simply set for your users what Message they receive when they subscribe, and then the Message they receive when they confirm their subscription.
-

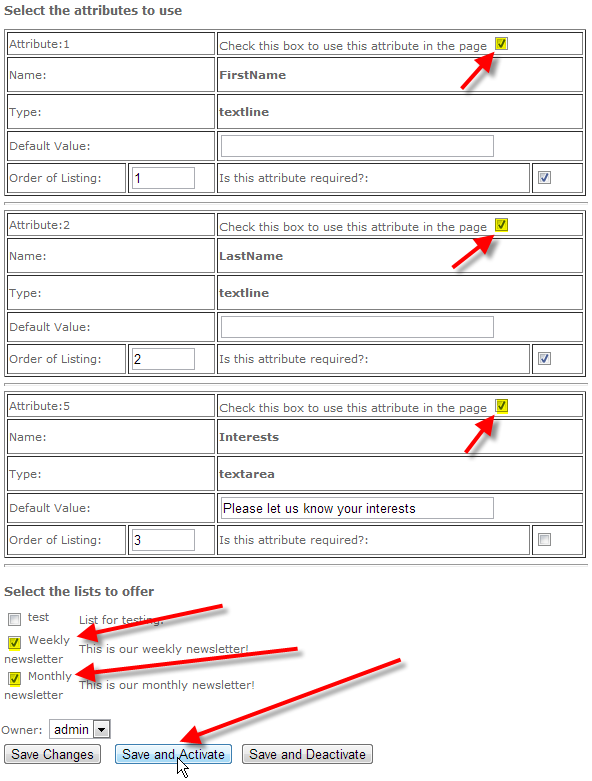
Now under the Select the attributes to use section, we’re going to want select all of our attributes that we had setup earlier. In our case we’re going to check Check this box to use this attribute in the page, for all 3 of our attributes that we setup.
Finally at the bottom from the Select the lists to offer section, we want to check both our Weekly and Monthly lists. Then click on Save and Activate at the bottom of the page.
-

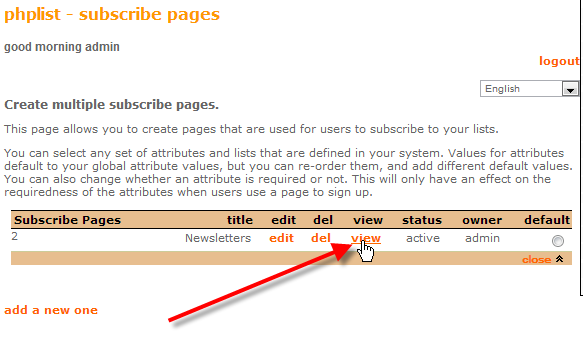
Now you’ll be dropped to the subscribe pages section of phpList and you should be able to see the Newsletterssubscribe page that we just created.
Click on view beside the list to take a look at what your users would see.
-

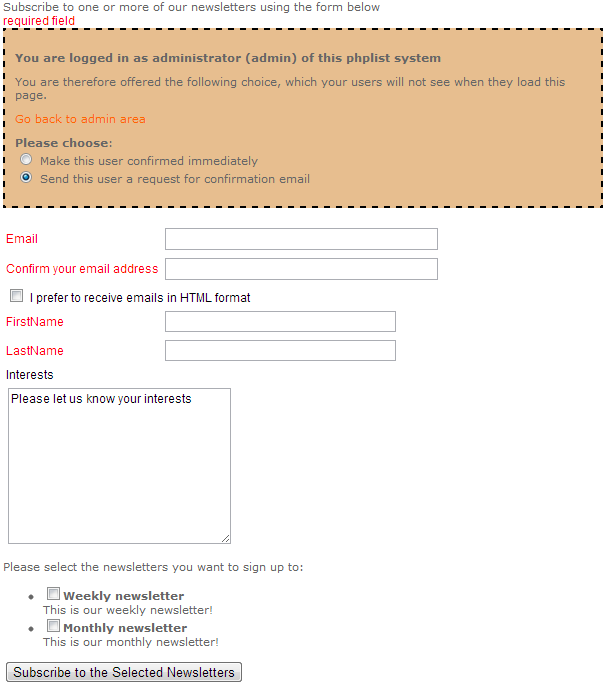
You’ll see an admin notice at the top of the page, allowing for you to confirm the email address you typed in right away, or force an email to that address asking the user to confirm their subscription. Normal users will not be given this option.
You should also see the attributes that we’ve added to this particlar subscribe page, in this example we’re using FirstName, LastName, and Interests.
At the bottom of the subscribe page you should also see the mailing lists that we’ve made active.
You should now have successfully finished configuring your phpList installation. In other articles we’ll also discuss more advanced topics such as how to send your mailing lists, and user and list management.


I just downloaded phpList with Softaculous as described in your article. I then attempted to Complete phpList setup as described in that article. The instructions you provide are talking about a Dashboard that looks nothing like what I got. I stumbled on. The manual available from the dashboard is completely missing the “creating a subscribe page’ section that users claim they have updated. I attempted to create a subscribe page anyway. What I got opens up with 4 subchoices, subscribe, modify parameters, unsubscribe and contact administrator. I find no way to access the details of any of these, nor for that matter to turn any of them off. If I select subscribe, I get a completely blank page, and if I look at the source for it it stops after 11 lines at which point it is at <link rel = "SHORTCUT ICON" ….
I am telling you all this because I question the wisdom of your organization recommending this product. I am about to deinstal and try something else.
Sorry to hear about the trouble you are experiencing, our phpList articles have not been updated in quite some time. I will have the content team review these articles for accuracy in the future. Here is a link to the official phpList guide on Creating a subscribe page: https://www.phplist.org/manual/books/phplist-manual/page/creating-a-subscribe-page
This should be more up-to-date than our guide. Thank you for contacting us.