In this article we’ll cover how to install phpList with Softaculous. phpList is a popular open source newsletter manager that will allow you to setup and manage multiple mailing lists for your domain from a centralized web accessible location.
Softaculous is an easy 1-click application installer that should be available to any shared hosting customer in their cPanel. VPS or dedicated server customer’s are also able to purchase a license for Softaculous in AMP to have it installed on their own server.
To get started simply follow the steps below.
- Login to your cPanel.

Under the Software / Services section, click on Softaculous.

From the left-hand menu scroll down till you see the Mails section, then click on phpList.

Or if you prefer in the top-right search box, type in phplist, then click on the phpList link.

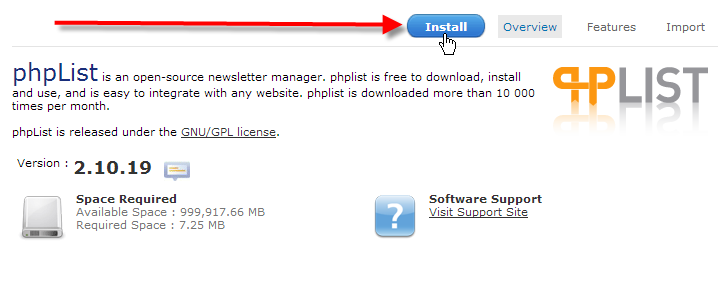
Next click on the Install link toward the top-right of the page.

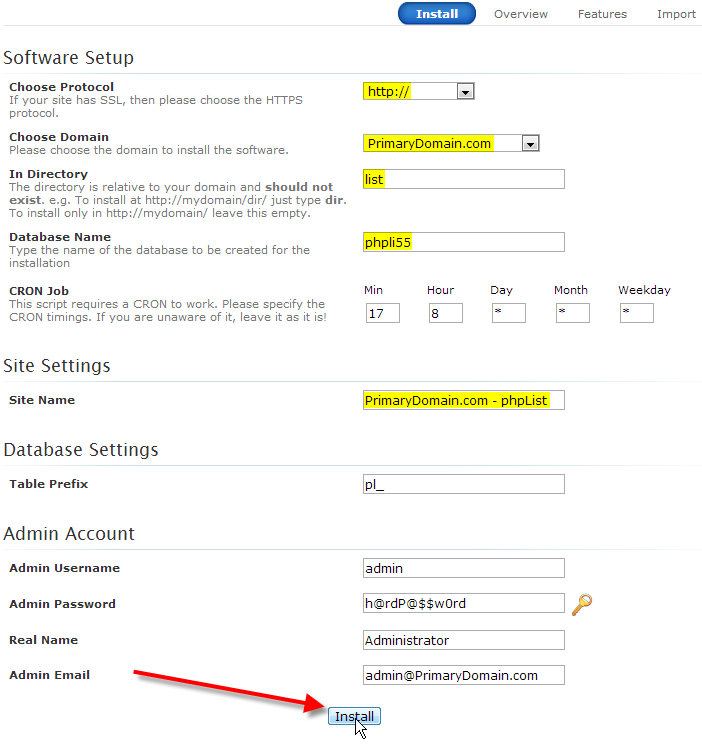
Now you’ll be presented with the Software Setup page. From here you can configure exactly how you’d like to have phpList installed.
Choose Protocol Typically left at the default of https:// unless your main site is setup to always re-direct to https://www. in which case you’d want to select that option. If your site has a SSL certificate installed on it you could also choose either of the https:// options. Choose Domain Select the domain name you’d like phpList installed to. In Directory The relative directory to the domain you’ve selected, where you’d like phpList installed to. In this example we are installing it to the PrimaryDomain.com/list directory, so you only need to enter in list as the directory name. Database Name The name of the database that phpList will create. CRON Job Set the scheduled time that phpList should run its background tasks. By default it will be set to: 17 8 * * *
This is set to run on the 17th minute, of the 8th hour, every day, every month, and every weekday. Or in lamens terms 8:17AM local server time every day.In most cases this default setting is perfectly fine, and you can always adjust it after installation as well if you notice it’s having issues running at the time selected.
Site Name What you’d like to call your phpList installation Table Prefix The prefix used for your database, the default of pl_ should be fine. Admin Username The admin username you use to access your phpList installation. Admin Password The admin password you use to access your phpList installation. Real Name The display name you’d like to use for your phpList administrator account. Admin Email The email address of the administrator. After filling out all of this information, click on Install.

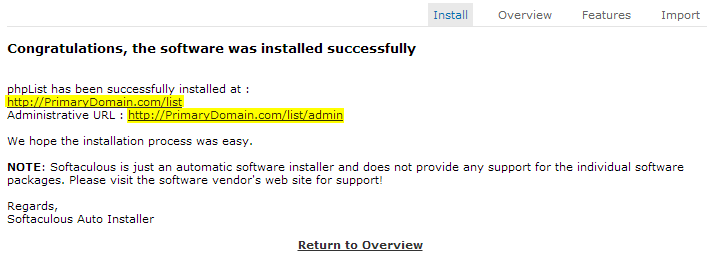
The installation process could run for a few minutes, after it’s complete you should get a Congratulations, the software was installed successfully message.
Congratulations! You should now know how to successfully install the phpList newsletter manager application easily from Softaculous. The next thing you’ll want to do is follow our guide on how to complete phpList setup after a Softaculous install, as it walks you through the final steps you need to take to get your phpList software fully operational.


