Table of Contents
CyberPanel free and enterprise editions have the ability to manage website and system backups. The CyberPanel backup features also allow sysadmins to automatically create and transfer archives.
Some of the features explained below are not stable.
Manually Create CyberPanel Backups
This section covers how to create a full website and server backup now.
- Log into CyberPanel.
- Select Backup > Create Backup.
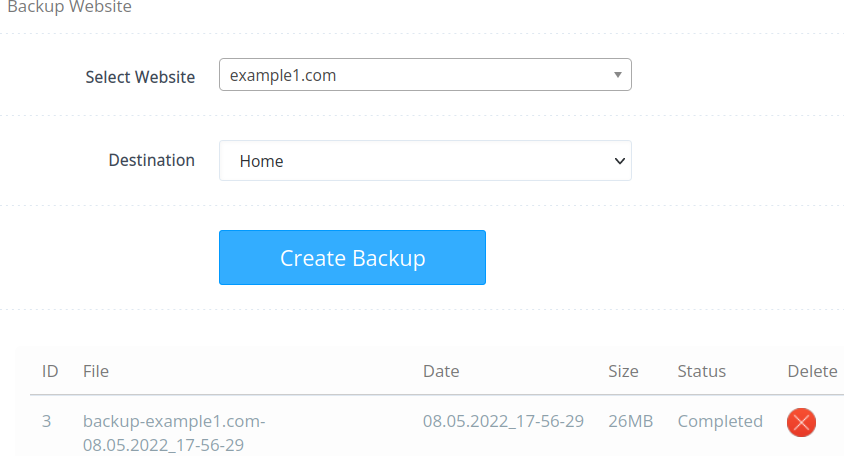
- Choose the website from the drop-down menu.

- Select a destination from the second drop-down list. “Home” stores backups in the website’s backup directory (e.g. /home/example.com/backup/).
- Select Create Backup.
- You can delete backups from the list at the bottom with the red “X” button.
Remote Backup Migration
CyberPanel makes it easy to transfer data to another CyberPanel server and a Google account.
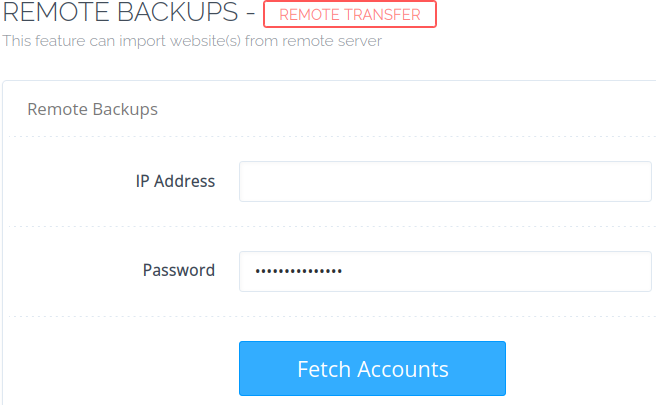
Backup > Remote Backups – From here you can import sites from another CyberPanel server. Once you type the server IP address and admin user credentials for that external server, you’ll be able to list sites available to import.
Backup > Setup Google Drive – CyberPanel Google Drive backups can be configured once you create an account with the developer company site, Cyberpersons.com.

Schedule CyberPanel Server Backups
This section covers automating full system backups.
Manage Server Backup Destinations
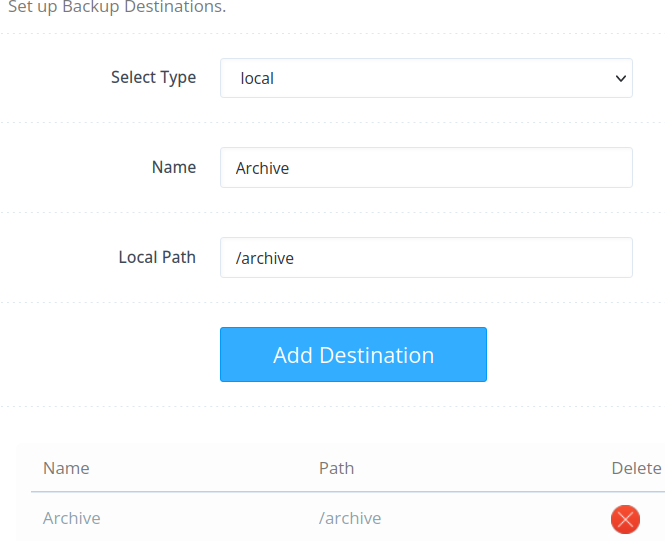
First, create any custom local or SFTP storage locations necessary.
- Select Backup > Add/Delete Destination.
- Select local or SFTP from the drop-down menu.

- Configure the backup destination.
- Select Add Destination.
- You can delete backups from the list at the bottom with the red “X” button.
Create a Server Backup Schedule
Ensure rsync is installed before automating backups.
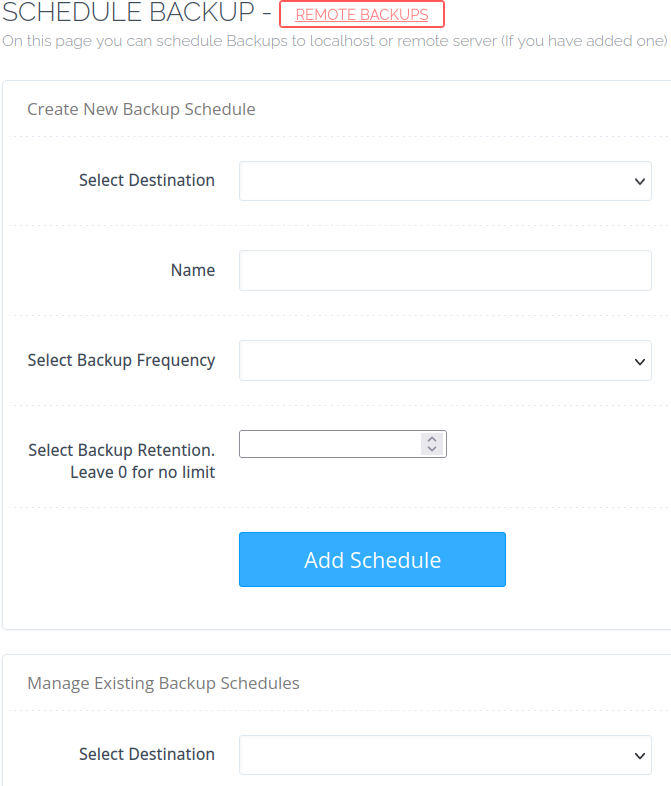
- Select Backup > Schedule Backup.
- Select a destination created during the “Add/Delete Destination” steps above.

- Add a name for the backup schedule.
- Select Never, Daily, or Weekly from the frequency drop-down list.
- Specify the number of backups to retain (“0” means no backups are deleted automatically).
- Click Add Schedule.
- Refresh (F5) the page.
- At the bottom, under “Manage Existing Backup Schedules,” select the destination.

- Select the job, or backup schedule, you just created. This is also where you can delete a backup schedule.
- Select individual sites from the list to backup, then Add Site. Or, select Add All.

These steps did not work properly when we tested CyberPanel 2.3. If you have issues, we recommend instead creating manual backups or creating a backup cron job until this function is fixed.
Restore a Server Backup
This feature restores scheduled backups. Note that these steps did not work properly during our CyberPanel 2.3 testing.
- Select Backup > Restore Backup.
- Select a backup from the drop-down menu.
- Make changes as needed.
CyberPanel Incremental Backups
Unlike a full backup, an incremental backup only stores changes since the last full or incremental backup. Incremental backups cover you between a full backup schedule set to weekly or longer.
Note that differential backups (not an available feature in CyberPanel) include data that changed since the last full backup.
Manage Incremental Backup Destinations
First, create a destination.
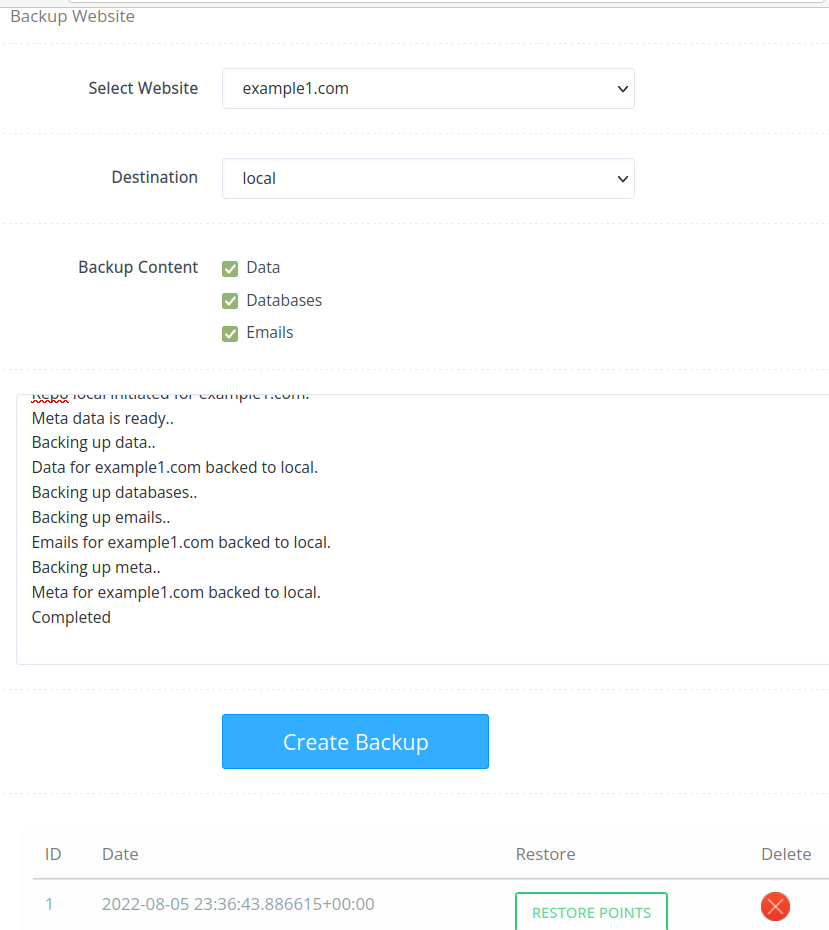
- Select Incremental Backup > Create/Restore Backup.
- Select a website from the drop-down menu.

- Select a destination from the list.
- Check the boxes for what you wish to backup (data, databases, and emails).
- Select Create Backup.
- At the bottom, select Restore Points to restore the data types or delete the backup.
Schedule Incremental Backups
Ensure rsync is installed first.
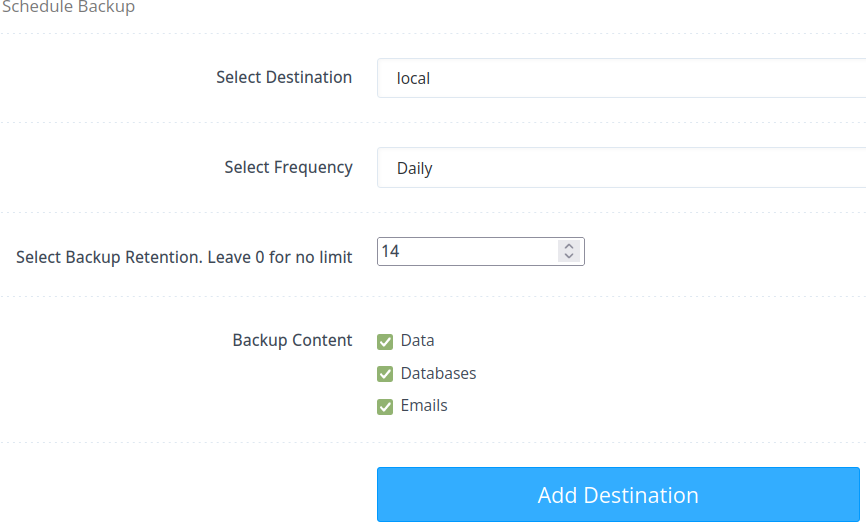
- Select Incremental Backup > Schedule Backups.
- Select a destination created earlier.
- Select a frequency (daily or weekly) that fits how often you make changes to your data.
- Set the backup retention amount (“0” means no backups are deleted automatically).
- Check boxes for what you want backed up (data, databases, and emails).
- Select Add Destination.

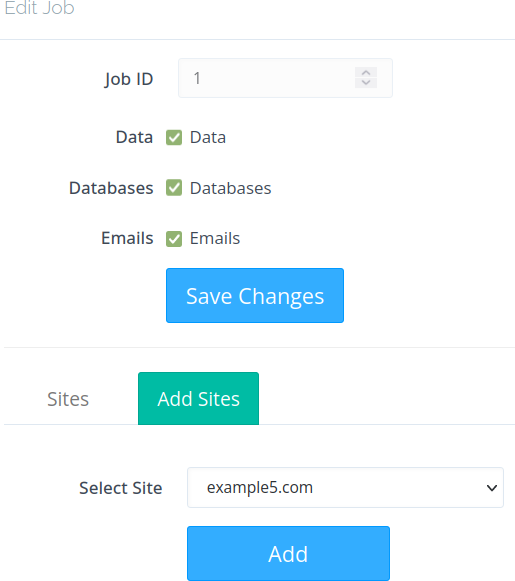
- As the account search bar doesn’t work, you’ll need to select Edit at the bottom.
- Click the Add Sites tab.

- Choose a website from the drop-down list and select Add.
- Repeat the previous step until you’ve added all necessary websites.
- Click the Sites tab to review or remove any sites.
Manage Incremental Destinations
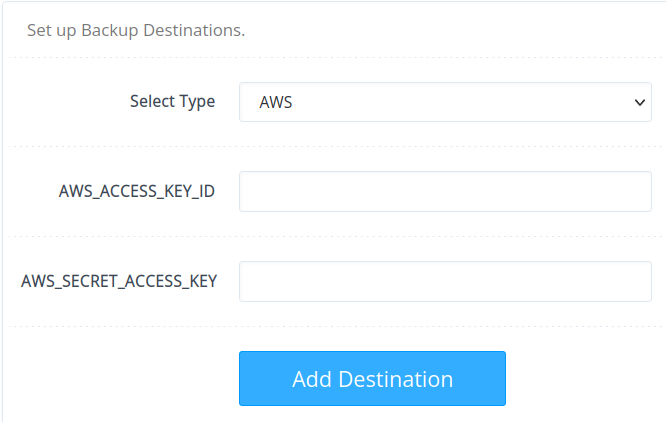
Follow these steps to add remote SFTP and AWS backup locations.
- Select Incremental Backup > Add/Remove Destinations.
- Select a type from the list (AWS is added by default).
- Add the AWS_ACCESS_KEY_ID.
- Add the AWS_SECRET_ACCESS_KEY.
- Select Add Destination.
Restore Incremental Backup from Remote Destination
Follow this after restoring a full backup, if you’ve created incremental backups.
- Select Incremental Backup > Restore from Remote.
- Select a website to restore.
- Choose a destination.
- Type the backup password.
- Fetch Restore Points.
- Make changes as needed.
Continue learning about how to get the most out of your CyberPanel server.
With our Cloud Server Hosting, you can deploy a lightning-fast, reliable cloud platform with built-in redundancy – ensuring the availability of your environment!



Thank you! This was very informative!
We’re glad it helped you Peter!