Table of Contents
The CyberPanel email server is feature-rich enough for some of the most sophisticated use cases. Email forwarding, spam mitigation, and sending rate limit are just a few of the stable capabilities available.
- Create a CyberPanel Email Account
- CyberPanel Email Server Settings
- CyberPanel Email Security and Troubleshooting
Create a CyberPanel Email Account
Ensure you’ve added the domain as a website in CyberPanel before continuing.
- Log into CyberPanel.
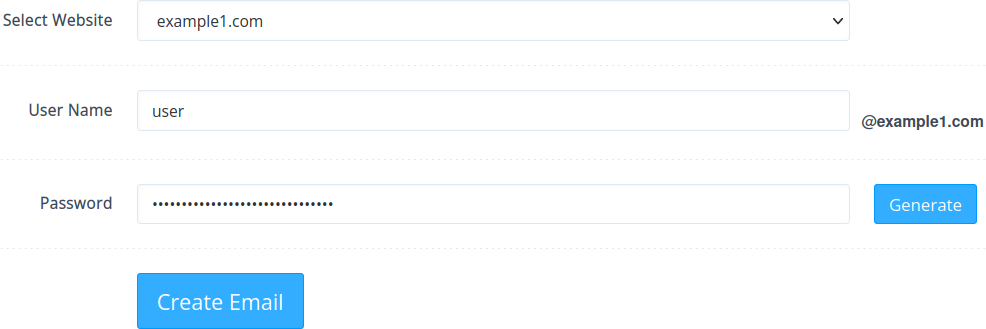
- Select Email > Create Email.
- Select a website from the drop-down menu.
- Type a username.

- Type a strong password.
- Create Email.
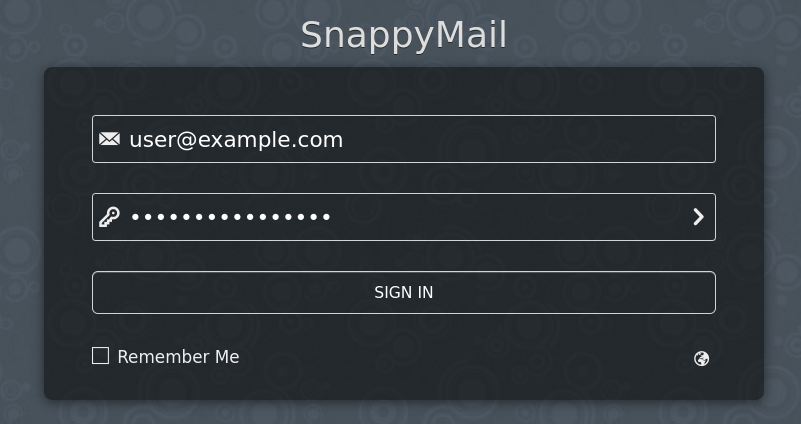
- Select Email > Access Webmail.
- Enter your email account credentials to sign into SnappyMail.

Contact If you receive the error “Can’t connect to server: Server message: Can’t connect to host “tcp://localhost:143,” contact CyberPanel directly.
Reset Email Account Password
Follow these steps if you forget a CyberPanel email account password.
- Select Email > Change Password.
- Select a domain from the drop-down list.
- Select the email account to modify.

- Type a new password.
- Select Change Password.
- Save the user credentials in a password manager.
List Email Account Info for Email Clients
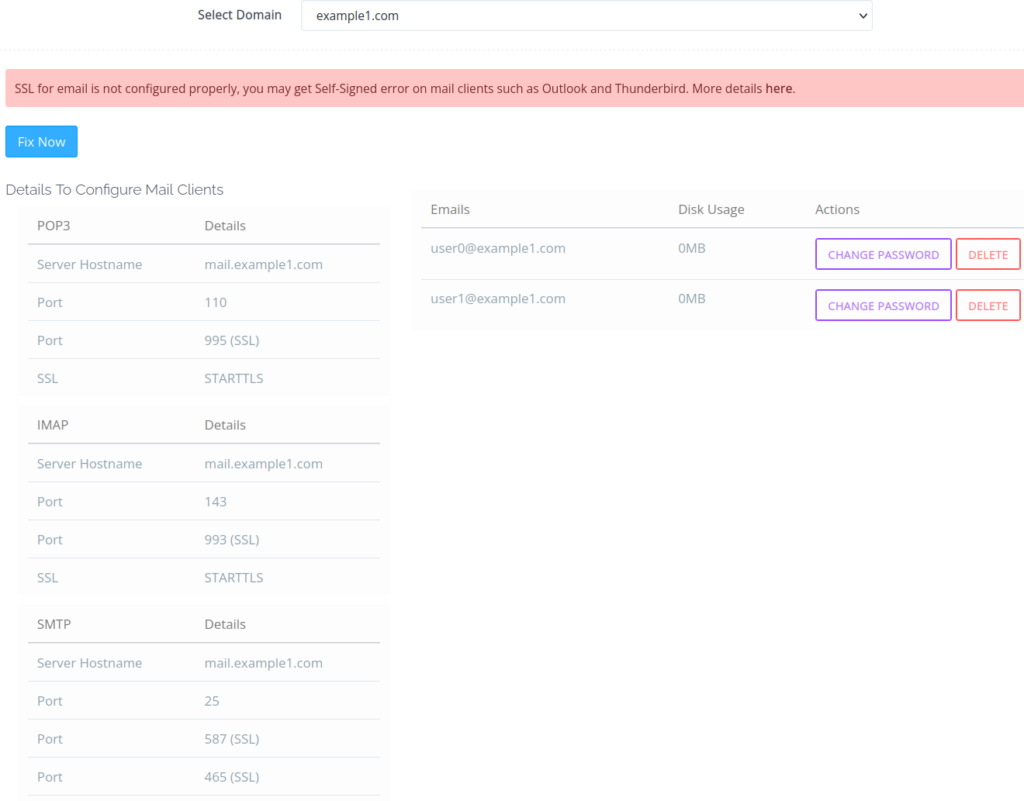
This section covers how to view all email accounts for a domain and info for integration with desktop mail clients such as Thunderbird. Some users prefer this for the extensive customization available in desktop applications.
- Select Email > List Emails.
- Select a domain from the drop-down list.

- Copy POP3, IMAP, and SMTP server connection details as necessary.
- Delete or change passwords for email accounts as necessary on the right.
Delete Email Accounts
This is an alternative method for deleting CyberPanel email accounts.
- Select Email > Delete Email.
- Select a website from the list.
- Select an email account from the drop-down menu.
- Select Delete Email.
- Select Are you sure? to confirm.
CyberPanel Email Server Settings
The following features allow you to customize email communications.
Email Forwarding
Email forwarding is useful when you need to redirect communications to another email account for various reasons (out of office for an extended amount of time, for example).
- Select Email > Email Forwarding.
- Select the domain.
- Select the email account you want to modify.
- Select a forwarding option – “Forward to email” or “Pipe to program.”

- Type the destination address or application name in the text box.
- Select Forward Email.
Forwarding configurations will show in the list at the bottom of the page.
Email Limits
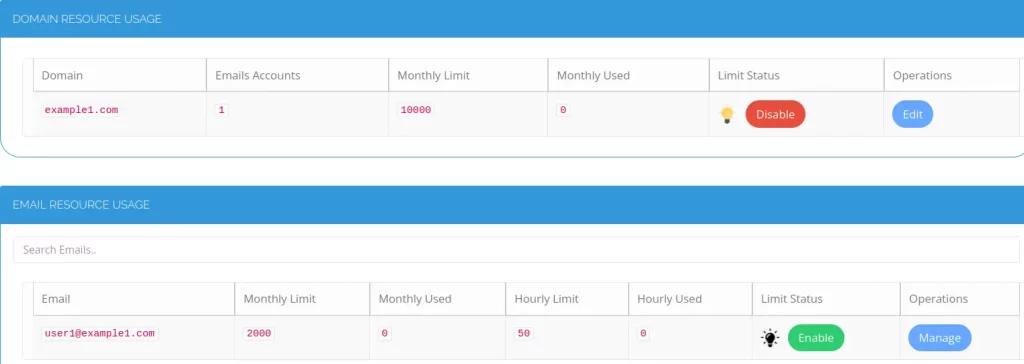
The Email Limits function restricts how many emails can be sent from a domain and email accounts on a monthly and hourly basis. This helps mitigate email spoofing and other spam attacks. It also serves as a load balancer to ensure your CyberPanel email marketing settings aren’t excessive (if enabled).
- Select Mail Settings > Email Policy Server.
- Select the server status button so it turns blue and states “On.”
- Save changes and wait for the success notification.
- Select Mail Settings > Email Limits.
- Select Enable to restrict emails sent from a domain.

- Select Manage to customize settings.
- Select Edit at the top to change the monthly limit.

- Type a monthly limit in the text box.
- Select Change Limits and the page will refresh.
- If you wish to apply further restrictions to individual email accounts, select Enable to the right of the account at the bottom.
- Select Manage for the email account.
- Enable logging for the email account if desired.

- Select Edit on the right.
- Set the monthly and hourly sending limit.
- Click Change Limits.
DKIM DNS Records Manager
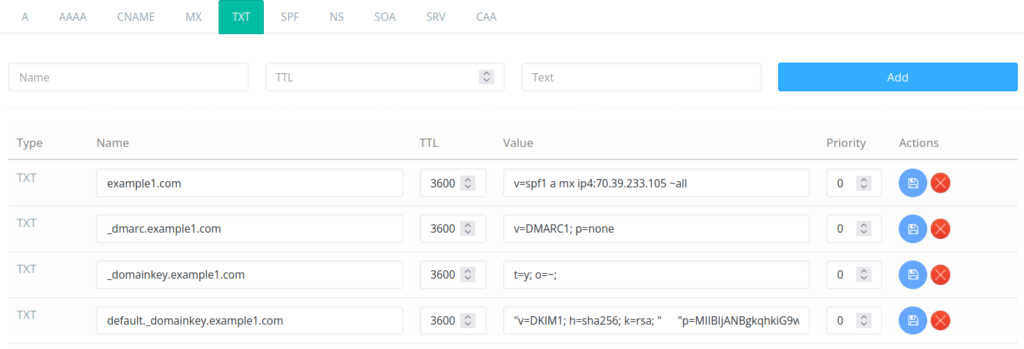
DomainKeys Identified Mail (DKIM) is an important security DNS record for any CyberPanel email setup. DKIM works with SPF, DMARC, and BIMI to verify that emails are legitimate before someone opens them. Every domain with email addresses should have a DKIM record.
- Select DNS > Add/Delete Records.
- Select the domain.
- Select the TXT tab.
- Look for a DNS record named “default._domainkey.[yourdomain].com” with a value starting with “”v=DKIM1.”

- If the record is missing, select Email > DKIM Manager.
- Select the domain to auto-generate a DKIM record.
- Repeat this process to review and develop additional DKIM records.
CyberPanel Email Security and Troubleshooting
This section covers CyberPanel server security features to prevent spam and resolve email server issues.
Spam Filtering
There are two email security plugins available to protect your CyberPanel email server. They may take a minute to install.
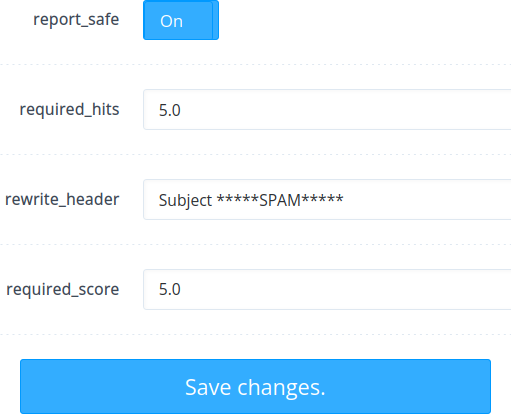
Mail Settings > SpamAssassin -This popular spam filter lets you control how many suspicious indicators must be present before an email is flagged as spam.
Mail Settings > MailScanner – This email security suite, with the MailWatch graphical interface, scans for malware, manages blocklists, and more. Log into your MailWatch instance with your CyberPanel admin credentials.

CyberPanel VPS Email Logs
It is important to understand where you can look to troubleshoot CyberPanel email server issues.
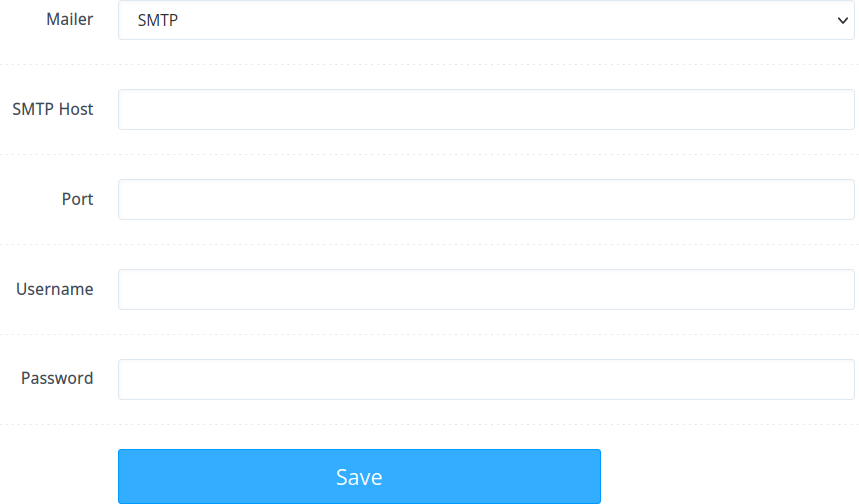
Logs > Server Mail – Configure SMTP settings to receive email notifications when server issues arise.
Logs > Email Log – This can be helpful in the case that your CyberPanel can’t send email.
Mail Settings > Mail Queue – Review emails unable to send for any reason.Learn more about your CyberPanel Free or Enterprise edition.
If you don’t need cPanel, don't pay for it. Only pay for what you need with our scalable Cloud VPS Hosting.
CentOS, Debian, or Ubuntu
No Bloatware
SSH and Root Access
