Using different social media tools within your site can help improve the quality of the site and overall visitor experience. The YouTube module lets you manage youtube videos in different ways within your site. You will be able to use them as separate file entittes. Below is a list of steps to help you install and configure the YouTube module in your Drupal 7 site.
Configuring the YouTube module in Drupal 7
- You will first need to download the module to your local computer. You can find that module here.
- Log into your Drupal 7 admin dashboard.
- From the top menu bar, locate the Modules option and click it.
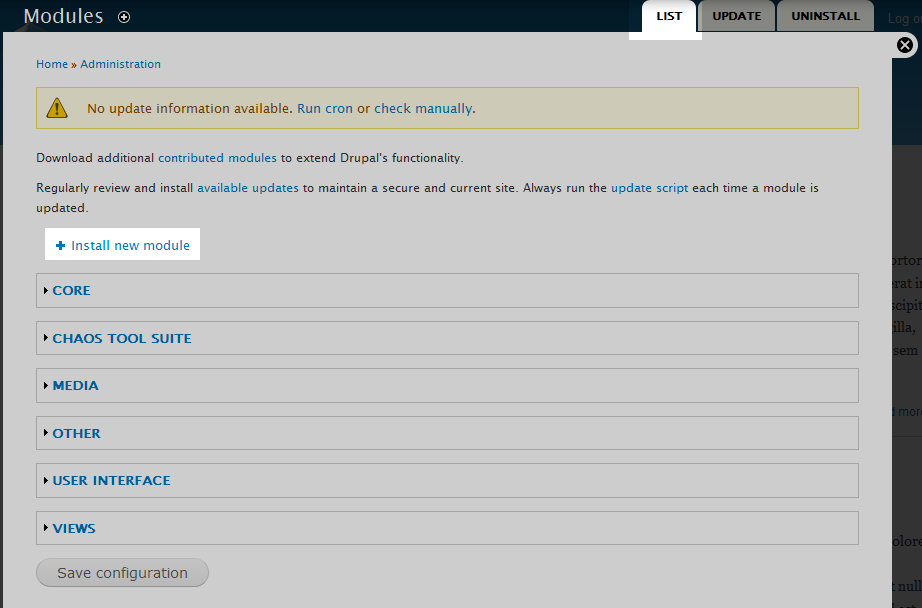
- You are now on the Modules List screen. Be sure you are on the List tab, found in the upper right corner of the page. Click on the Install New Module link found at the top of the page.

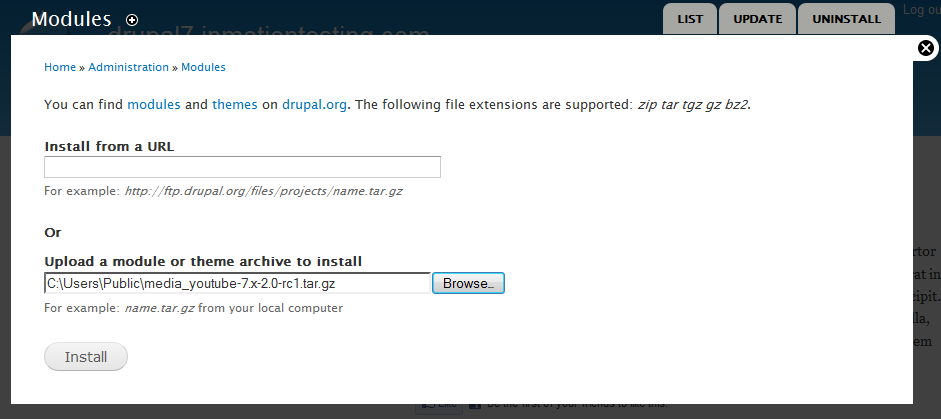
- On the module upload screen, click on the Browse button. From here, navigate to the folder in which the module is stored and click on Open. You should now see the path to the module in the Upload a module or theme archive to install. Click the Install button to complete the module installation.

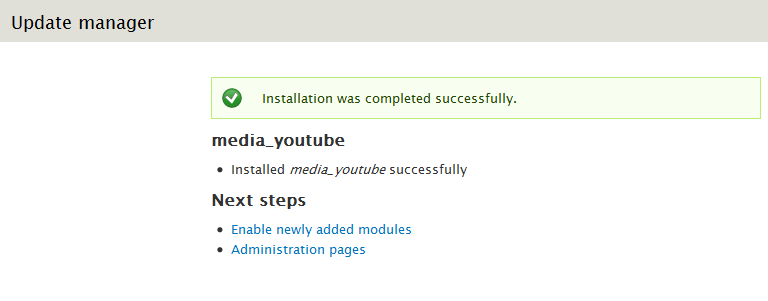
- Once the module installs, you will be sent to a page that displays a successful install message. From there, click on the link entitled Enable Newly Added Modules.

- You are taken back to the Modules list screen. From here, locate the Media: YouTube module in the Media category. Select the checkbox to the left of the module name and click on the Save Configuration button at the bottom of the page. This enables the module so it can be used for your content types.
- Per the instructions of the module, you can now allow YouTube videos to be used on your site either as file entities, or within the WYSIWYG editor.
File Entity
- Add a new "file" type field to your content type or entity. Choose the widget
  type "Multimedia browser". You can also select an existing file field.

- While setting up the field (or after selecting "edit" on an existing field)
  enable:


   - Enabled browser plugins: "Web"

   - Allowed remote media types: "Video"

   - Allowed URI schemes: "youtube:// (YouTube videos)"

 - On "Manage display" for the file field's content or entity type, choose
  "Rendered file" and a view mode.

 - Set up YouTube video formatter options for each view mode in the
  'Structure' -> 'File types' -> 'Manage' file display. This is where you can
  choose size, autoplay, appearance, and special JS API integration options.

 - When using the file field while creating or editing content, paste a YouTube
  video URL into the Web tab.
WYSIWYG Editor
- Enable the Media module "Media insert" button on your WYSIWYG profile.

 - Enable "Convert Media tags to markup" filter in the appropriate text formats.

 - Configure any desired settings in Configuration -> Media -> "Media Browser
  Settings"

 - Set up YouTube video formatter options in Structure -> File types ->
   Manage file display.
   **Note:** for any view mode that will be used in a WYSIWYG, enable both the
   YouTube video and preview image formatter. Arrange the Video formatter on top.
   This allows the video to be used when the content is viewed, and the preview
   when the content is being edited.

 - When editing a text area with your WYSIWYG, click the "Media insert" button,
  and paste a YouTube video url into the Web tab of the media browser.

