Table of Contents
Adding item links to your menus
Links are the meat and potatos of a menu. When clicked, they will send the visitor to another node (page, article, etc) within your Drupal site, or even to external site links. Whether you are wanting to add new items to existing menus or have just created a new menu, this article will help you learn how to add menu link items to your Drupal 8 menus.
- Log into your Drupal 8 admin interface.

From the top menu select the Menu option.

A secondary menu will appear just under the first. From here, click on the Structure option.

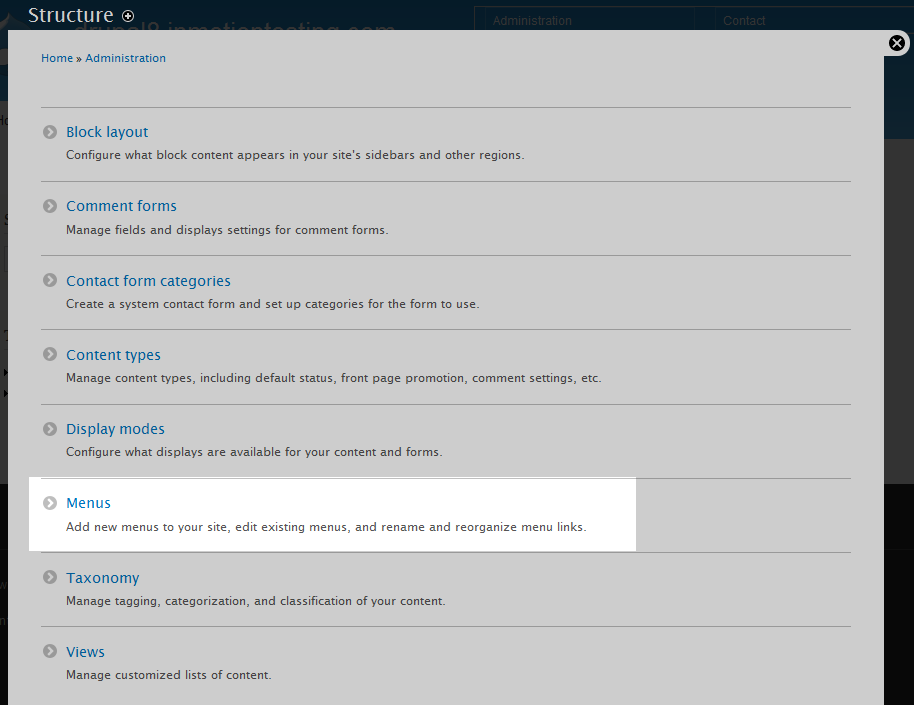
Now you are on the list of Structure types within Drupal 8. Click on the Menus option to continue.

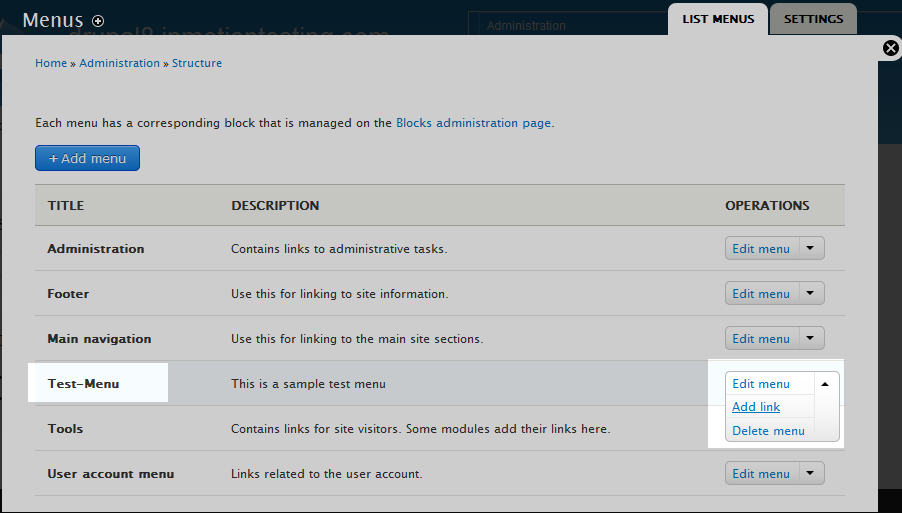
From the list of existing menus, find the one you want to work with and click on the down arrow next to the Edit Menu option. This brings up a list of options. Click on the Add Link option. In this example, we are working with the Test-Menu menu.

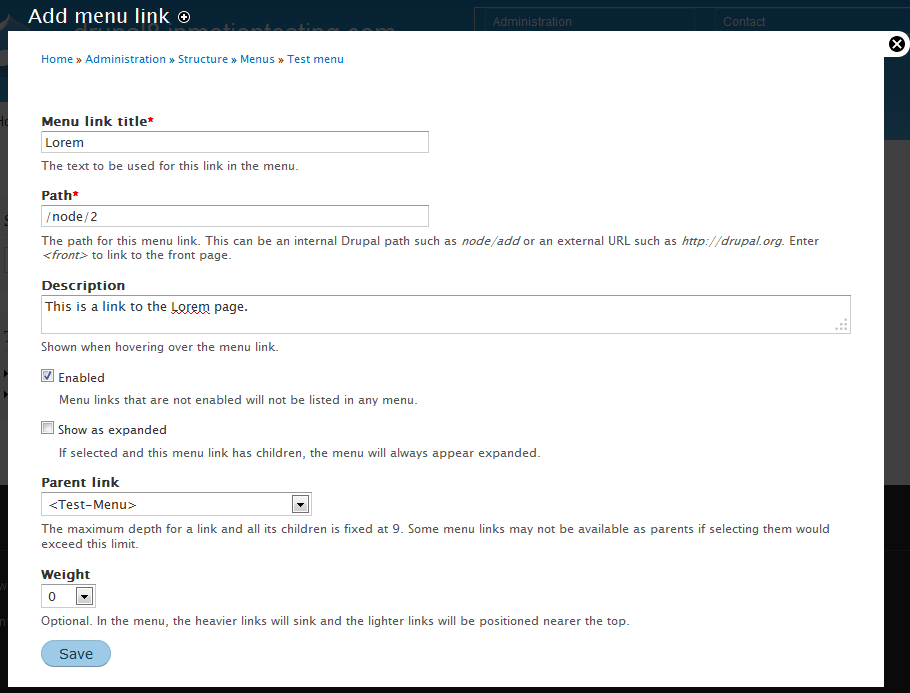
Now you arrive at the Link information page for your new link. Enter the appropriate data in the fields displayed.
Menu Link Title This is the text that will show on the menu. Path This is either an internal path, which you will need to know> This can be either the standard node assigned vy Drupal, such as node/2 or the alias assigned in the URL Path Settings of the content item, if you assigned one. You can also use absolute URLs, especially if you are going to point to an external address, such as https://google.com. Description This text is displayed when you hover over the menu item, like a tool tip. Enabled Is checked, the menu item will display in the menu. If unchecked, it will not display. Show as expanded If checked, any children this menu item has will also appear. If unchecked or if the item has no children, it will display normally. Parent Link Select the menu or parent link for this link. In this example, it will be a top item in the Test-Menu menu. Weight Helps determine the order of the menu links, lighet numbers (lower) are near the top or left, while heavier numbers (higher) are more towards the bottom or right. - Once you have entered all the data necessary, click on the Save button to save all the settings for your new link.

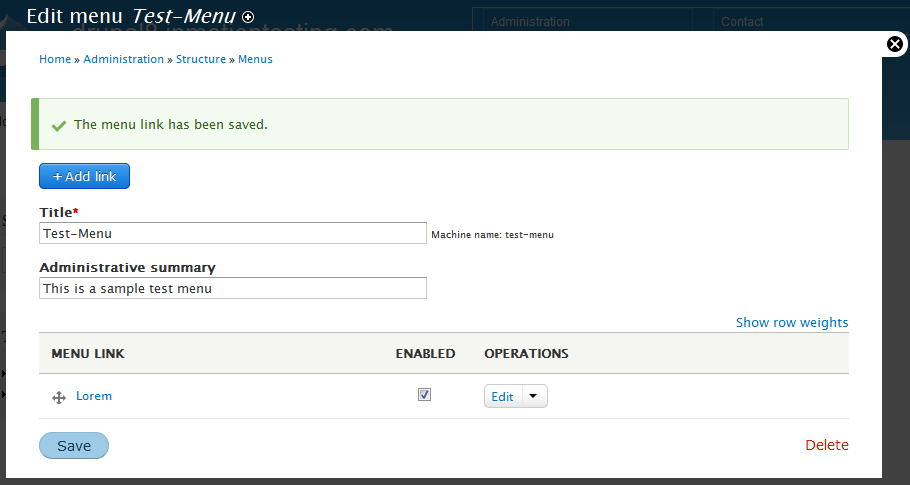
You are now taken back to the main page for the menu. You will see your newly added link in the Menu Link list. Click the Save button to confirm any changes you have made to the menu.


