Table of Contents
One of the more confusing settings in Drupal 7 is the Minimum Cache Lifetime. This setting manages caching with a minimum timeframe, meaning that the cache will not clear any pages that have not yet met that minimum lifetime requirement. It is a setting that forces the cache to live for a specific time before being able to be flushed. For example, all cache gets emptied when content is added or updated. Any pages that were under the minimum cache lifetime will not be cleared. Enabling the minimum cache lifetime setting in Drupal 7 is very easily done by performing the following steps.
How to enable and set the minimum cache lifespan in Drupal 7:
- Log into your Drupal 7 admin dashboard.
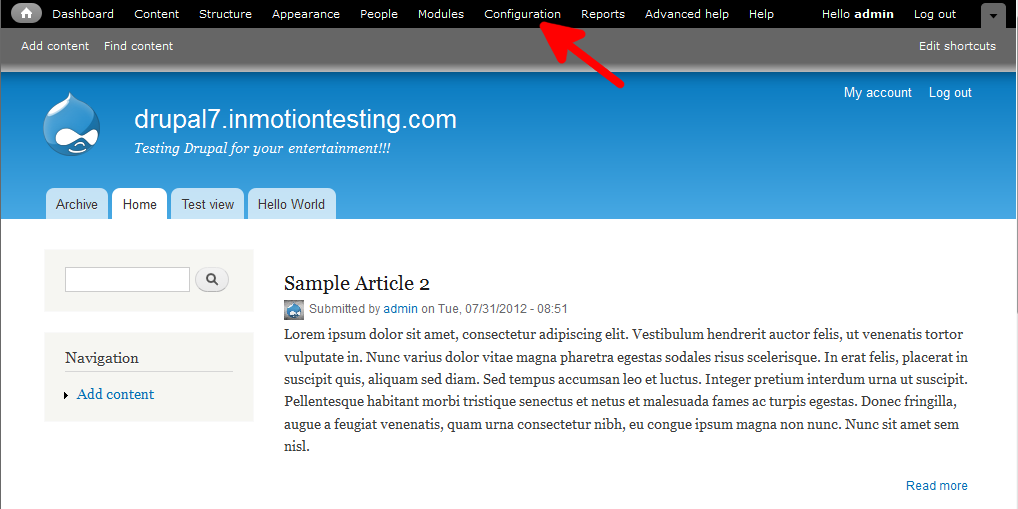
- On the top menu bar, locate the Configuration option and click on it.

- This brings you to the main Configuration category screen. Find the subcategory named Development and click on the Performance link.
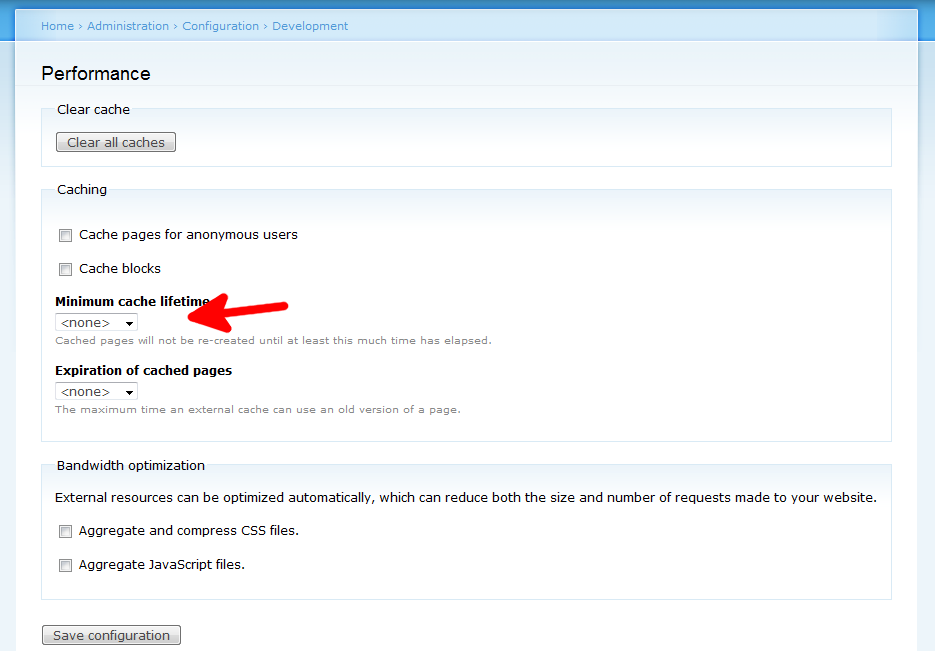
- Once on the Performance screen, locate the Caching section and select your desired lifetime setting from the dropdown. This ranges from 1 minute to 1 day.

- Once finished, go down to the bottom of the screen and click the Save Configuration button.
You have now enabled and configured the minimum cache lifetime setting in Drupal 7.
