Table of Contents
Many people want to leverage the power of social media to let people know about their site. Adding the code for the facebook like on every page can be tedious, not to mention the configuration of the size, position, etc. This article demonstrates how to install and configure the module in your Drupal site.
How to Install and Configure the Facebook Like Module
- You will first need to download the Facebook Like module to your local computer.
- Log into your Drupal admin dashboard.
- From the top menu bar, locate the Modules option and click it.
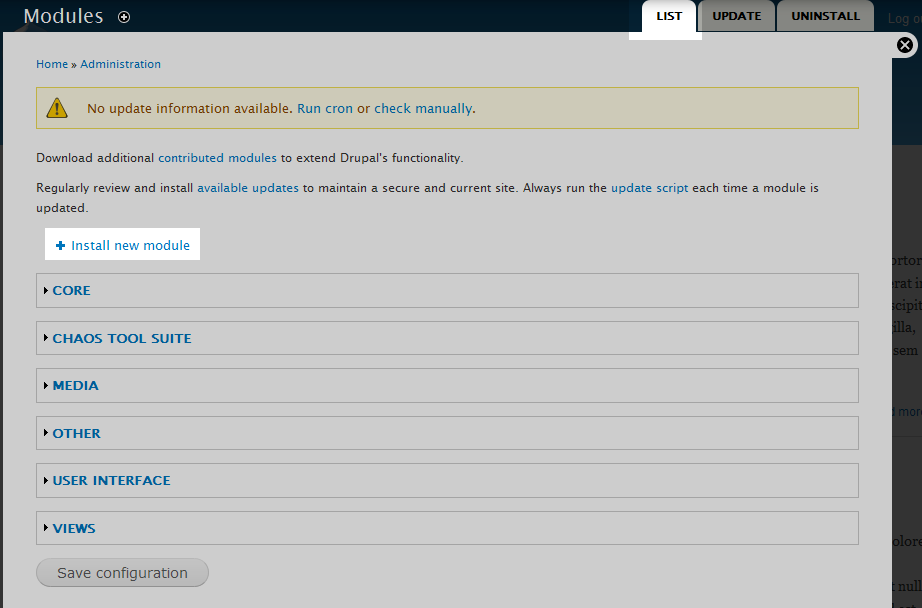
- You are now on the Modules List screen. Be sure you are on the List tab, found in the upper right corner of the page. Click on the Install New Module link found at the top of the page.
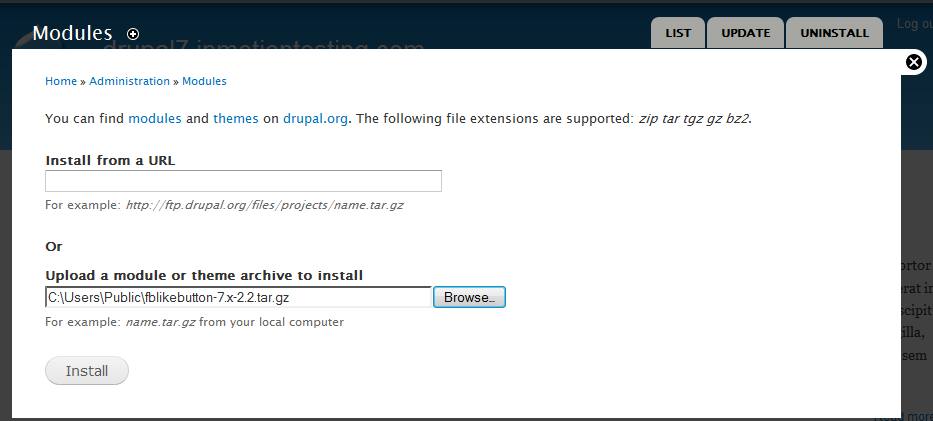
- On the module upload screen, click on the Browse button. From here, navigate to the folder in which the module is stored and click on Open.
- You should now see the path to the module in the Upload a module or theme archive to install. Click the Install button to complete the module installation.

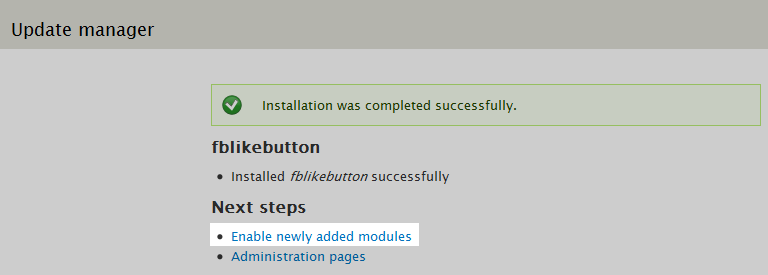
- Once the module installs, you will be sent to a page that displays a successful install message. From there, click on the link entitled Enable Newly Added Modules.

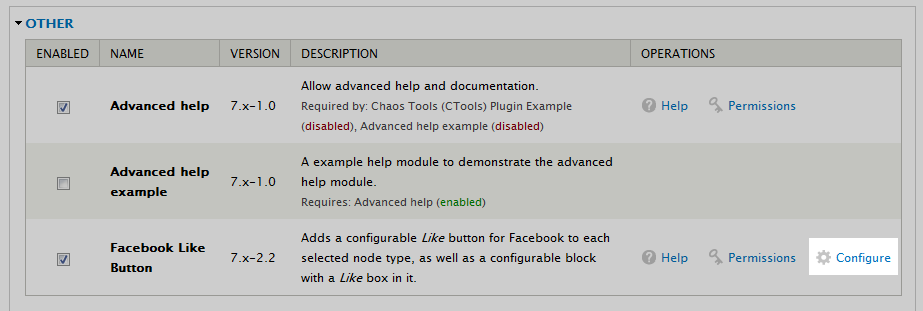
- You are taken back to the Modules list screen. From here, locate the Facebook Like module in the Other category. Select the checkbox to the left of the module name and click on the Save Configuration button at the bottom of the page. Once it is enabled, scroll down to the module again and click on the Configure link that now displays on the right side of the module name.

- From here you will have two choices: Dynamic and Static configuration. Select which version you want to configure. The Dynamic setting means the like button will be used to like whatever page is showing. The Static configuration allows you to set a single URL for the like to reference, no matter what page the like button is on. Each configuration has its own settings to configure. Once you have adjusted your settings, click the Save Configuration button at the bottom of the page.
Dynamic Settings
Display the Like button on these content types Select which content types you want to display the button. Where do you want to show the Like button (full node view) Select where you want to display the button in regards to content layout. Where do you want to show the Like button on teasers Where the button will display on the teasers, or even no display at all. Width of the iframe (px) Set the width of the button area. Height of the iframe (px) Set the height of the button area. Extra css styling needed Any additional CSS styling you would like goes here. Layout style Select from the different layouts. Show faces in the box Select whether or not to display profile pics under thebutton. Verb to display Select whether you wand the verbs ‘Like’ or ‘Recommend’ to display. Font Select the font type. Color scheme Select from either ‘Light’ or ‘Dark’ color scheme. Weight Select the level of importance (weight) that will determine the buttons position in the node. Language Select which language you want the button to be in. Static Settings
URL The URL for which the button will be referencing. This will stay the same across all the nodes (pages, articles, etc) on the site. Layout style Select from the different layouts. Show faces in the box Select whether or not to display profile pics under thebutton. Verb to display Select whether you wand the verbs ‘Like’ or ‘Recommend’ to display. Font Select the font type. Color scheme Select from either ‘Light’ or ‘Dark’ color scheme. Width of the iframe (px) Set the width of the button area. Height of the iframe (px) Set the height of the button area. Extra css styling needed Any additional CSS styling you would like goes here. Language Select which language you want the button to be in. - Lastly, we need to enable the permissions of who can view the button. You will need to return to the Modules list screen, locate the Facebook Like module, and click on the Permissions link.

- You are now on the main Permissions list. Find the Facebook Like Button area and select your options under the Access FB Like button setting. In this example, we enabled all of them so visitors, members, and admin can all view the button.

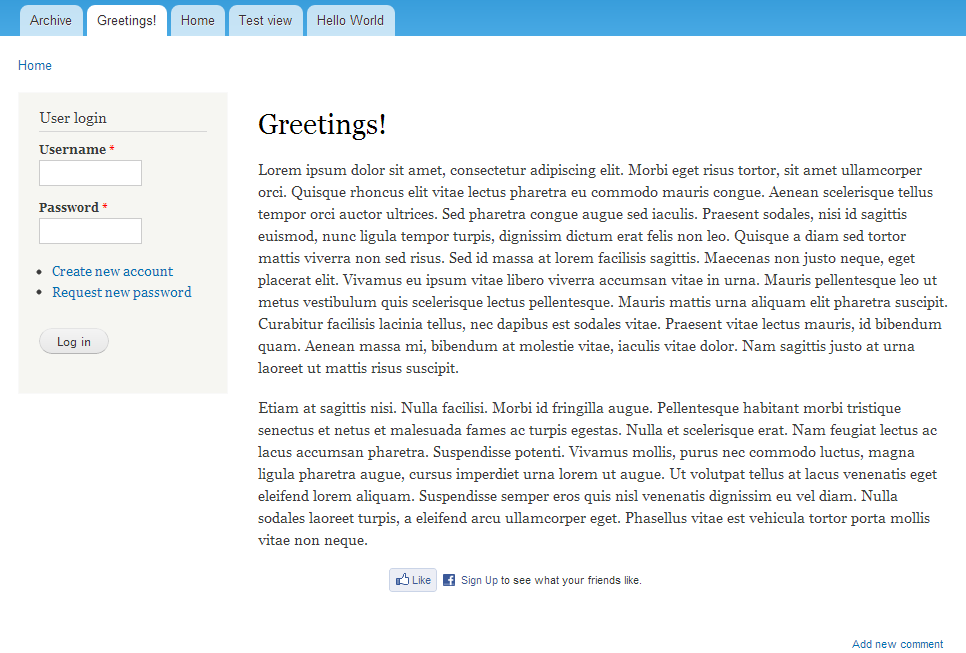
Your selected nodes (articles, pages, etc) should now display the button according to the permissions you set. Below is a screenshot displaying the Facebook Like button in action.

