When working with images, you may want to restrict them in ways that will help keep your site optimized. While you may limit them in physical size, you may also want to restrict them as far as maximum file size. This will force the node creators to optimize images if they exceed the limit even if they fit within any size restrictions you may have set.
How to set maximum file upload size in Drupal
- Log into your Drupal admin interface.

Using the top menu bar, Menu Tab.

Now a second menu bar will appear. Click on the Structure tab to continue.

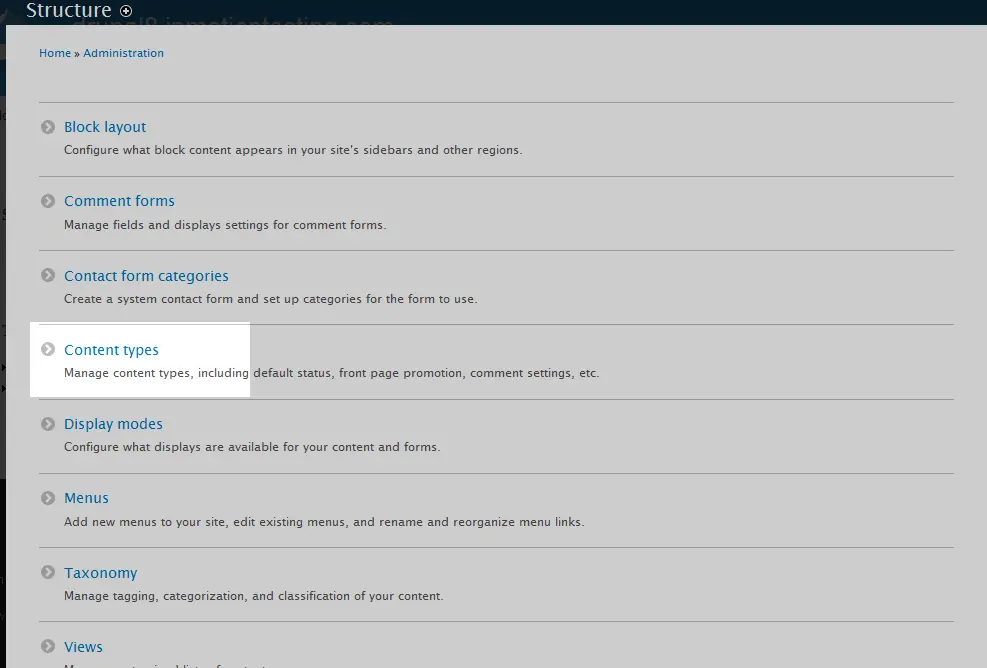
From here, click on the Content Types option from the Structure page.

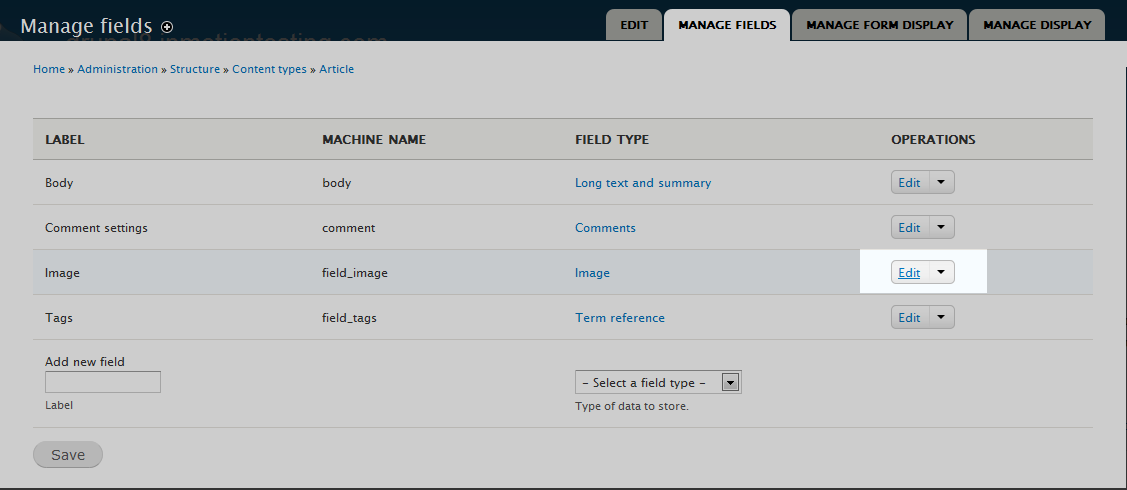
Now that you are on the Content Types page, find the content type you want to set the image settings for. In our example, we will work with the Article type. Look tot he dropdown on the right side of the Article row and Click on Manage Fields.

You are now taken to the Manage Fields page. From here you see a list of the current fields for Article content types. Click on the Edit option from the dropdown to the right side of the Image field row.

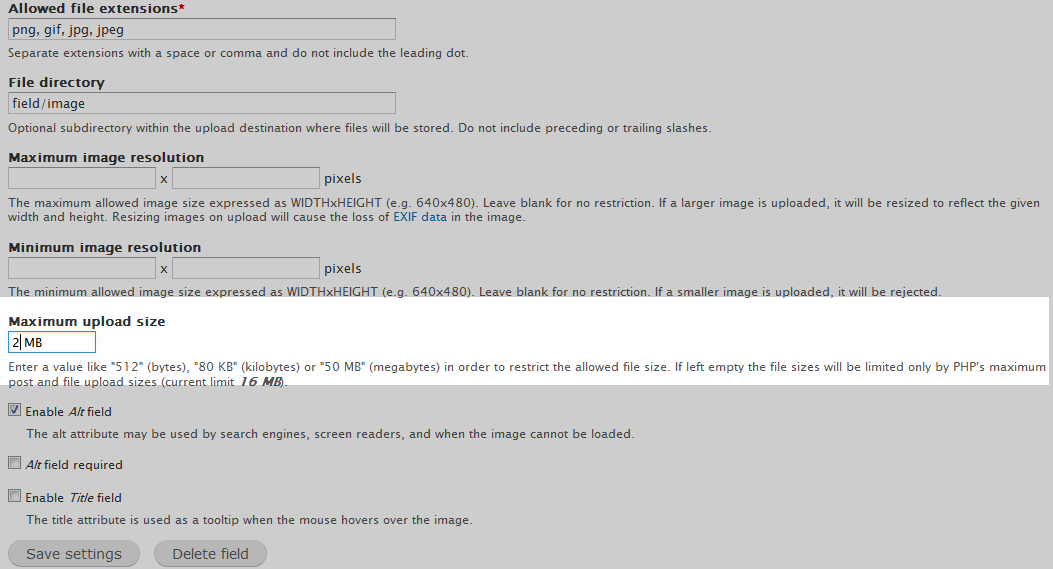
The Image Settings page appears, where you will need to find the Maximum Upload Size field. Here you can enter the maximum size you want any uploaded files to be. You may set the size by kb, or MB. For our example, we are setting them at 2MB.
Note: The maximum size entered here must first pass the settings in your php.ini file. This size setting is noted under the field itself. If you set a size here that is larger than the php.ini file setting, the file will be restricted by the php.ini setting. You may need to change your upload_max_filesize setting in your php.ini as well.- Once you have entered your size restrictions for either one or both fields, click on the Save Settings button. Your new filesize settings will now be active.


