Table of Contents

In this article, we’ll show you how to upgrade Apache on your web server using the EasyApache script in WHM (Web Host Manager) and command-line interface (CLI). This process would require having root access on your VPS or dedicated server, and it’s important to note this is a more advanced task that most users would never need to do.
When you use different versions of Apache you will have different modules to choose from. Also, when you upgrade the Apache web server you provide better overall security to your server as fixes will be applied as well.
If you happen to have read our article on how to pass PCI compliance scans, running an older version of Apache is a common way to fail one of those scans. So knowing how to upgrade Apache is good information to know if you’d like to be able to pass those PCI scans on your own.
Please note these instructions are for a very basic upgrade, and we won’t be touching on the more advanced options in this particular article. So you’ll see a lot of options available in the screenshots that we aren’t going to explain in-depth here.
Upgrade Apache via WHM
- Log into WHM.
- In the Find box at the top-left, type in Easy, then click on EasyApache.
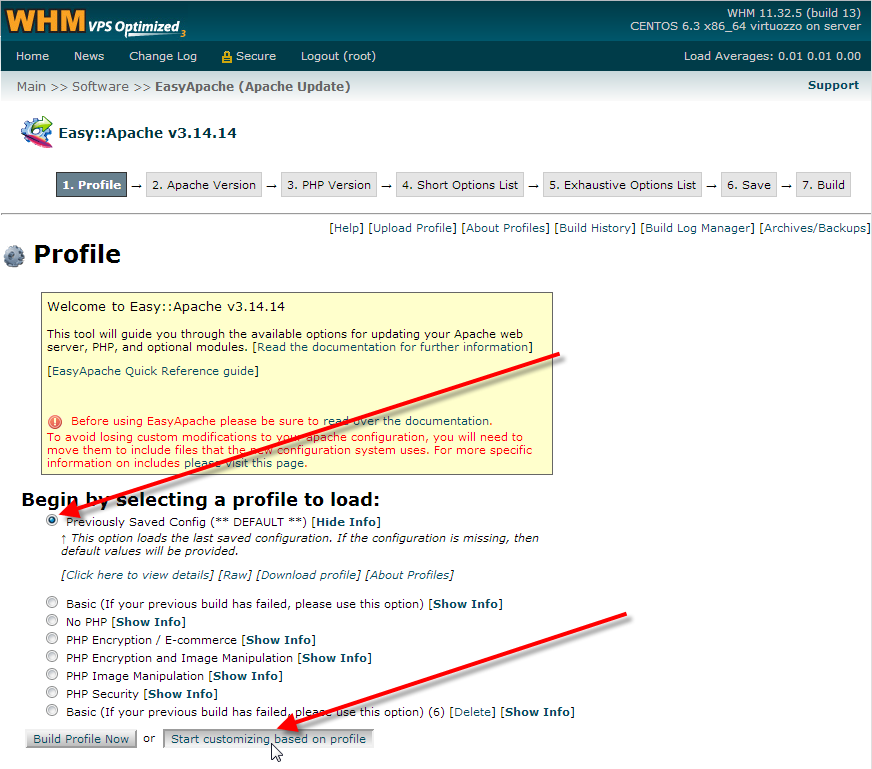
- Leave the Previously Saved Config (** DEFAULT **) option selected, and click on Start customizing based on profile.

- Select the Apache 2.2.23 option, then click Next Step.

- We are keeping the same PHP version since we’re just updating Apache, so on the PHP Version page simply click on Next Step again.
- Again we aren’t making any custom changes at this point, so on the Short Options List page, simply scroll to the bottom of the page and click on Save and Build.
- A Confirm Action window will pop-up asking if you’d like to Recompile Apache and PHP now? go ahead and click Yes.

- Next a Please ackowledge window will pop-up letting you know if the Apache build process is interrupted (you close your web-browser for instance), this could result in data loss. An Apache rebuild in some cases can take upwards of 45 minutes, so it’s important to make sure that you’ll have access to WHM for the entire duration. Once you understand these implications then click on I Understand.
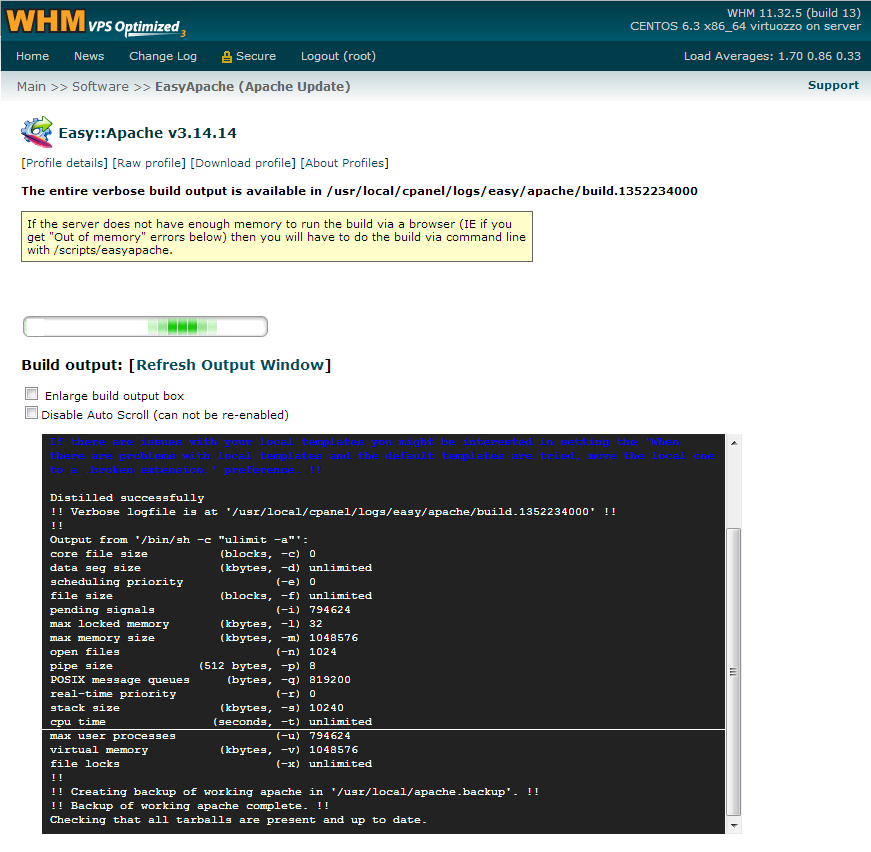
- You should briefly see a build page that lists any errors if they were encountered, then after about 5 seconds it should automatically start the rebuild process and show you the status screen of this happening. The Apache rebuild can take upwards of 45 minutes so please be patient and be sure not to close your web-browser during the process.

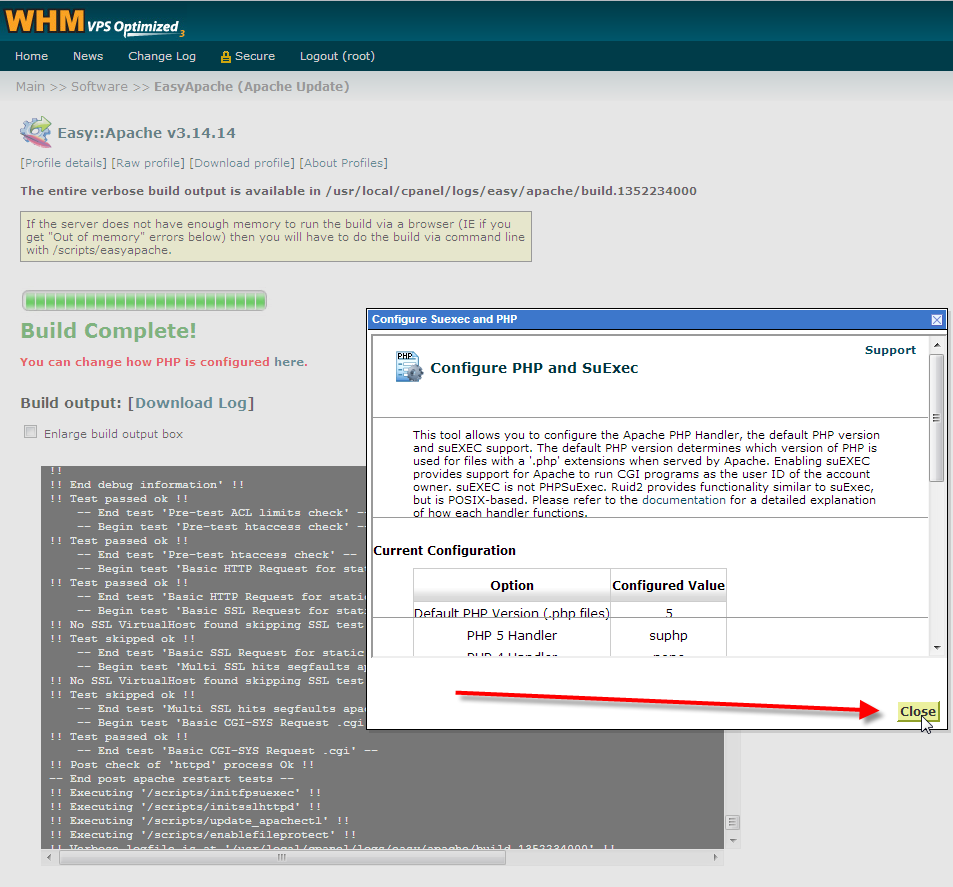
- After the Apache rebuild is fully complete a Configure Suexec and PHP pop-up will display, since we’re just upgrading Apache in this article you can just click on Close.

Upgrade Apache via Command Line Interface
- Log into your servers command line interface as the root user.
- Run the following to start up EasyApache.
- A window will come up regarding previous build issues or cPanel upgrades. Just hit tab and select no for both.
- At this point it will provide profiles to load. You can go ahead and select (spacebar) the Apache version you desire such as Apache 2.2 or 2.4.

- If you need custom PHP versions, Apache modules installed, or removed then you can hit tab and select Customize Profile. If not, select Build Profile.

- You will need to confirm what you are doing by selecting Yes to rebuild Apache.
- Another prompt will show up asking you to acknowledge that you understand the changes being made to the server. You will need to select I Understand before the program will continue.
- To verify that your Apache is running on the correct version run the following code.
You should then see a result similar to the following.
Your server should now be running the updated version of Apache, and you should now understand how to upgrade Apache using EasyApache in WHM.
Get the best value on fast and customizable dedicated server hosting solutions. Choose from Managed Dedicated Servers with your choice of cPanel or Control Web Panel, or select a Bare Metal Server for complete server control via the command line.
DDoS Protection
Free Backup Storage
cPanel or Control Web Panel
Managed Server
Unmetered Bandwidth


You should probably consider updating this thread. It doesn’t work for Easy Apache 4. I type “scripts/easyapache” and I get “EA3 is no longer available”
This means you have already upgraded to EA4. Now, you should access/upgrade Apache using Easy Apache in the Web Host Manager (WHM). I have added a flagged note to the article to clarify this.
Thank you for letting us know,
John-Paul