Table of Contents

HubSpot can create emails used for marketing purposes. These marketing emails allow you to reach out to your customers to provide an immediate or planned response. HubSpot helps you create and send these emails with templates and a design interface.
Three Types of Marketing Emails
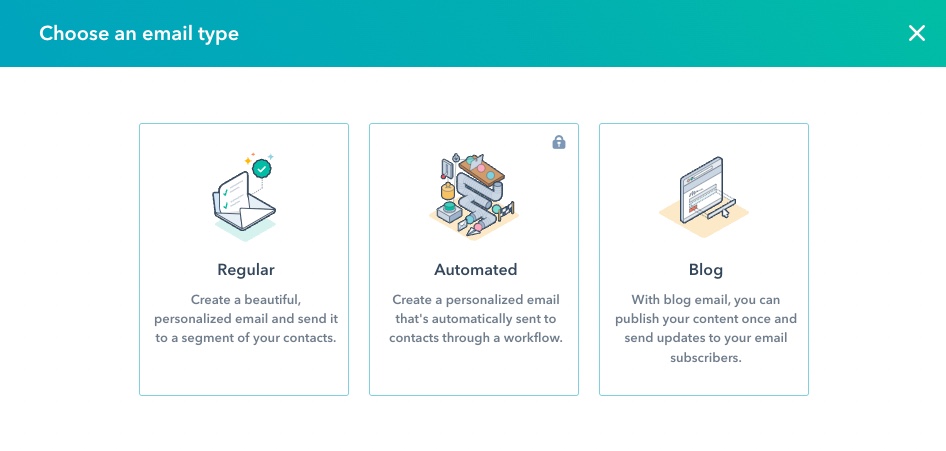
HubSpot can create regular, automated, or blog emails. Regular emails allow you to send personalized messages to a segment of your contacts. Automated emails are sent via a workflow in response to a viewer interaction. This option requires an upgraded HubSpot account. Blog emails are used to update subscribers about new content.
How to Create a Regular Email
Follow the steps below to create a new regular or personalized email. You must be logged into the WordPress Administrator Dashboard to follow these directions.
The email you are creating autosaves during the creation process. After step 5, you can also click on SAVE in the top left corner if you wish to complete it later.
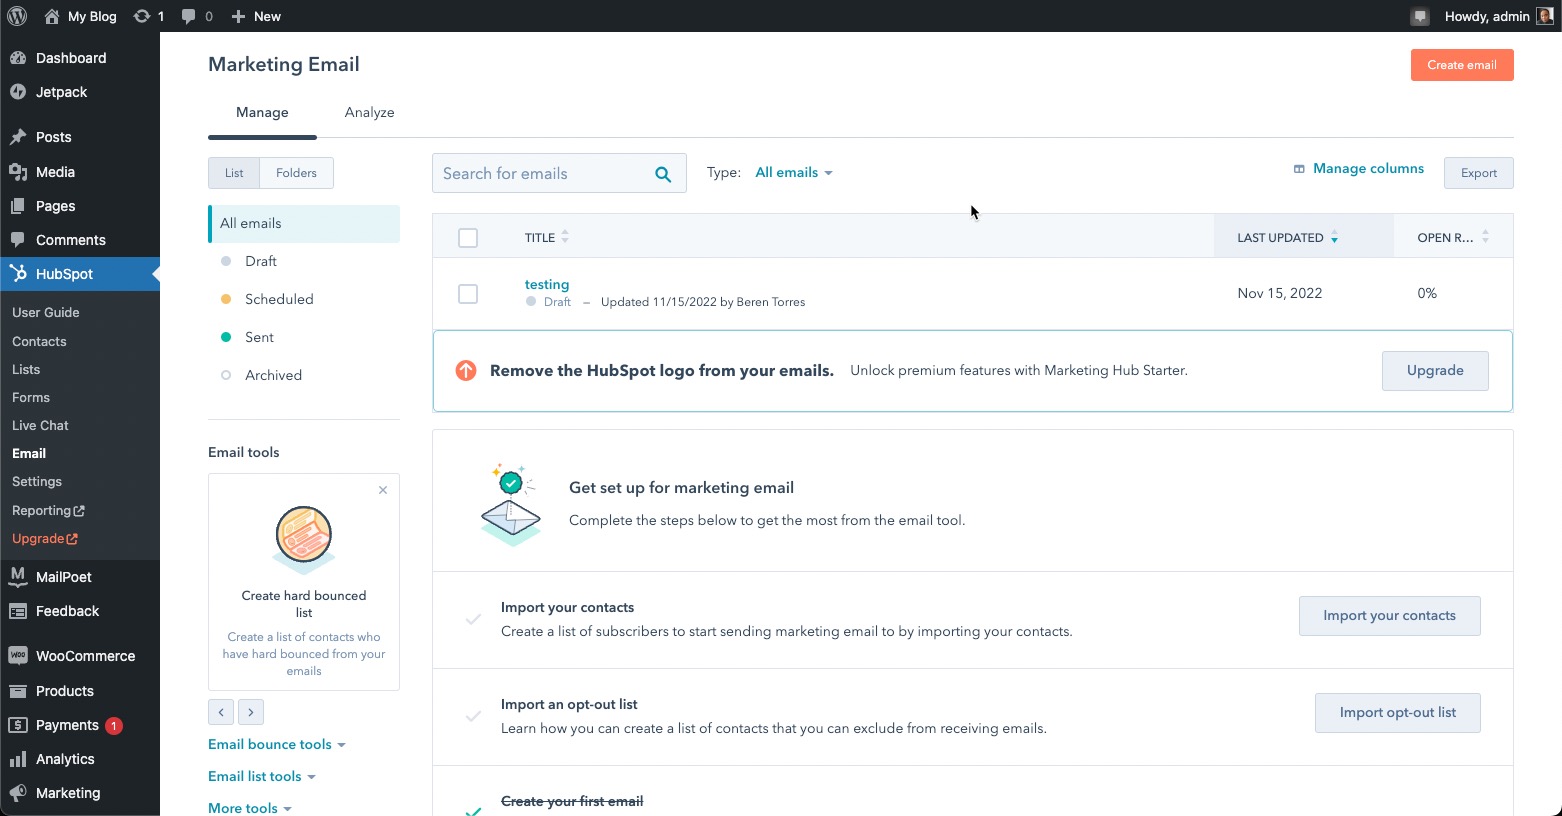
- Click on HubSpot in the main menu.
- Click on Email. This will open the Marketing Email page.
- Click on Create email in the top right corner.

- You will see three email types that you can choose to create: Regular, Automated, or Blog. Click on Regular.

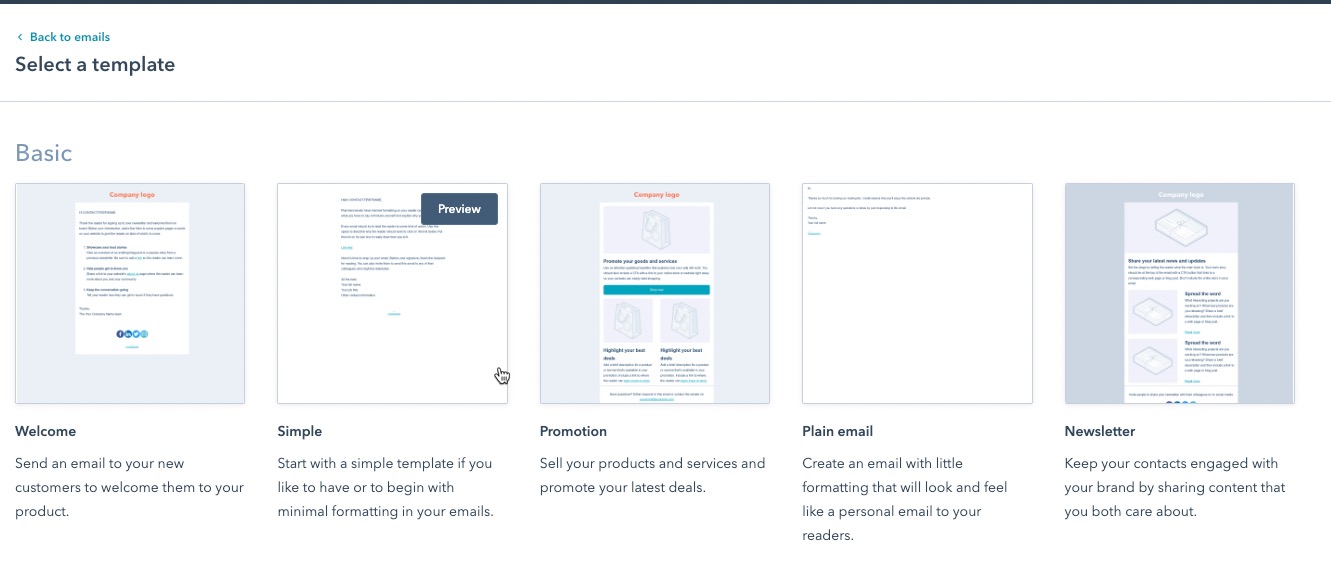
- Select a Basic template for your email: Welcome, Simple, Promotion, Plain email, and Newsletter.

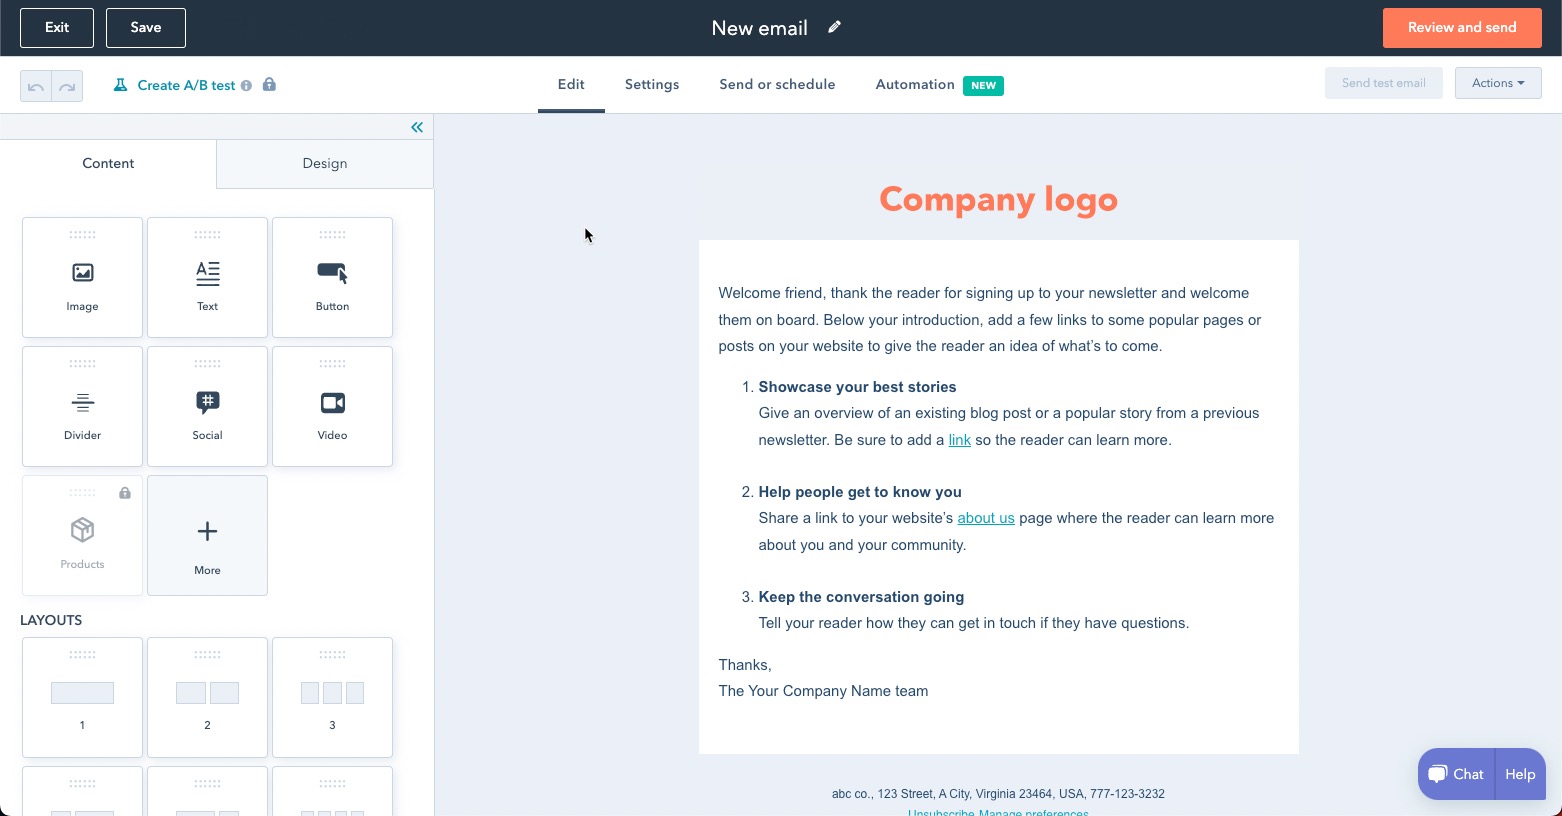
- There are four stages to creating your email. These stages are Edit, Settings, Send or schedule, and Automation. You start on the Edit page, where you can change the content of the email as well as the design and layout. Customize the email for your needs.

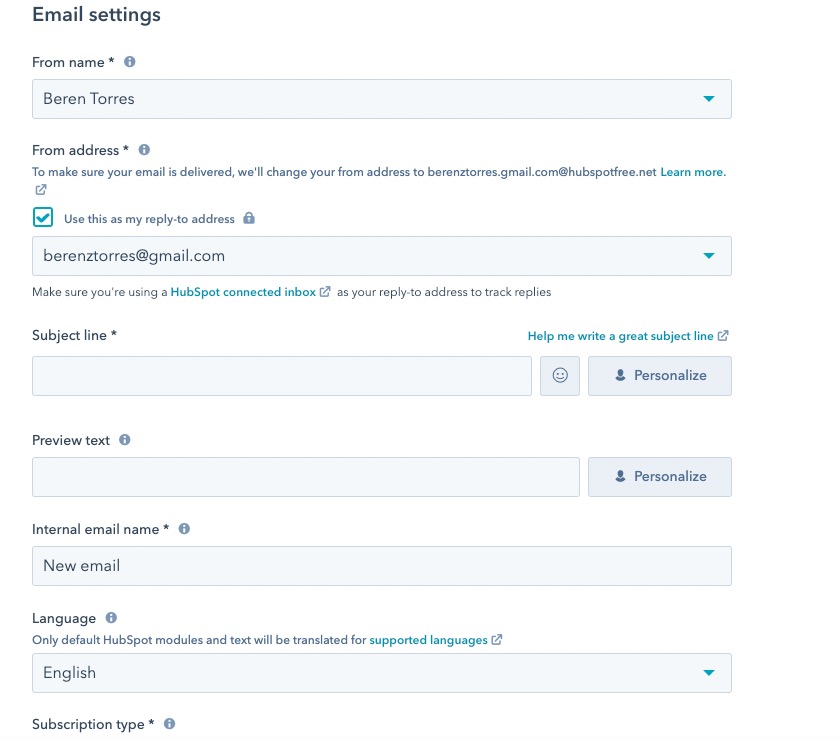
- Next, click on Email Settings. These settings are information about the email, including the reply-to address, the subject line, the internal name of the email, and the physical address of your business. The subject line is a required field.

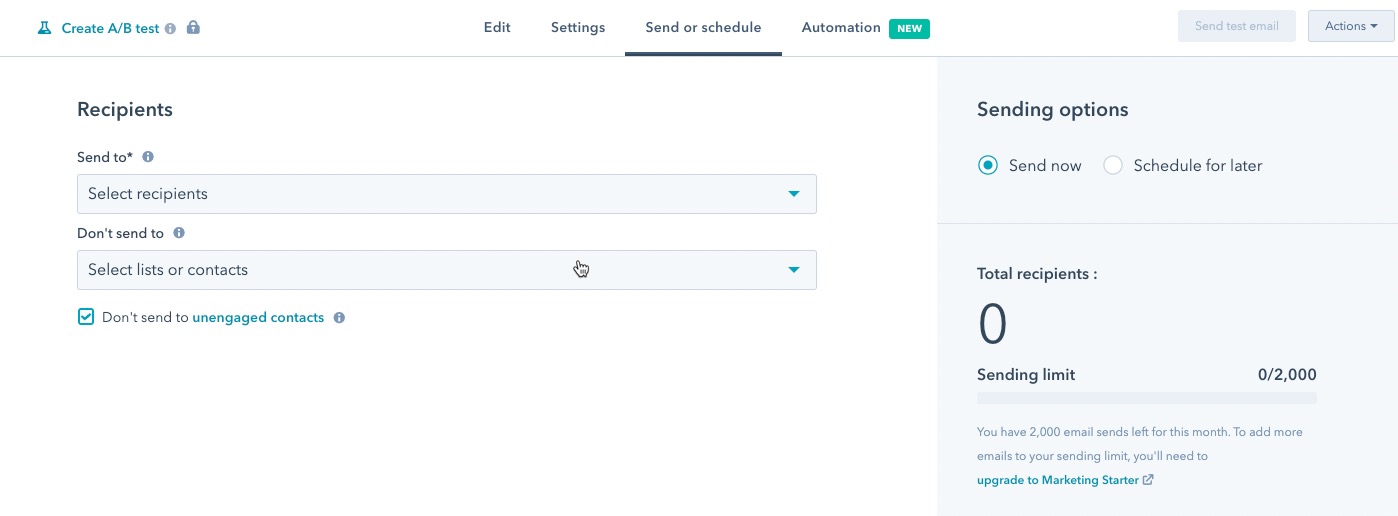
- When you have added the email settings, click on Send or schedule.

- Select your Sending options. You will need to determine the email recipient and if you intend to schedule to send it at a later date and time. Selecting Send now means that you’re sending the email today – it does not immediately send the email.
- Click on Automation. Lets you set up a sequence of actions after a customer responds to your email. This feature is only available with a HubSpot upgrade.
- Click on Review and schedule in the top right corner. This will open a review window showing corrections and suggestions. Click on Schedule at the bottom to send the email. You can also click on Preview to see what the email will look like when it’s sent.
HubSpot makes email marketing a simpler task by providing a wizard to help guide you in the creation process. You can send emails to specific recipients in your contact list and focus on a message that will help benefit your business and your customer.
