Table of Contents
Now that we’ve created a category for our images, we are now ready to upload our first image into Phoca Gallery. Adding images is very easy in Phoca Gallery, and we’ll guide you through the upload process.
Adding an image to Phoca Gallery
- Log into your Joomla 2.5 admin dashboard

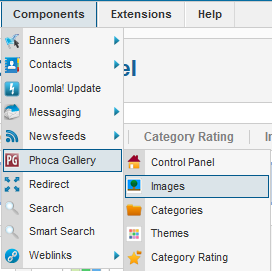
In the top menu, hover over Components » Phoca Gallery, and then click Images

In the top right menu, click New
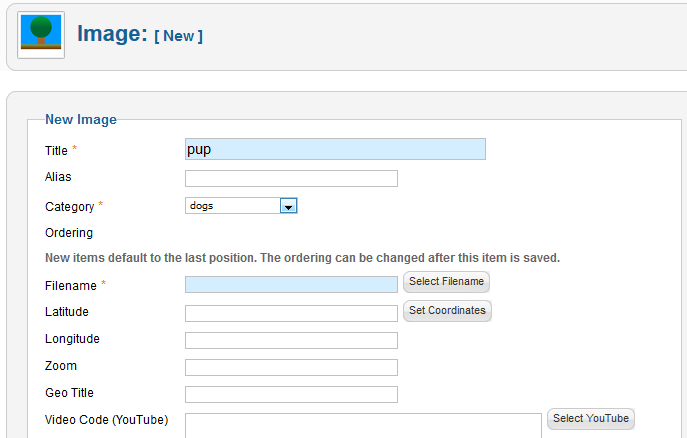
- Enter a name for the image next to Title.

Next to Category, select an image category from the drop down list.

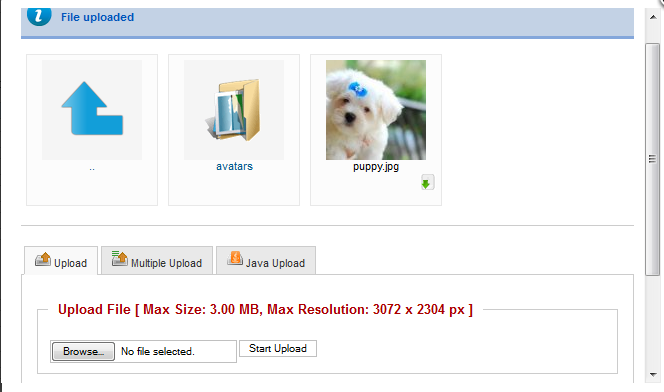
Next to Filename, click the Select Filename button. Click the Browse button and find the image on your computer. Click on the image and then click the Open button. Finally click the Start Upload button. After the image has been uploaded, you will see a thumbnail of the photo, click it.

There are many other settings you can adjust for your image, but as of now we have configured the minimum settings. Click Save & Close in the top right menu.
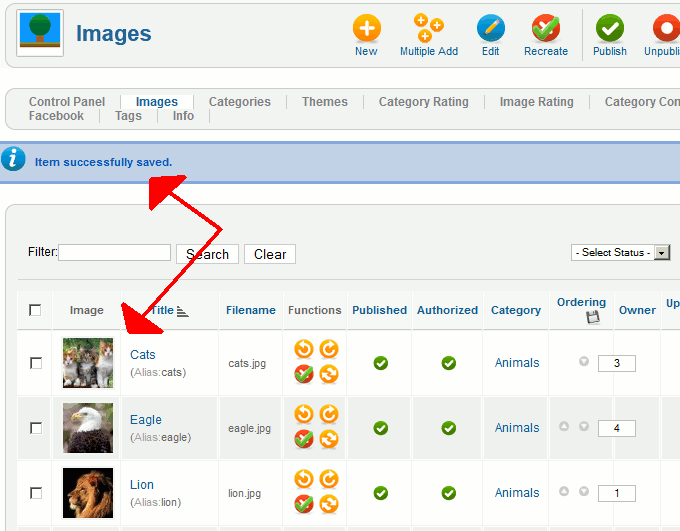
You have successfully uploaded an image in Phoca Gallery! After Clicking Save & Close you will see a listing of all of the images you’ve uploaded thus far.


