Table of Contents
Starting with VirtueMart 2.0.2, you can use Authorize.net as your payment gateway option. This allows you to use their popular service for processing credit card transactions.
You must install VirtueMart, and have an Authorize.net account before attempting to follow this tutorial.
How to Setup Authorize.net in VirtueMart
- Login to the Joomla dashboard.
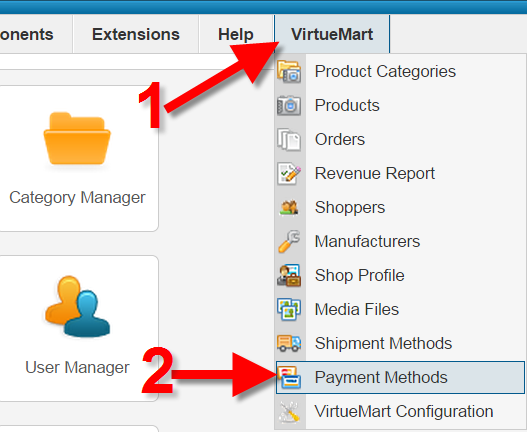
- In the navigation menu, move your mouse over VirtueMart(1) and click Payment Methods(2).
- Click the New button in the top menu.

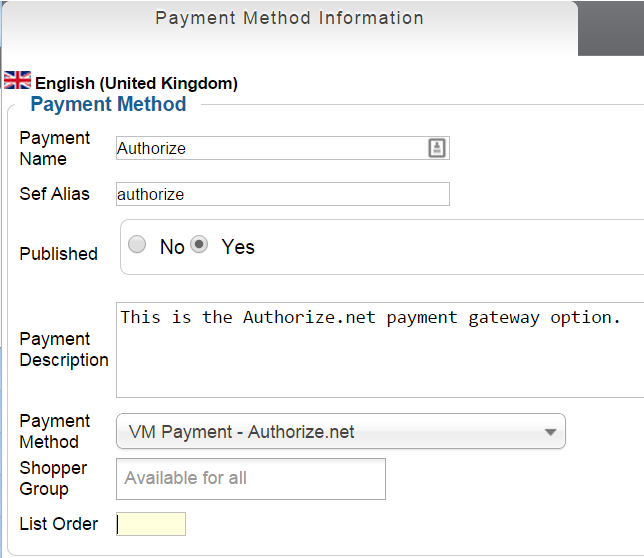
- You will see the Payment Method page, it will look like this:

Fill in the information as needed, below is a description of the fields.
Option Description Payment Name Give this payment option a name such as: Authorize.net Sef Alias You can enter a “Search Engine Friendly” word here, which will be included in the URL. Learn more about SEF URLs in VirtueMart. Published Choose Yes to make this payment option available. Payment Description Provide more details about this payment method. Shoppers will see this on the checkout page. Payment Method You must choose the VM Payment – Authorize.net option. Shopper Group Choose which groups can use this payment option, or leave blank to make it Available for all. List order You can arrange what order the payment options are listed in here. For example, lower numbers will be displayed higher on the list. - Click the Save button when you are done. You will see a Payment Method successfully saved message.
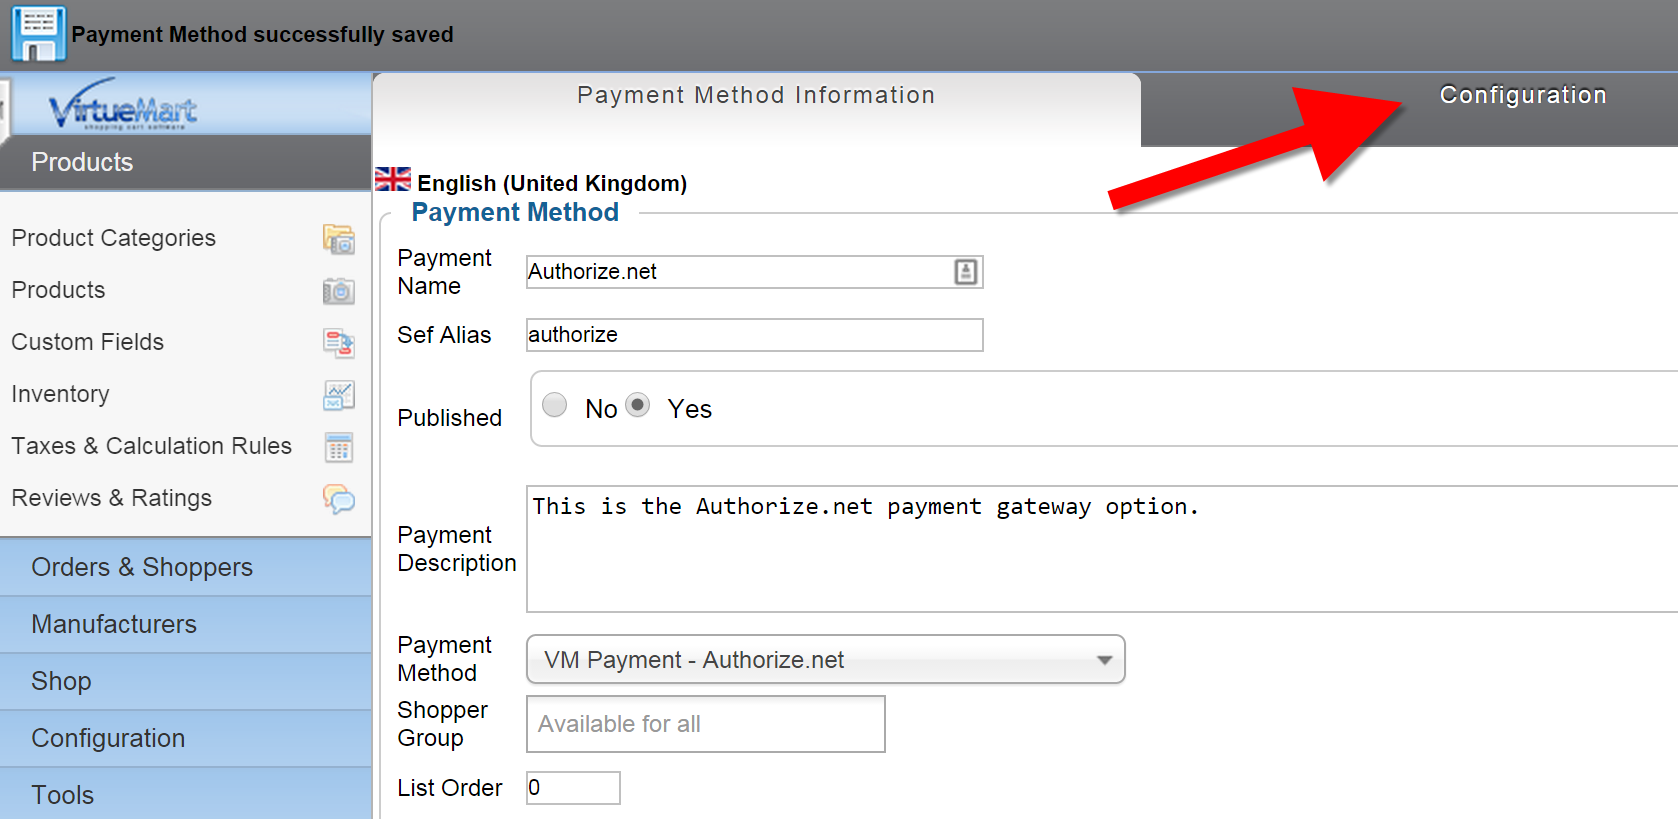
- Click the Configuration tab.

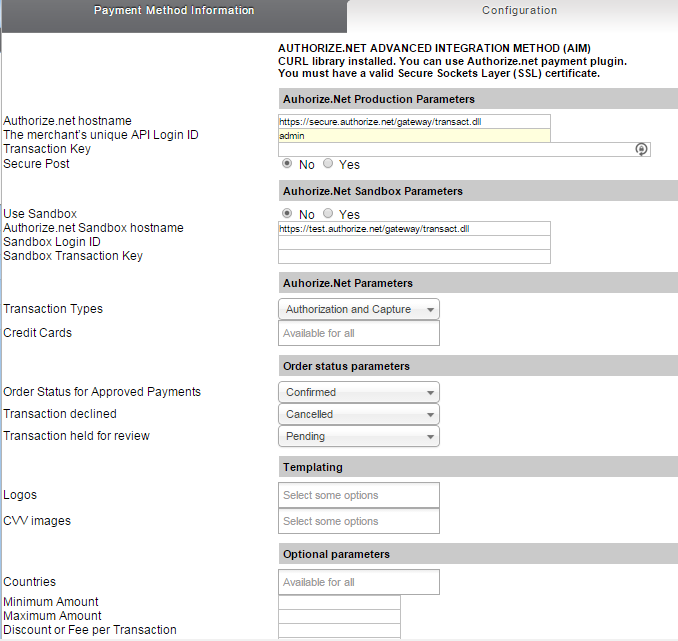
You will then see the Configuration page, it will look like this:
Fill in the fields as needed, below is a description of what to enter provided by VirtueMart.
Option Description Authorize.net hostname Leave the default value if you are not sure. The merchant’s unique API Login ID The merchant API Login ID is provided in the Merchant Interface and must be stored securely. Transaction Key Enter the merchant’s unique Transaction Key Secure Post Important: You must have an SSL installed and configured correctly for this to work. Use Sandbox Choosing Yes will put your Authorize.net payment option in testing mode. Authorize.net Sandbox hostname Enter your Authorize.net Sandbox hostname here to “Put your payment method into TEST MODE.“ Sandbox Login ID Enter your Sandbox Login ID here to “Put your payment method into TEST MODE.“ Sandbox Transaction Key Enter your Sandbox Transaction key to “Put your payment method into TEST MODE.“ Transaction Types Authorization and Capture: is the most common type of credit card transaction. The amount is sent for authorization, and if approved, is automatically submitted for settlement. Authorization Only: the transaction will not be sent for settlement until the credit card transaction type Prior Authorization and Capture is submitted, or the transaction is submitted for capture manually in the Merchant Interface. Credit Cards Start typing in the box for a list of credit cards to appear. Click each credit card name to select it, then repeat for multiple cards. Leave blank to allow Authorize.net to be used by all credit cards. Order Status for Approved Payments Select the order status to which the actual order is set, if the Authorize.Net IPN was successful. If using download selling options: select the status which enables the download (then the customer is instantly notified about the download via e-mail). Transaction declined Choose what you want the status of the transaction to be if it is declined. Transaction held for review Choose what you want the status of the transaction to be if it is held for review. Logos If you have uploaded a small image to display on payment methods, select it here. CVV images OPTIONAL: CVV is Credit Card Verification Value, the 3-digit number usually on the back of your card. Select an image you have uploaded for the CVV Tooltip Help that shows the 3-digit number circled on the back of a credit card. Countries Select which countries the Authorize.net payment option is available for, or leave blank to be or all countries. Minimum Amount Minimum Order Amount to offer this Payment. Maximum Amount Maximum Order Amount to offer this Payment. Discount or Fee per Transaction Discount or Fee to apply for this payment per transaction. Discount or Fee per Total Amount Discount or Fee to apply for this payment per total amount. Tax Tax to apply to the fee. Debug? If set to yes, payment transaction will be logged in the log folder. Log If set to Yes, the Debug information will be recorded in the /logs folder. - Click Save to complete the Authorize.net setup in VirtueMart.
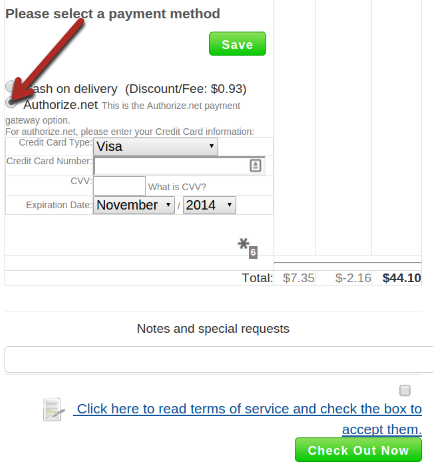
Congratulations, now you know how to add Authorize.net as a payment gateway in VirtueMart! Now when customers checkout through your store, they will have the option of using Authorize.net to process their credit card payment.

Do you guys know how to fix an Authorize.Net Error E00003 – Data at the root level is invalid? I can’t figure out where the file generates to fix this error. Error response after submitting payment for any part.
Joomla 3.9.16 – VM 3.610
Thanks!
Ryan
Hello and sorry for your issue. I recommend you check your error logs and contact our Live Support if you need further assistance.
Hello Team,
How can i store card details on my website thorough authorize.net in virtuemart ?
can you please help me.
Thanks,
Allen Justin
If you want to store credit card information, first, you will have to ensure your server meets Payment Card Industry standards also known as PCI Compliance. You would have to contact Authorize.net about interacting with their servers, and most likely this will require a custom-coded solution.
Thank you,
John-Paul
What folder do I place an image in for CVV tooltip, in Virtuemart 3.2 ?
Thank you
When looking at their documentation , it appears that you simply need to have the image saved somewhere online and then be able to reference it form a URL. If you need further information you will need to contact their support/developer for additional assistance with the Joomla plugin.