Knowing how to add and remove menu items is one of the most common tasks when working with a Joomla 4.0 website. A website menu is a roadmap to a website. Well-designed menus will get your visitors to the content they want to see quickly and easily. At the same time, you will want to be able to replace to remove content identified through the menus on your Joomla site.
This article will take you through the steps of adding and removing a menu item on a Joomla 4.0 website. We also define all of the menu items involved in creating each menu entry.
Searching for a new web host for your upgraded Joomla 4.0 website? Check out InMotion’s Managed VPS hosting solutions for secure and performance-oriented servers that are tailored to your budget needs.
Adding a Menu Item
The steps to add a menu item in Joomla 4.0 are simple. For the purposes of showing how to add a menu item, we will walk you through the steps without discussing each option in depth. The details for the items in adding a new menu item will be detailed in the following section. Follow the instructions below to go through the process of adding a new menu item:
- Log into the Joomla Administrator Dashboard.
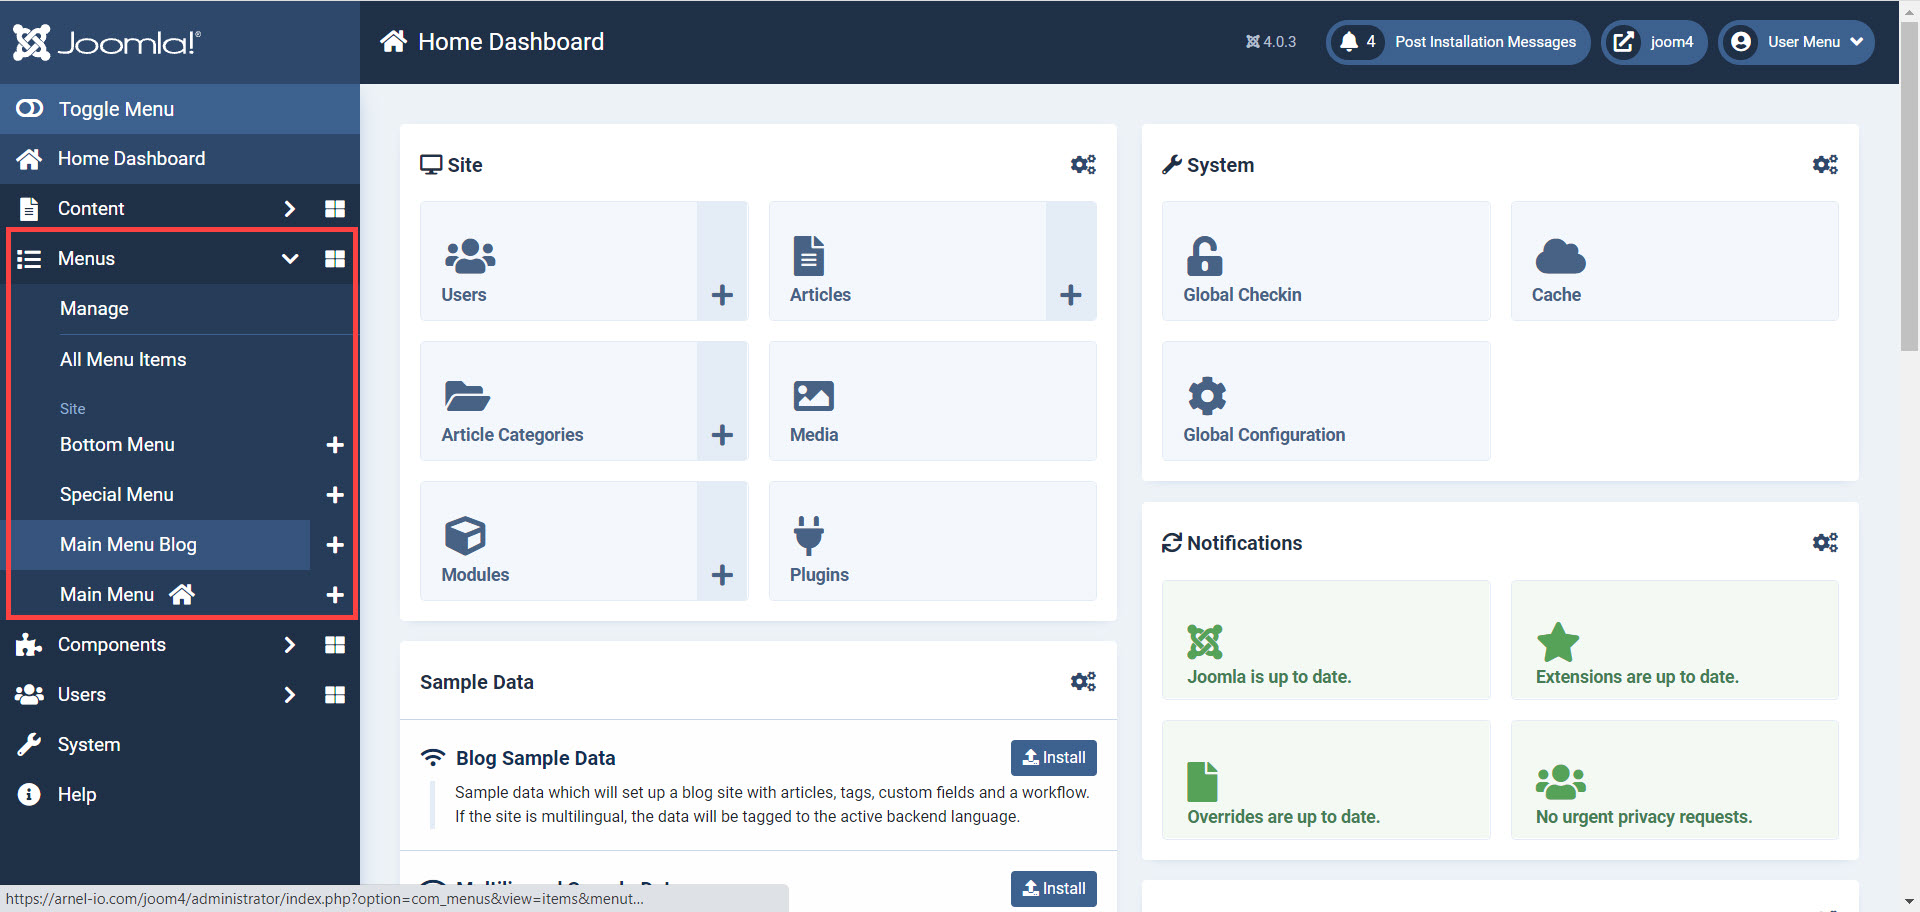
- In the main menu, click on Menus. If you’re unfamiliar with the menu interface, please see Learning About the Menu Interface in Joomla 4.0.
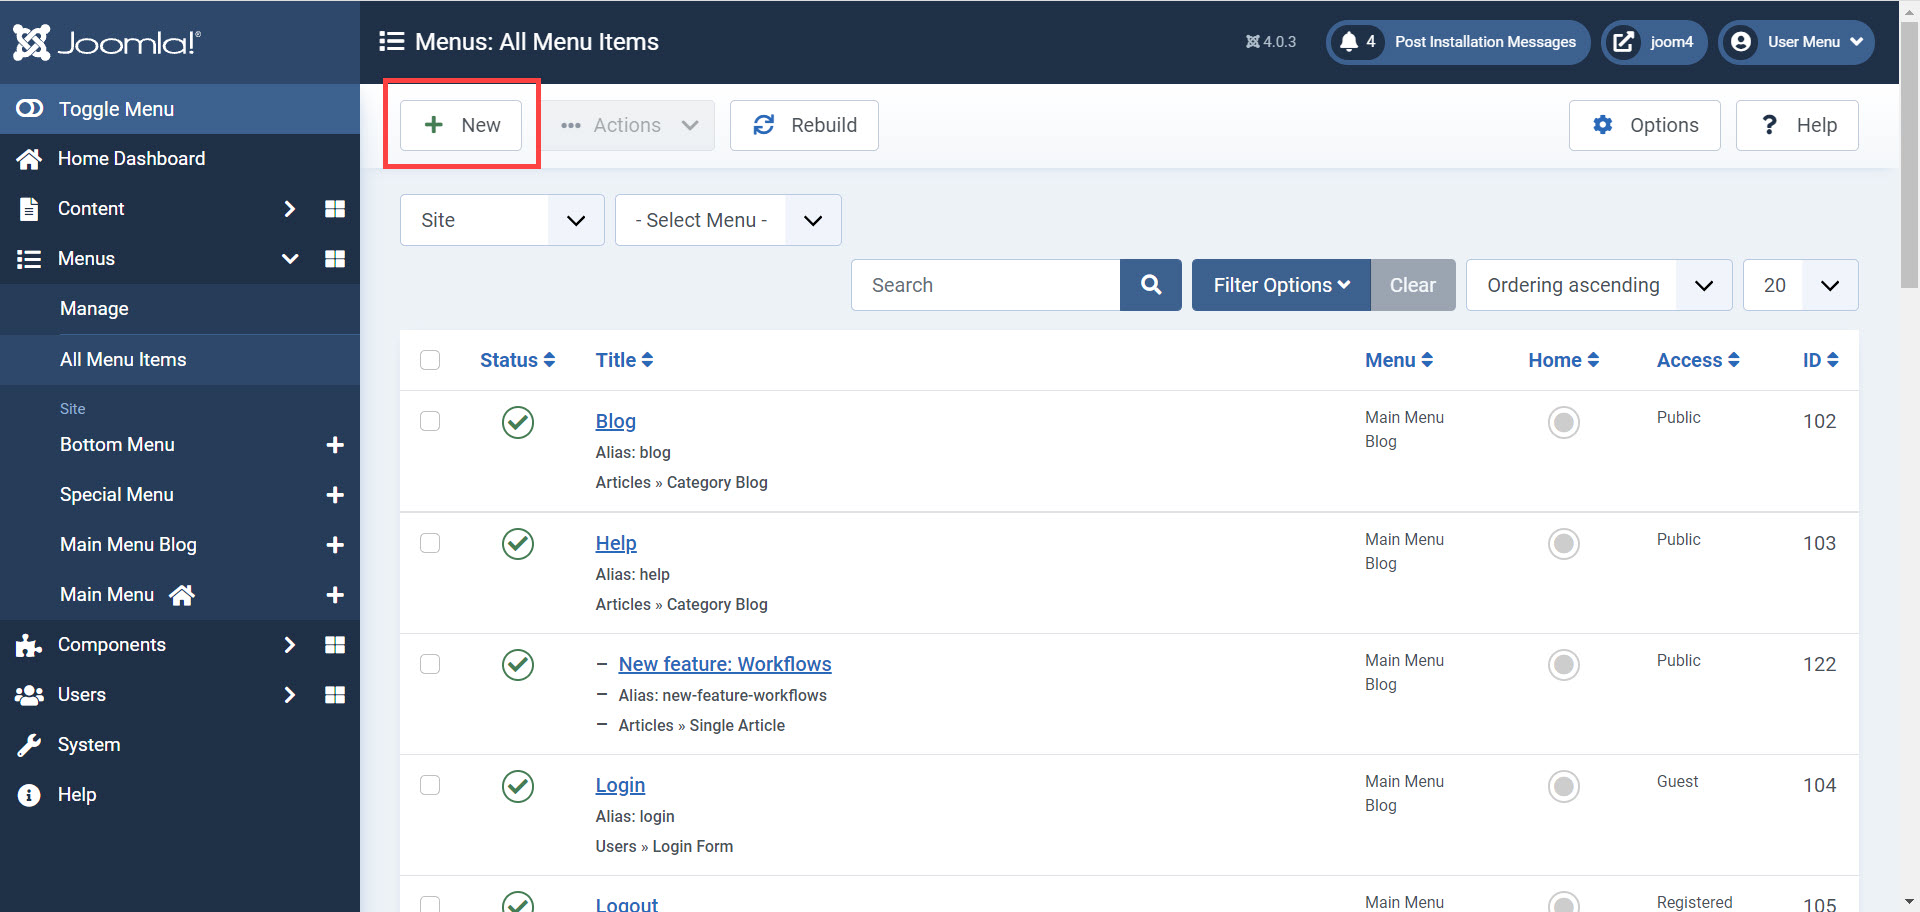
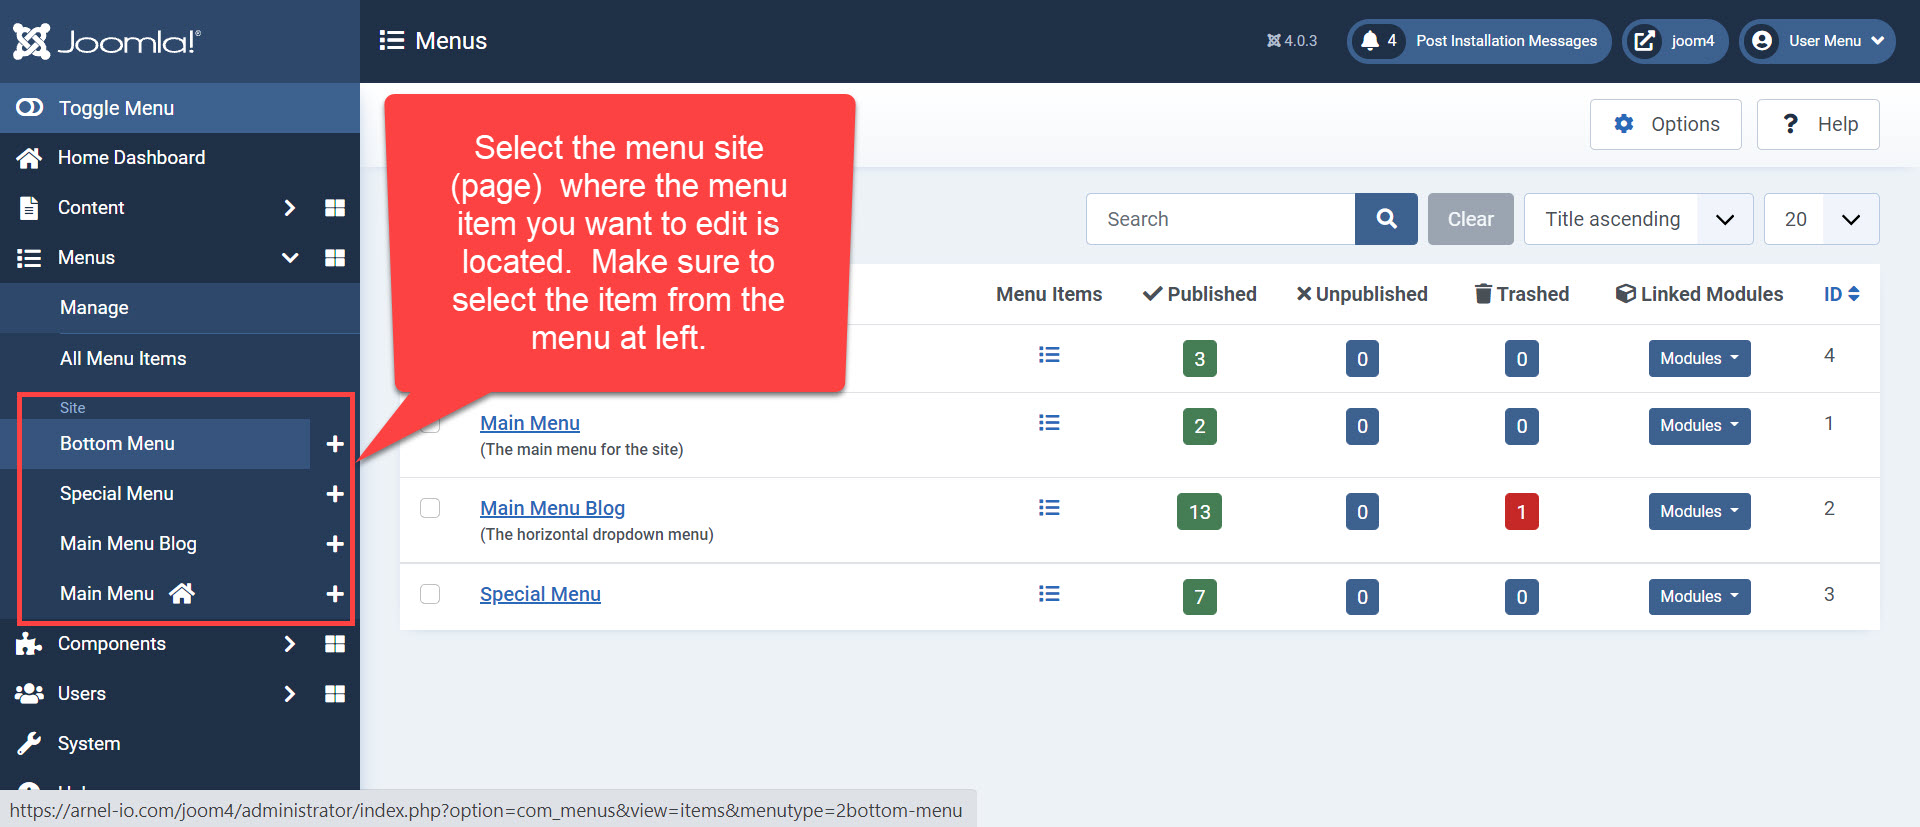
- If you have a menu structure already and you know where you want the new menu item to be, then click on the + sign next to the site item where you want to add the menu item. Otherwise, at the top of the page, click on +New to open the new menu item interface.
- When the new menu item interface appears, make sure to give the item a title. The items that starred (*) are required. Make the title as concise as possible. The alias used in the URL for the title is derived from the title that you add. Keep your titles as concise as possible to keep the URL for your new menu item from being too long.
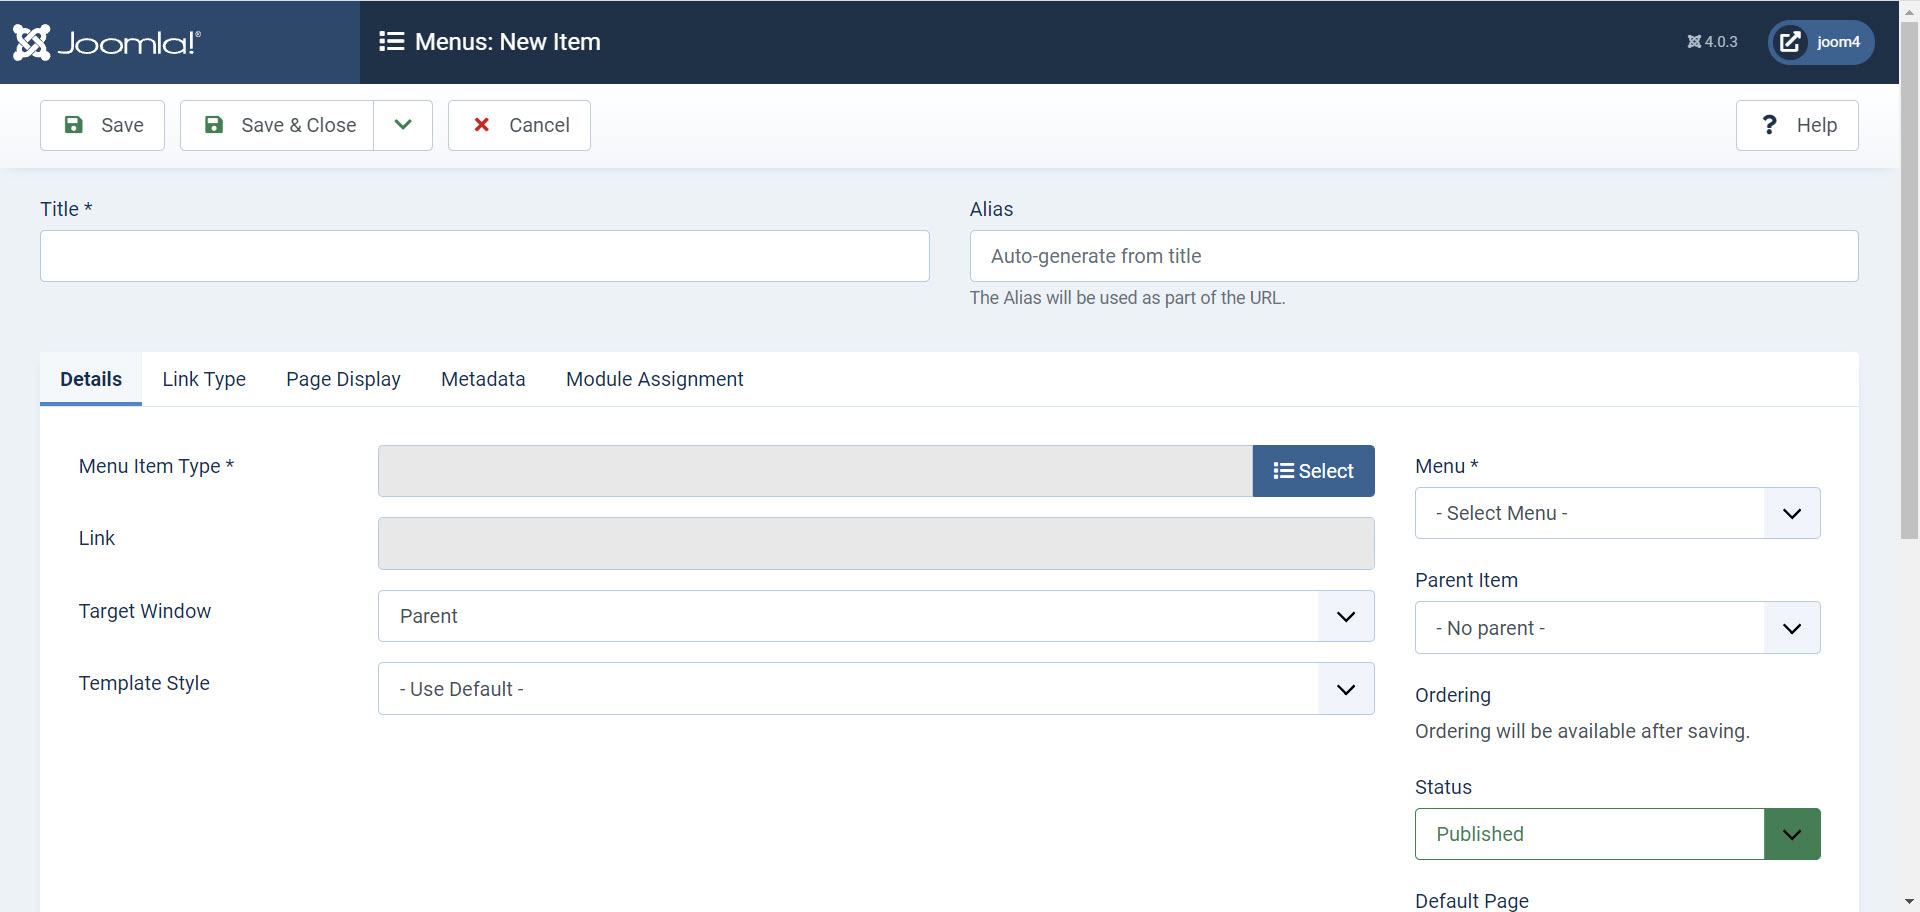
- That next item that you need to fill is the Menu Item Type. Click on the blue Select button to choose the item you wish to use for the menu item. If you have content already prepared for this menu item, then you can select it. However, if you’re planning to write the article that applies, youu can select Articles > Create Article.
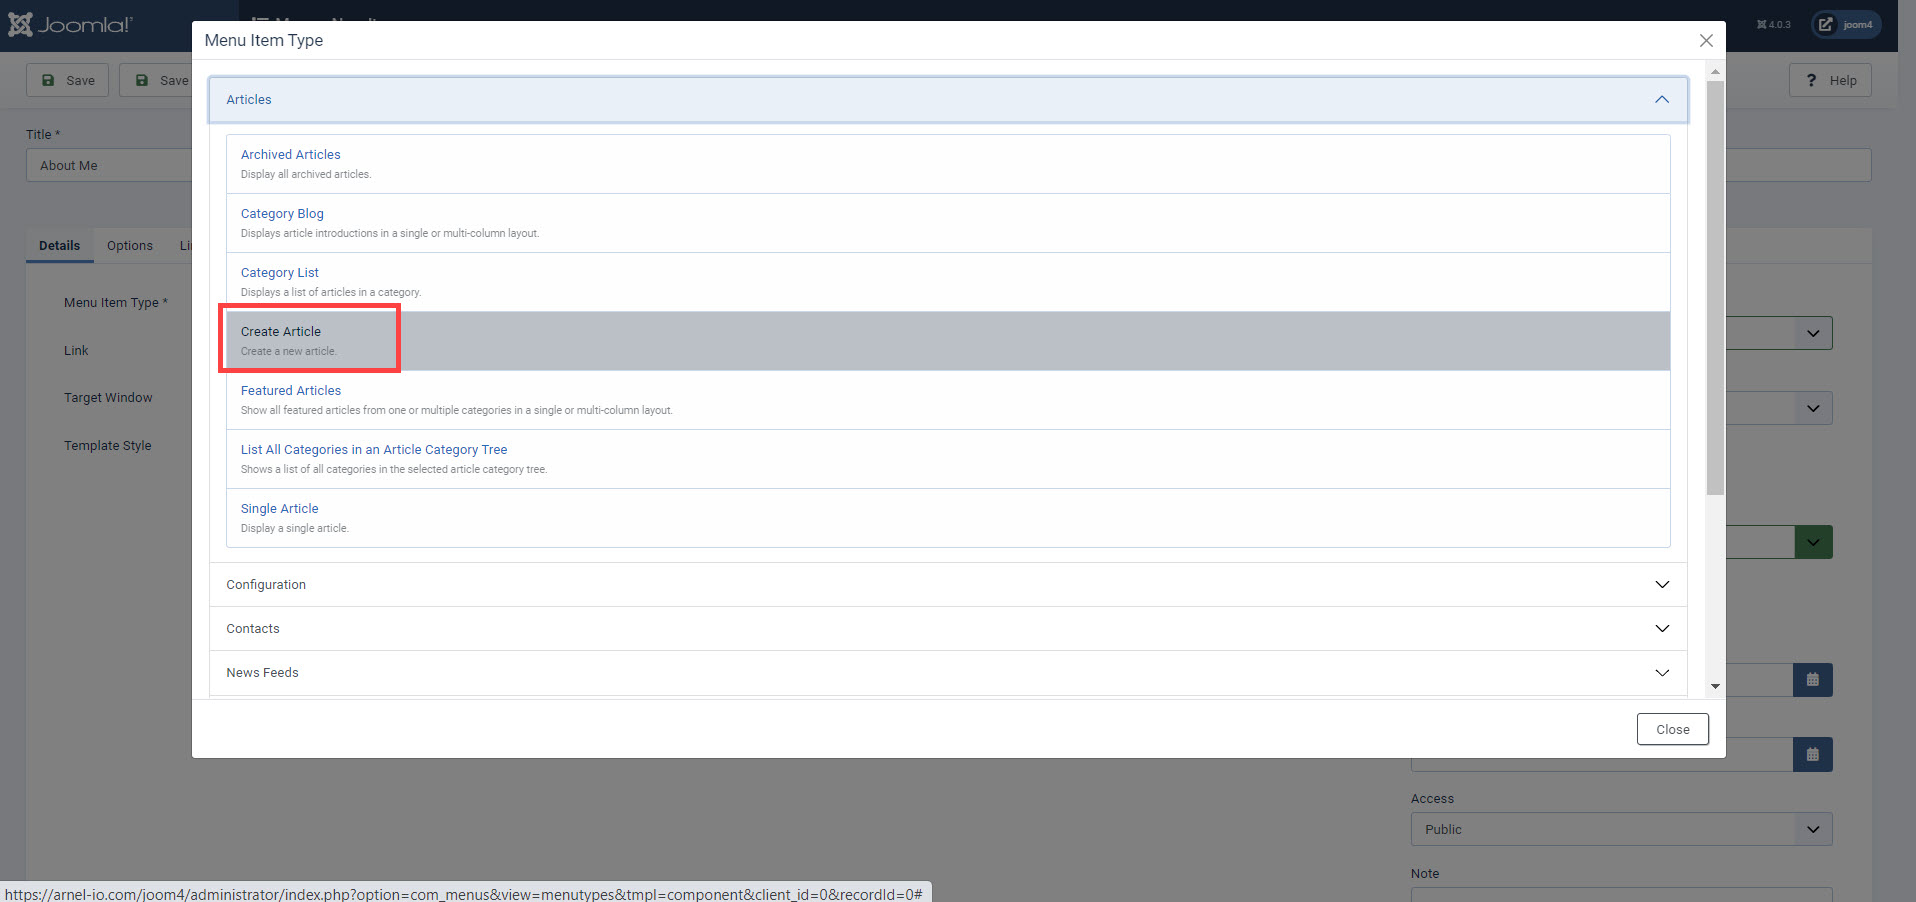
Once you select the option, click on the Close button in the bottom right corner.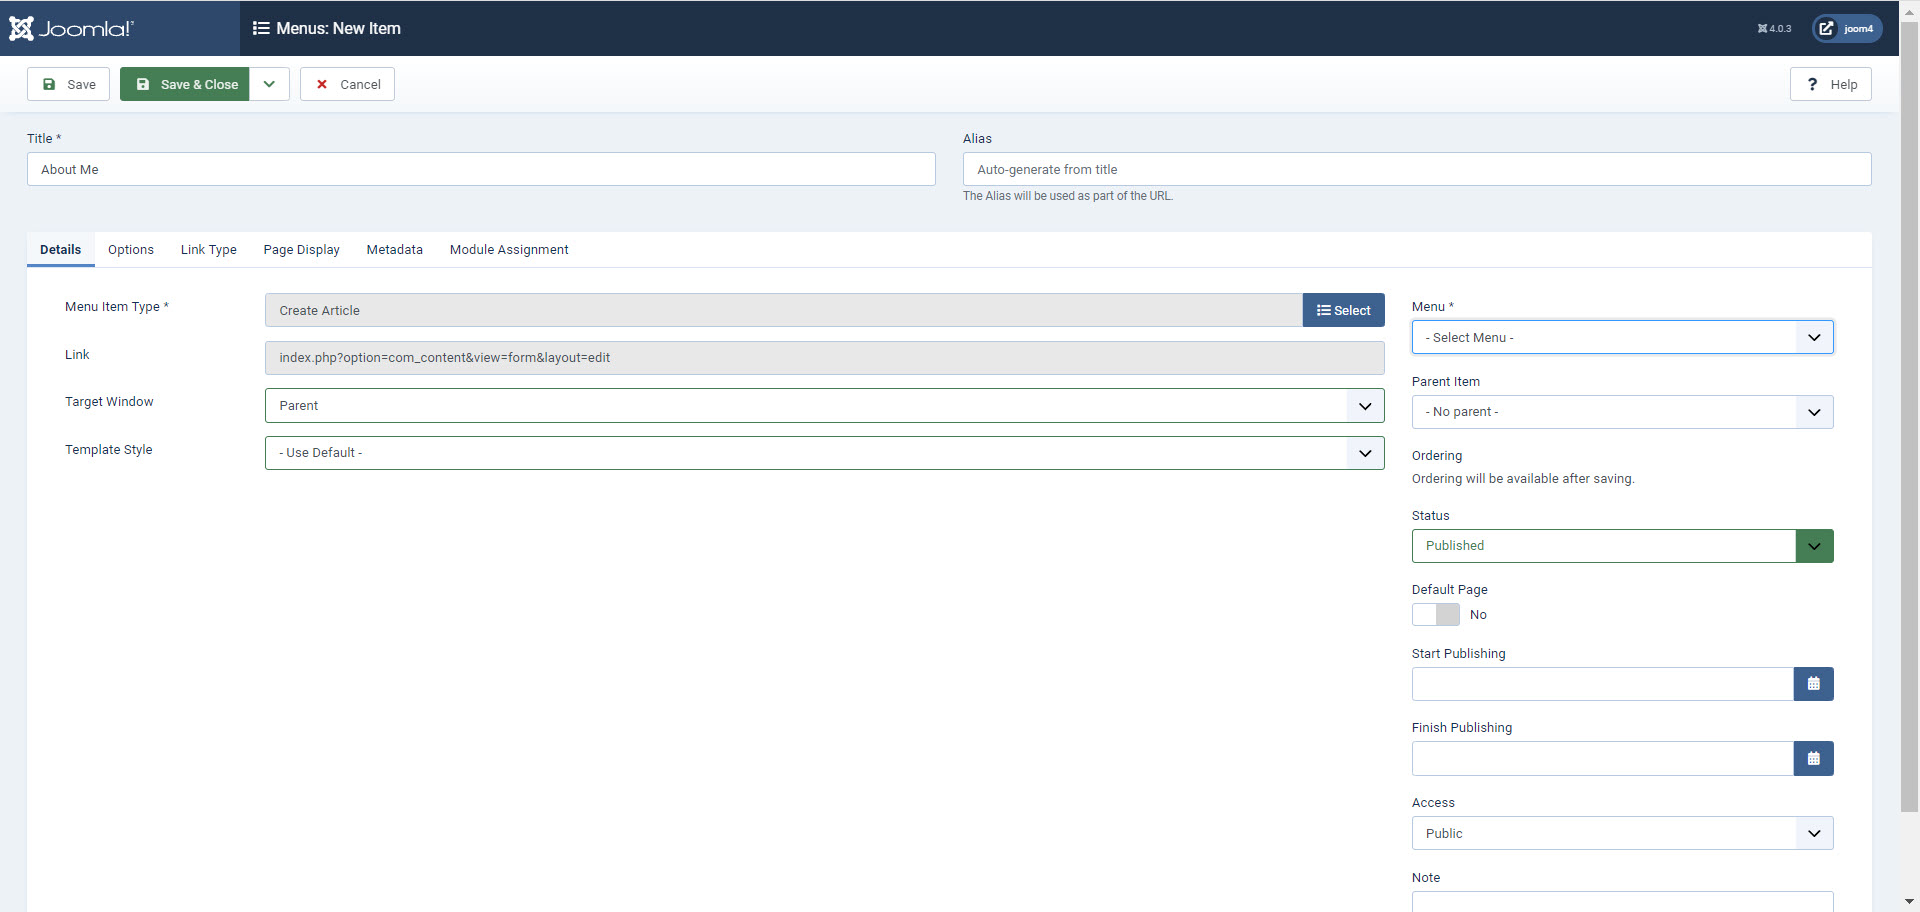
- Next, under Menu, select where you want t the menu to appear. In general, you will have menu structure in place. If you don’t then select Main Menu as a default for now.

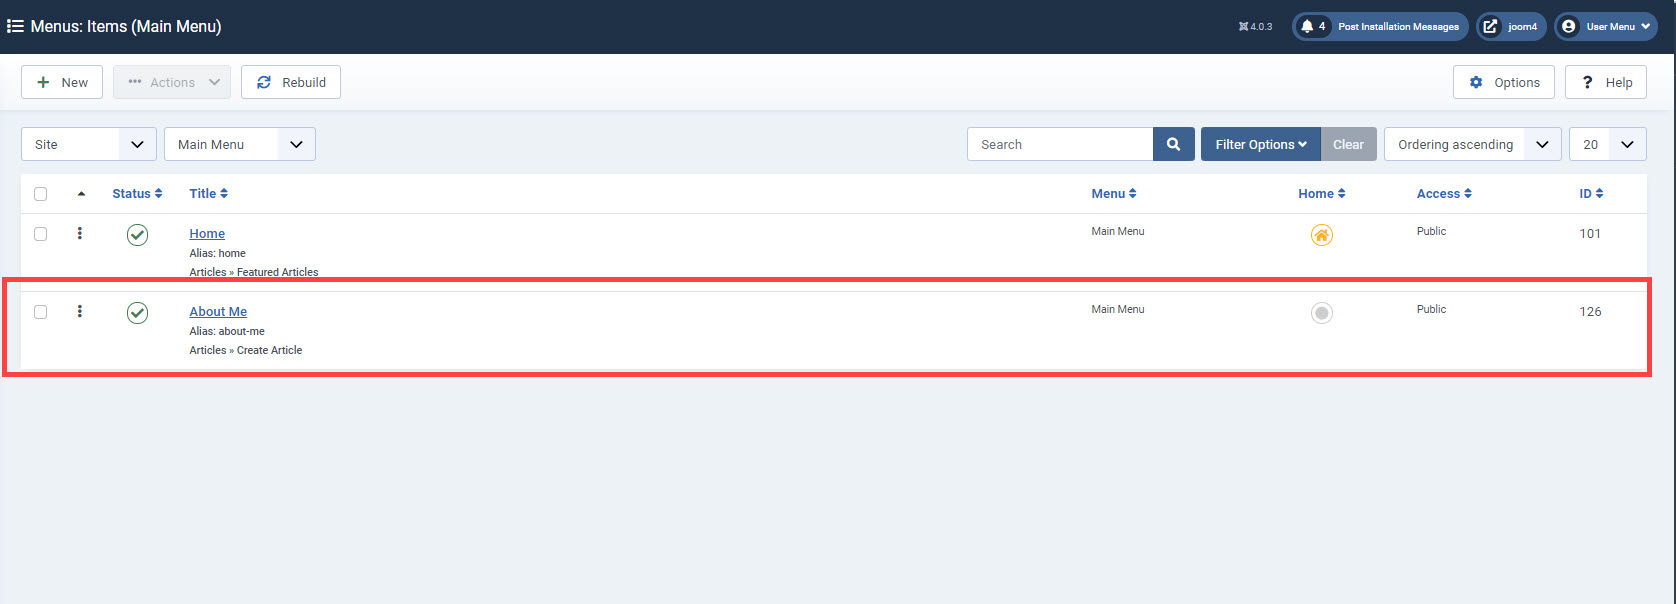
- That completes the required sections of creating new item. click on Save or Save and Close in the top left corner. You will see a confirmation when the item has been saved.
The menu item will appear in the menu that you selected. In this example, you can see it added to the Main Menu.
New Menu Item Options
When you add new menu items there are many options for each tab that can be selected. Each option is labeled with a number and the corresponding description is numbered below.
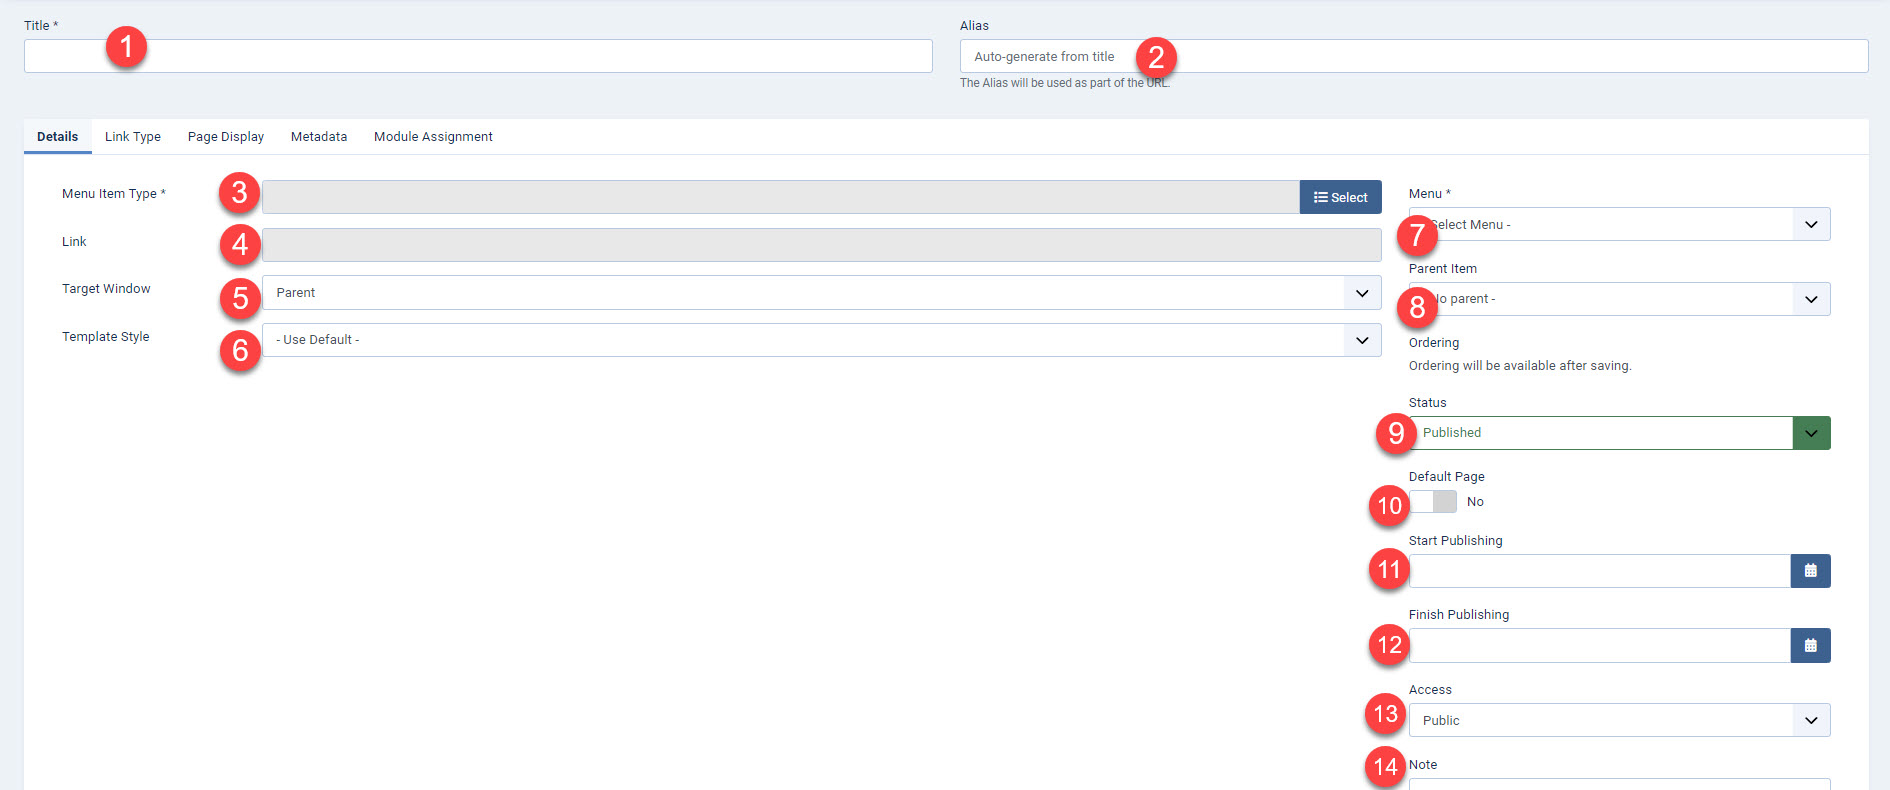
Details Tab
The details tab starts after the Title and Alias
- Title* – this is the title displayed in the menu
- Alias – auto-generated from the title; used in the URL for the menu item
- Menu Item Type* – can be a core menu type provided by installed extension. The options include:
Articles – Archived Articles, Category Blog, Category List, Create Article, Featured Articles, List All Categories in an Article Category Tree, Single Article
Configurations – Display template Options, Site Configuration options
Contacts – Create Contact, Featured Contacts, List All Categories in a Contact Category Tree, List Contacts in a Category, Single Contact
News Feeds -List All Categories in a News Feed Category Tree, List News Feeds in a Category
Privacy – Confirm Request, Create Request, Extend Consent
Smart Search – Search
|System Links – Menu Heading
Tags – Compact List of Tagged Items, List All Tags
Users – Edit User Profile
Wrapper – iFrame Wrapper - Link – System generated link for the menu
- Target Window – window where menu will appear selected from drop-down list
- Template Style – selected template available per the Joomla installation
- Menu* – required item that shows where the menu link will appear
- Parent Item – parent menu item
- Status – Published, Unpublished, or trashed
- Default Page– the designated home page for the site; there can only be one home page
- Start Publishing– date to publish menu item
- Finish Publishing – date to unpublish menu item
- Access – level of access that can view the men item
- Note – area provided for a note that an administrator can save for the menu item
Link Type
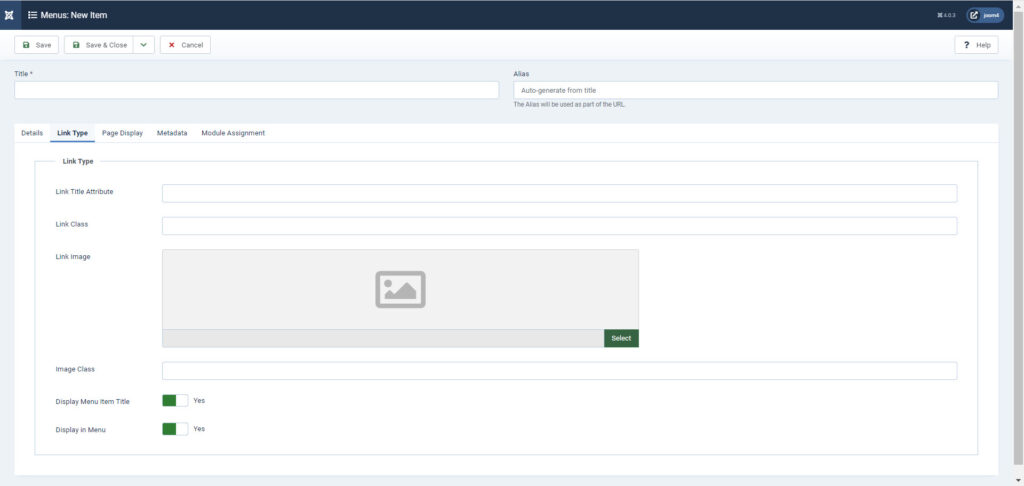
The Link Type tab provides the properties for the menu link. It includes the following:
- Link Title Attribute – optional custom description for the title attribute of the menu link
- Link Class – optional custom style to apply to the menu link
- Link Image – optional image that is used with the menu link
- Image Class – optional class to apply to the image
- Display Main Title – used as a menu title if the optional image is used
- Display in Menu – option to hide the menu item from displaying in the menu
Page Display
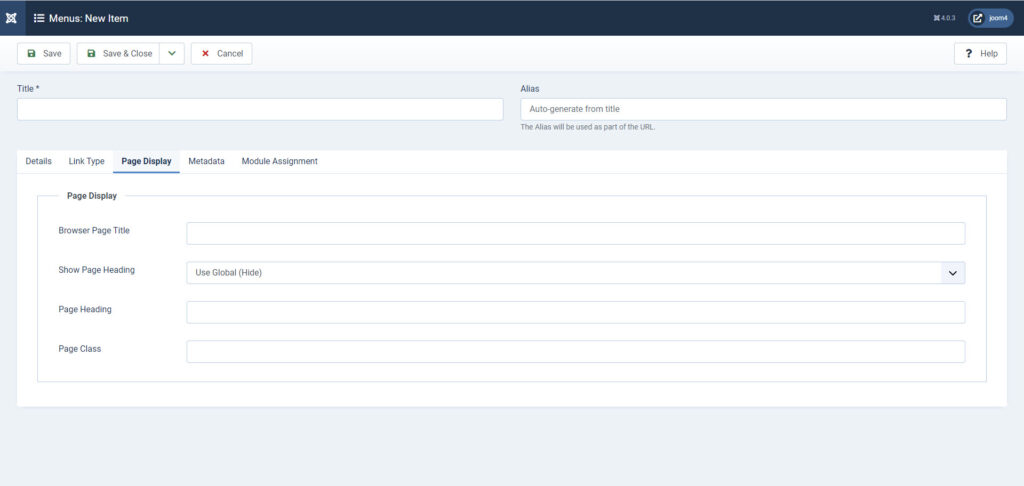
The Page Display is used to store values for the display of the menu page (site). These settings include:
- Browser Page Title – optional text used for the the browser page title. The default value is based on the menu item title
- Show Page Heading – used to show or hide the Browser Page title. Will revert to menu item title if not text was added for the Browser Page title
- Page Heading – optional alternate text for the page heading
- Page Class – optional CSS class that can be used for specific CSS styling applying to the page
Metadata
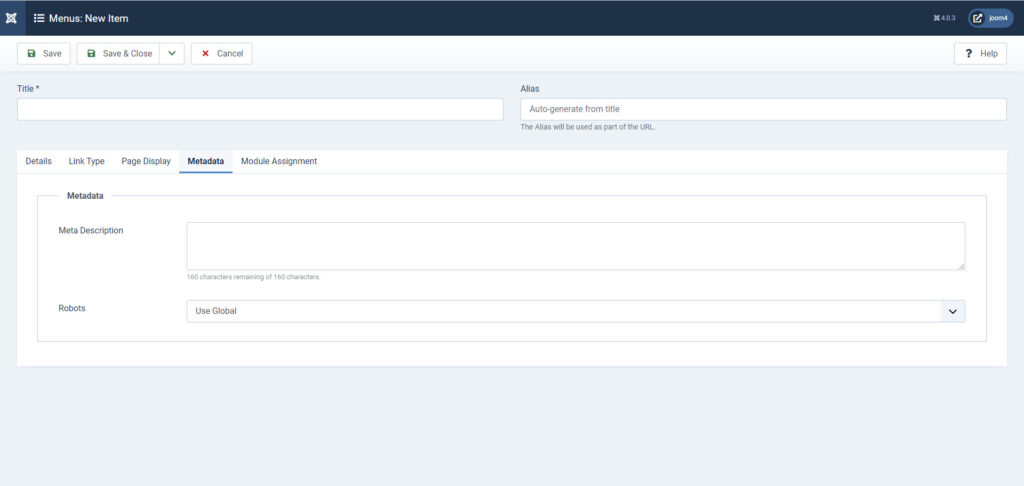
The Metadata tab provides an area where specific text can be stored to help describe and provide keywords to help with search engines. This tab includes the options for:
- Meta Description – optional paragraph used as the descripton of the page in the HTML output; used by search engines to describe the page
- Meta Keywords – optional comma-separated list of keywords and/or phrases
- Robots – instructions for search engine robots (Use Global/Index, Follow/No ind3x, follow/Index, No follow/No index, no follow – these options are selectable from down menu). Based on the meta tags used in a Robots.txt file.
- Secure – (off/on/ignore) – will appear if you have HTTPS enabled on your server and valid SSL certificate applied to your site. If selected, then it will force the use of the secure link
Module Assignment
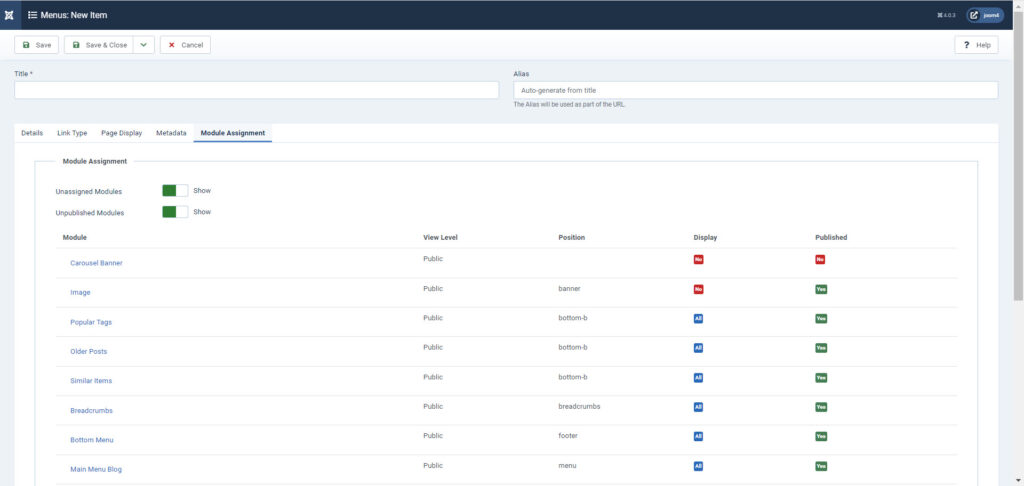
Joomla modules can be assigned to work with specific elements of your site. For example, menus can have one or more modules that affect their behavior. A search and breadcrumbs module can be set to show on all pages. There are two main settings at the top of the tab:
- Unassigned Modules – (show/hide) shows or hides modules unassigned to this menu item
- Unpublished Modules – (show/hide) shows or hides modules that unpublished
Removing a Menu Item
There are multiple ways to remove a menu item, but we will be focusing on the quickest and simplest way to remove a menu item. This will prevent the user from being able to access that menu item on the front end.
- Log in to the Joomla Administrator Dashboard.
- Click on Menus in the main menu located at the left side of the dashboard page.
- Select the site (page) from the menu in the left-hand column. You will see a list of the menu items appear.
- To remove a menu item, simply click on the circled green check mark. This will immediately unpublish the item and it will not appear in the menu.
This is just one method of removing a menu item. For a more in-depth look at removing items from your menu check out How to Trash, Unpublish, and Hide Menu Items in Joomla 4.0.
Upgrade to VPS Hosting for Peak Performance
Upgrade to InMotion VPS Hosting today for top-notch performance, security, and flexibility, and save up to $2,493 – a faster, stronger hosting solution is just a click away!
![]() Dedicated Resources
Dedicated Resources ![]() NVMe SSD Storage
NVMe SSD Storage ![]() High-Availability
High-Availability ![]() Ironclad Security
Ironclad Security ![]() Premium Support
Premium Support