Table of Contents

New versions and updates to Joomla software are released through what is known as update channels. Your Joomla site will then receive update alerts based on which one you select.
For example, you can set your site to only receive updates that are considered “stable”. This means that it has been well-tested and is an official release.
If you want your site to run beta versions of releases before they are officially finalized, you can choose this option as well. For example, you may be testing new features on a copy of your site before updating the live version.
This guide will explain what channel options you can choose from then show you how to set a Joomla 4 Update Channel.
What Update Channels Are available?
Before you can decide what update channel is right for your website, you need to know what options are available. In this section, we will go over the update channels you can choose from.
- Default – This will allow your site to receive “standard” updates that are released.
- Joomla Next – This will cause Joomla to only update when the next major Joomla release is available.
- Testing – When selected, you can then choose the minimum stability level of the updates you want. Available options are: Development, Alpha, Beta, Release Candidate, and Stable.
- Custom URL – This lets you pull your Joomla updates from a different “non-standard” location.
Set Joomla 4 Update Channel
Now that you know the update channel that you want to use, we’ll show you how to set the Joomla 4 Update channel in the Admin Panel of your site.
- Login to Joomla Admin Panel.
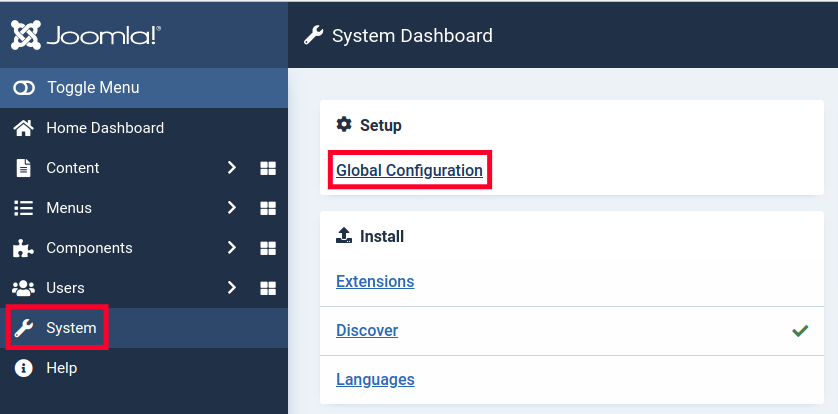
- Click System in the navigation menu, then Global Configuration under the Setup section.

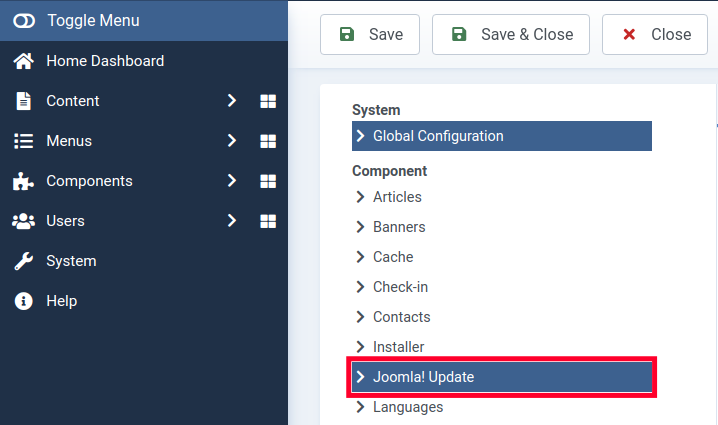
- Click the Joomla! Update link under Component.

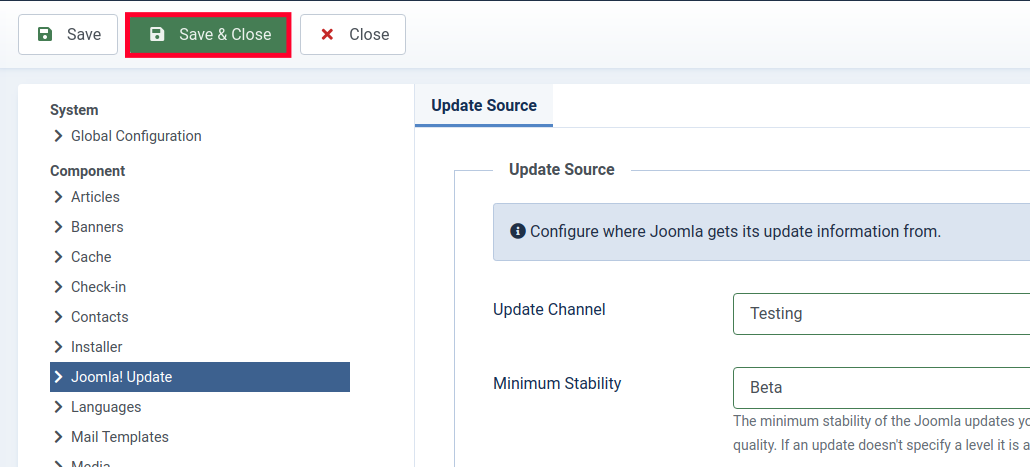
- Click the dropdown box next to Update Channel.

- Choose your Update Channel as outlined in the section above.
- Click the Save & Close button. You are finished when you see a “Configuration saved” message.

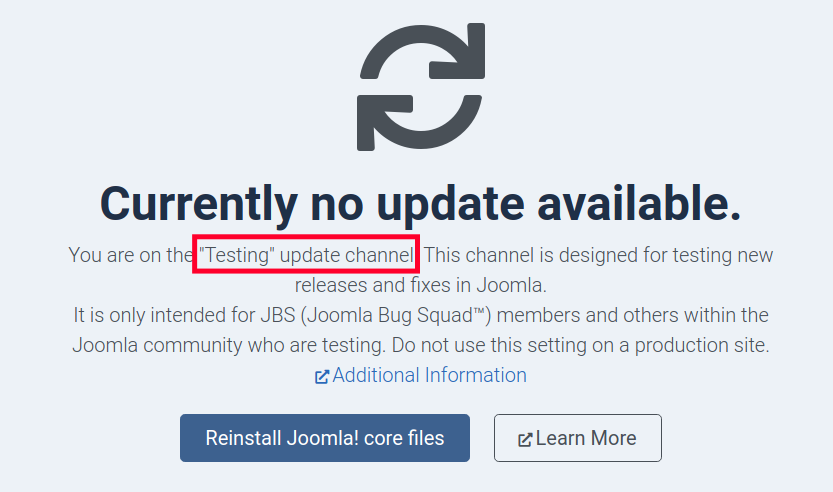
- Now when you check for updates you will see your chosen Joomla 4 Update Channel listed.

Now you know what channel options are available and how to set your Joomla 4 Update Channel. Check out our Joomla 4 section for more guides to help you build a successful website.
