Table of Contents
One way to emphasize the articles that you have created as content on your Joomla 4.0 site is to use an extension like Mini Frontpage by TemplatePlazza. This extension lets a viewer scroll through content quickly and gets their attention through its placement and interface.
Follow the instructions in this article to learn how to get this free extension, install it, and use it on your Joomla site!
- How to Obtain the Free Mini Frontpage Extension
- Install the Extension
- Use the Extension on your Joomla 4.0 Site
Looking for a new home for your new Joomla 4.0 website? Look no further than InMotion’s Managed VPS hosting solutions! You’ll find performance-oriented servers configured for your application and budget needs.
How to Get the Mini Frontpage Extension
The free version of the Mini Frontpage extension can easily be downloaded from the Template Plazza website, but you will need to first sign up as a user if you have not already created an account. Once you have a user created, you can log in and then download the extension.
- Log in as a user.
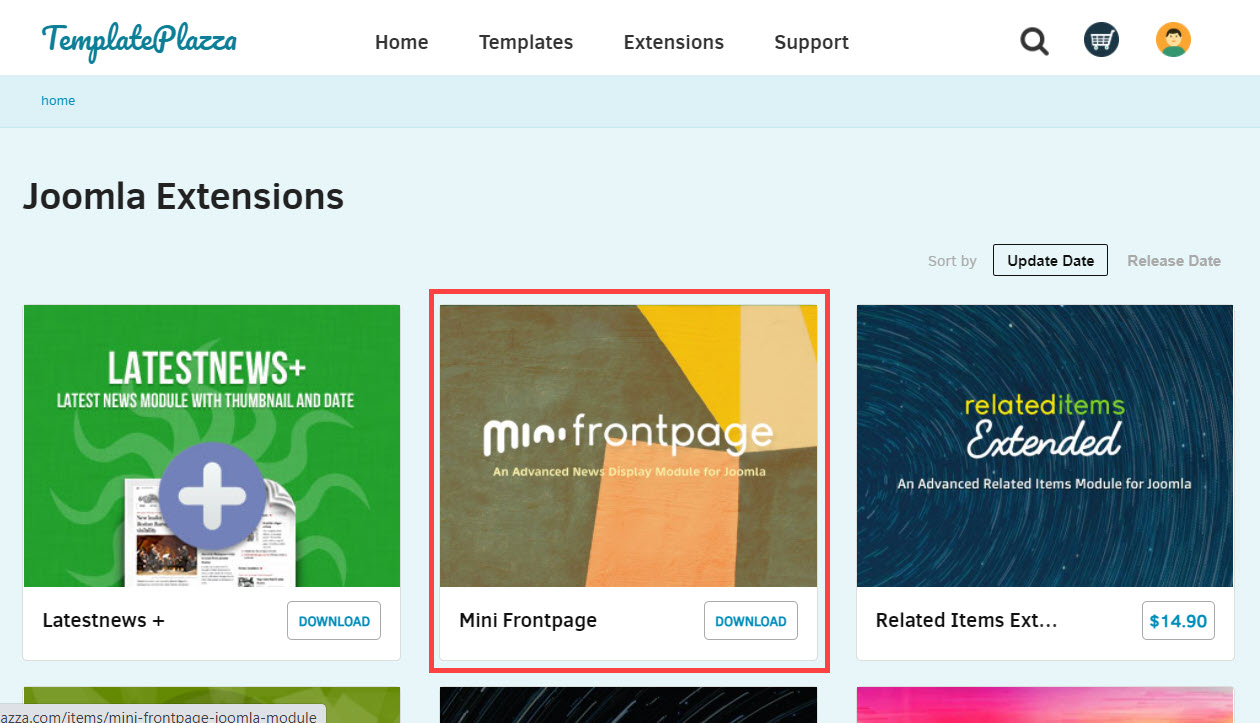
- At top of the page, click on the Extensions menu item.
- Click on the icon that represents the Mini Frontpage extension.

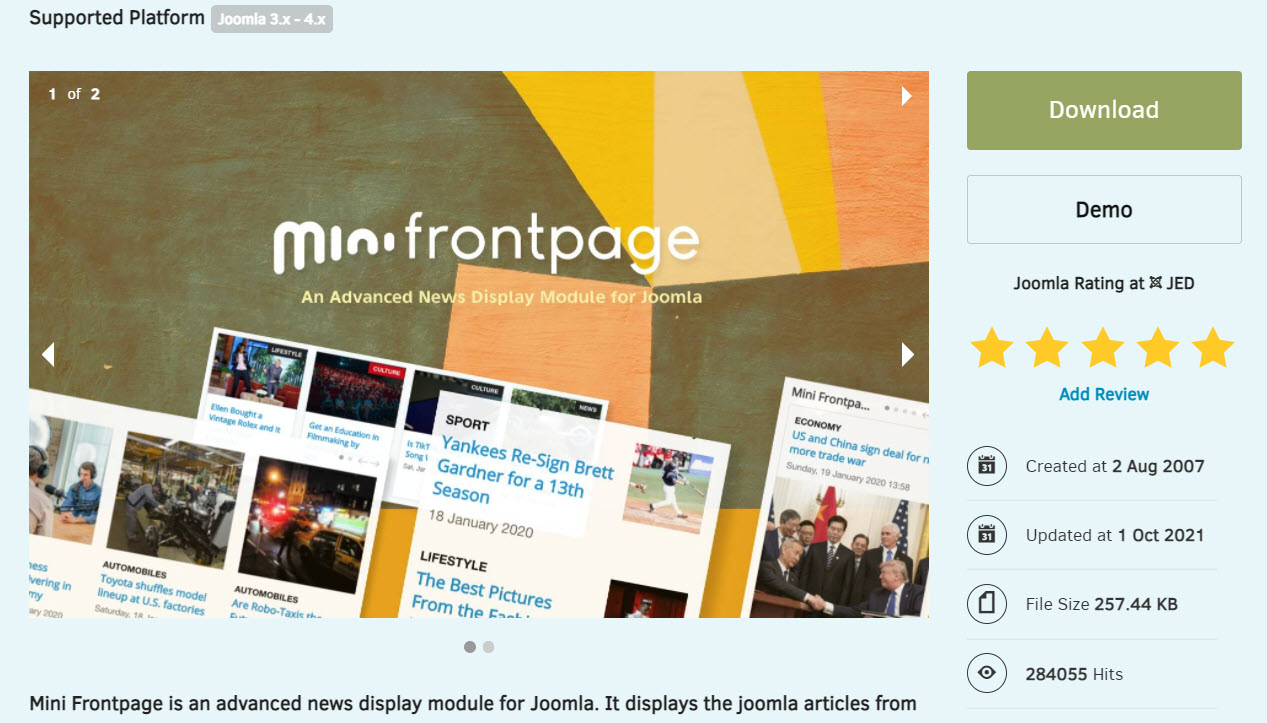
- You will then be sent to the download page. Click on the Download button.

- You will get a Zip file when the download completes. The current file name is mod_minifrontpage_unzip-first.zip To save yourself a little time (and follow the filename’s direction), unzip the file. This zip file contains 2 versions of the extension. For the purpose of this article we will be using the 4.0 version. Make sure you know the location of the file so that you can find it when you install it.
When you unzip the file, you will see two files: mod_minifrontpage_J4.zip and modminifrontpage_J3.zip. We will be using the “J4” version of the file in the next section.
Install the Extension
Now that you have the installation file, we will go into Joomla 4.0 to install it. Follow the instructions to complete the installation and then activate the extension so that you can use it with your Joomla 4.0 site.
- Log into the Joomla Administrator Dashboard.
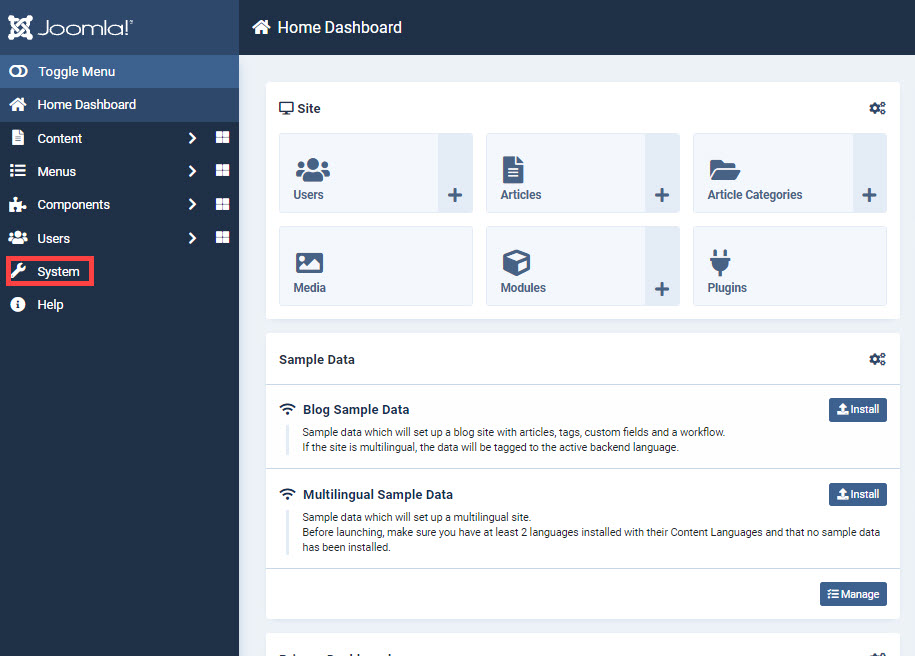
- In the main menu to left of the screen, click on System.

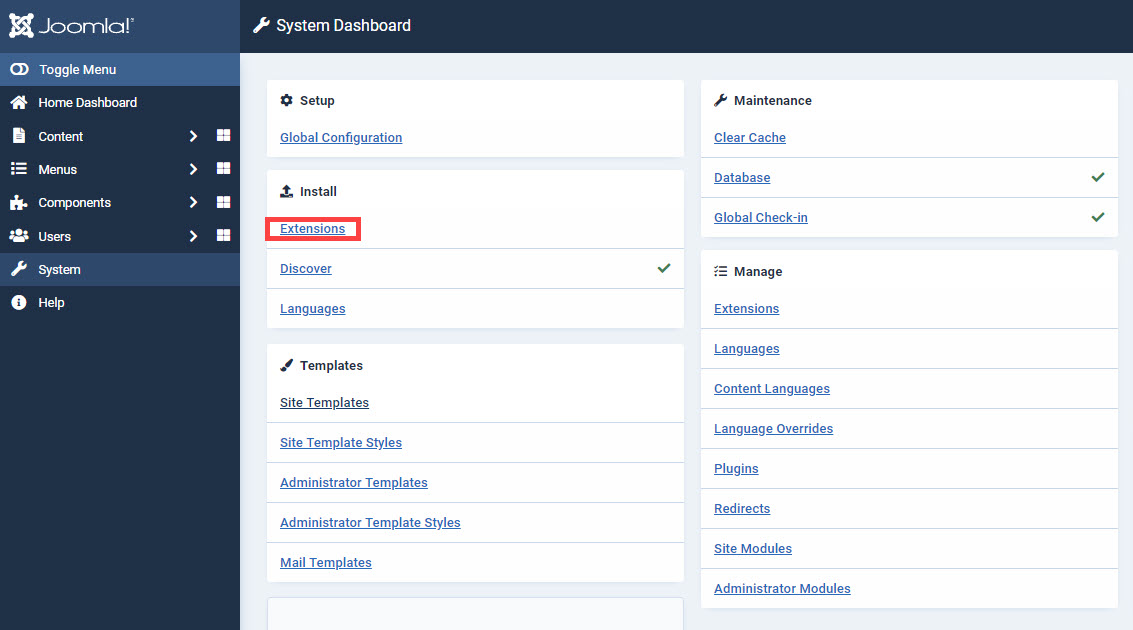
- Next, click on Extensions in the section labeled Install.

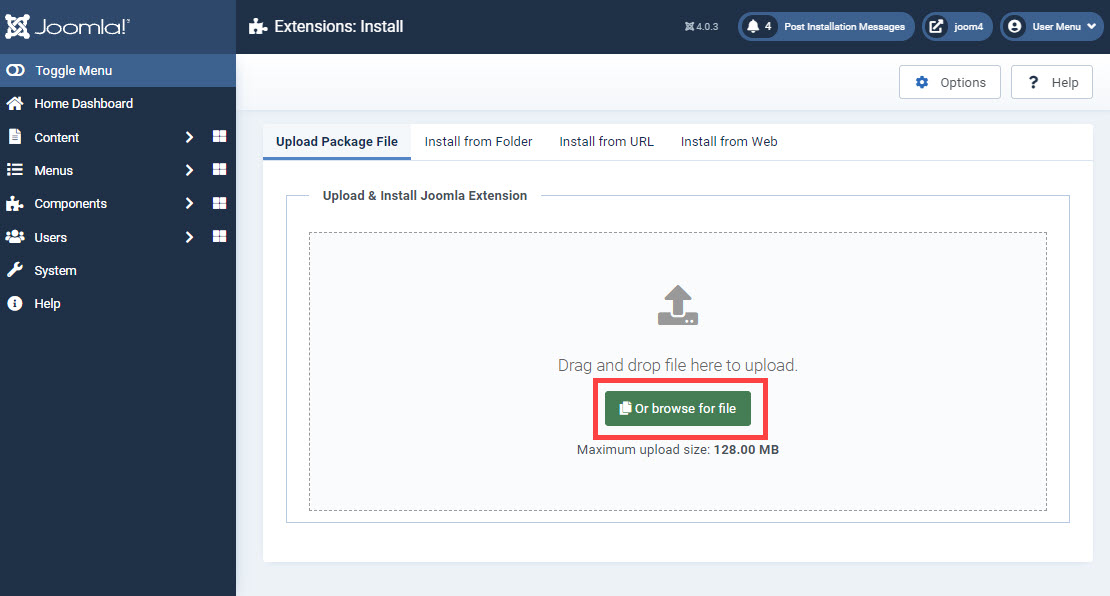
- Once you click on Extensions, you will get a prompt to drag-and-drop the installation file or search for it so that you can upload it. Remember that the installation file is named: mod_minifrontpage.zip.

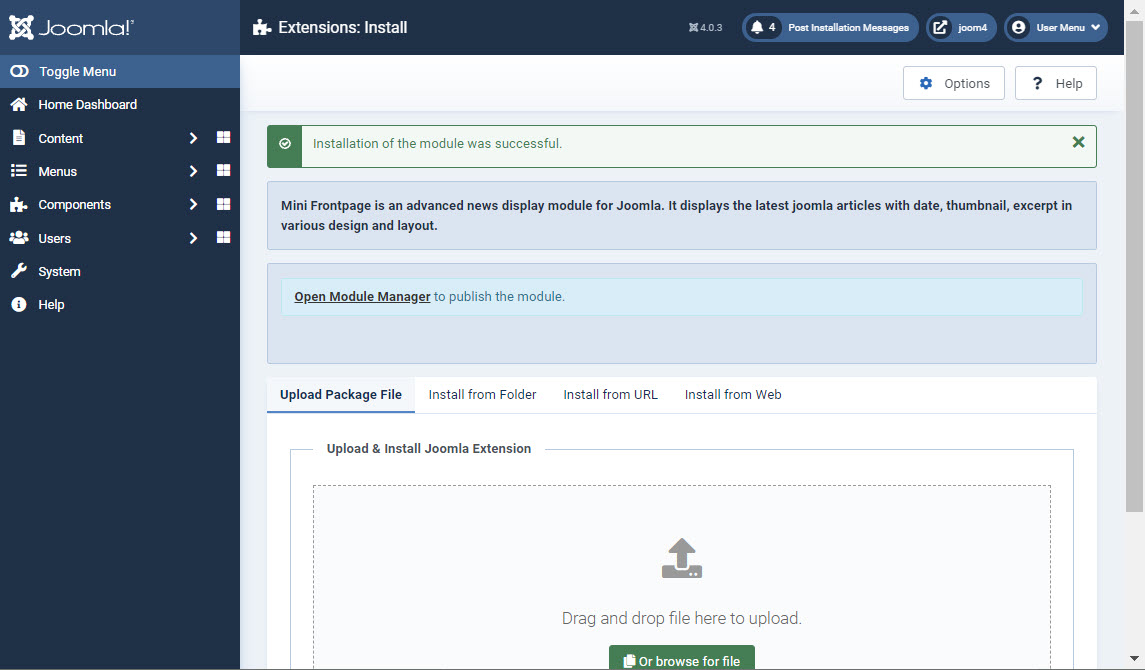
- When you select the installation zip file it will automatically begin the installation process. When it’s done you’ll see a screen like this:

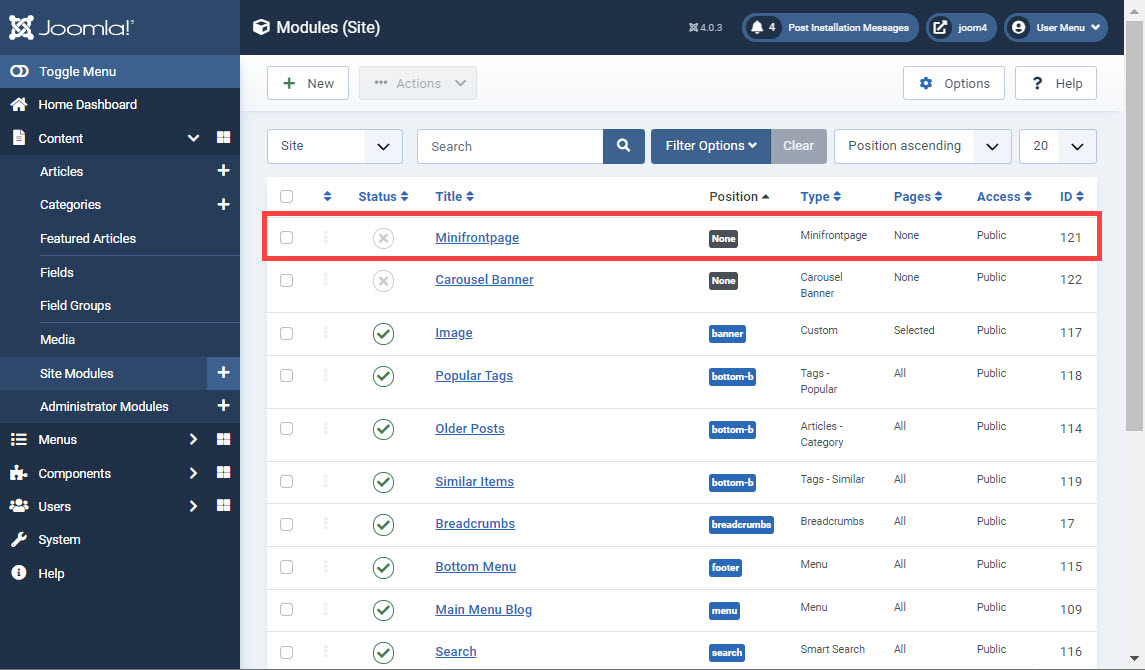
Next, you will to click on the link labeled “Open Module Manager to publish the module.” - Once you’re in the Module Manager, you will see a list of all the modules starting with the ones that you have most recently installed. To activate, click on the circled X next to the module name that you have just loaded.

Once you have clicked on the X it will change into a green circled checkmark. This will enable it to be active so that you can use it to make your contact standout on your Joomla site.
Use the Extension on your Joomla 4.0 Site
When the extension has been activated, then you are ready to use it on your Joomla 4.0 site. Before you can start to use the extension you will need to first see the position on where it will appear, how many articles will be displayed, etc. Follow the directions below to make changes on the Module page.
Editing the Module Options
The module page contains many options that you can set for the Mini Frontpage extension. The screenshot for the Module tab has been divided into three parts so that you can see each section.
- Log into the Joomla Administrator Dashboard.
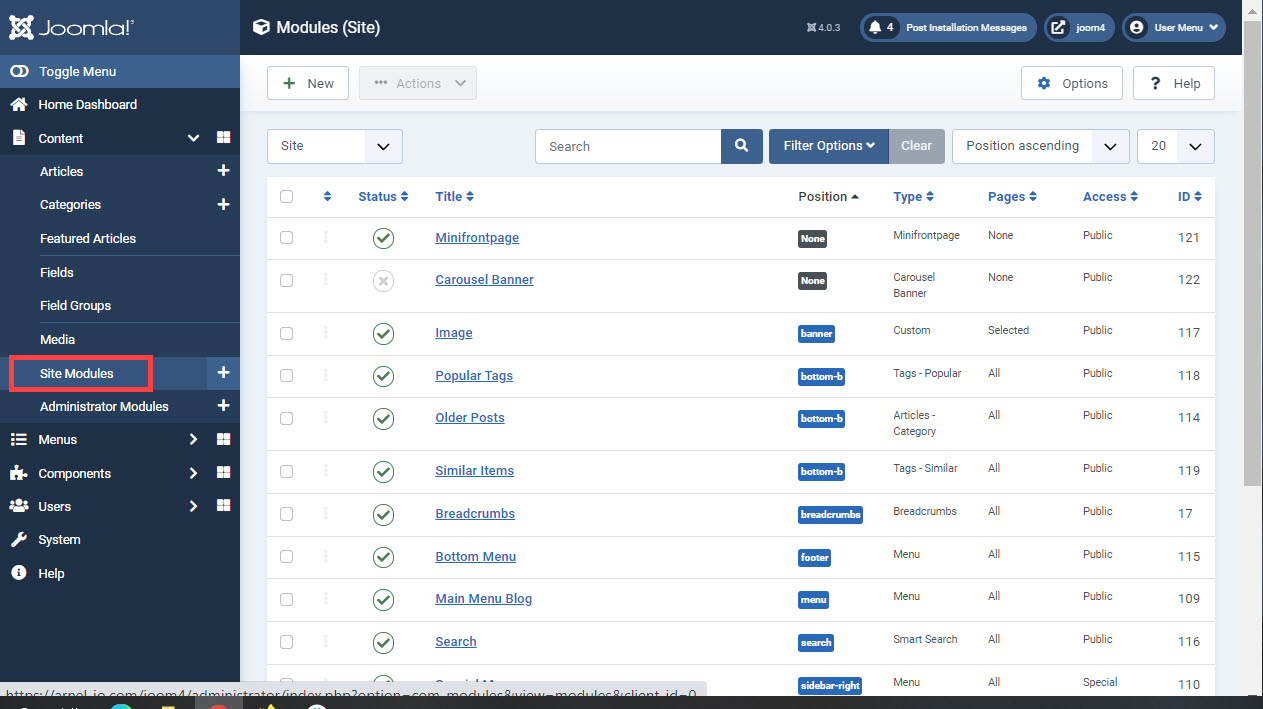
- Click on Content in the main menu at left.

- Next, click on Site Modules.

Here you will see a list of the modules including the Minifrontpage extension that you loaded earlier. Click on the link for Minifrontpage to proceed. - Once you have the Site Module opened, you will be able to make some necessary changes. The Module tab is the first section that you will start with. All of the tabs will be described below.
Module Tab
This tab is divided into 3 screenshots because of the numerous options. Note that the top section also includes a link to the PRO version of the plugin.
Note that if you make changes to the settings, then click on Save or Save & Close in the top left corner in order to save your changes.
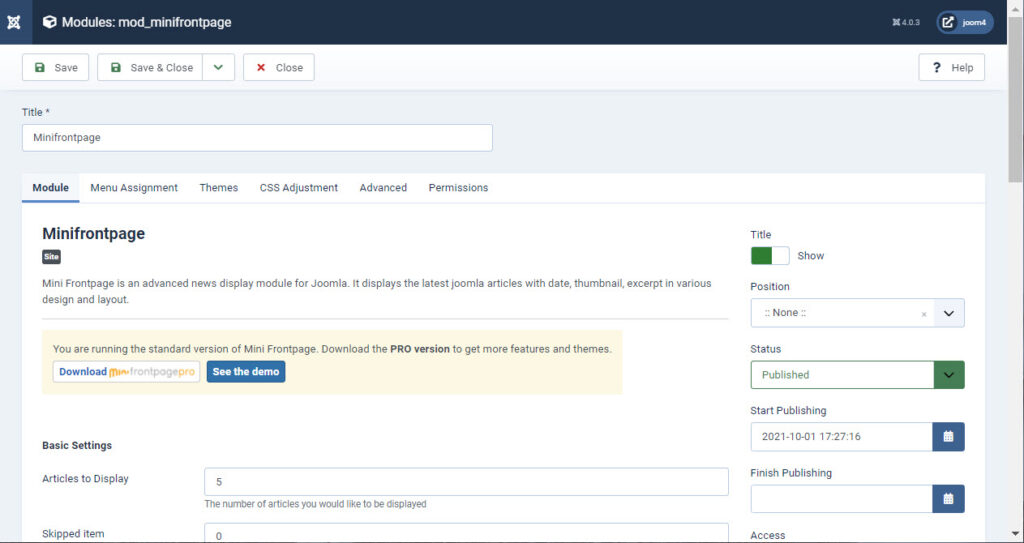
At the top of the page, you can set the Title for this particular module. Then, in the top right corner, you can elect to show or hide the title.
In the right column, you will then see Position. Click on the drop-down arrow to select a position within your site. The availability of locations will depend on the theme you are using.
Underneath Position is the option for Status. By default, it is set to Published. This means that when the changes are made and saved, then these changes will be displayed on the front end of your Joomla site. There is also the option for Unpublished which removes the current settings, removing them from being displayed, but not deleting them. The option for Trashed also deletes the previous settings reverting everything to the default settings.
The options for Start Publishing and Finish Publishing allow you to schedule when these settings will be applied.
Under the Basic Settings section You will see:
Articles to Display – this is the number of articles displayed and rotated by the module
The next section shows the middle of the Module tab.
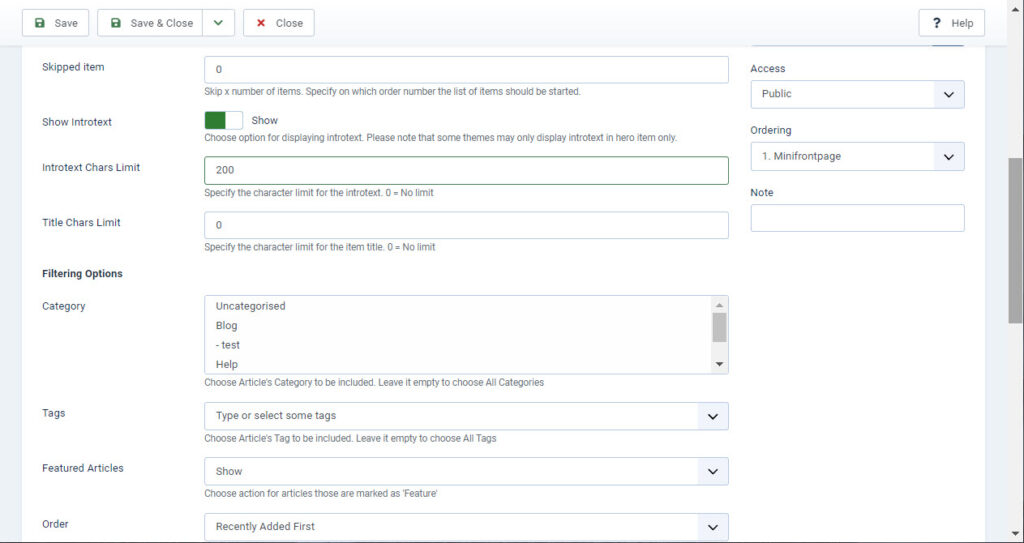
Skipped Item – this is the number of items that will be skipped if you want to start on a different item in the list other than the first one.
Show introtext – select to show or not show the introductory text for the displayed article. This may be affected by the theme you are using.
Title Chars Limit – limits the number of characters for the article title.
Category – select the article category that you want to be displayed. Leave blank to select all categories.
Tags – choose the article tag that will be displayed. Leave empty to choose all tags.
Featured Articles – select to show articles that are marked as Feature.
Order – allows you to select different options for how items will be displayed: 
The last screenshot shows the bottom options in the Module tab.
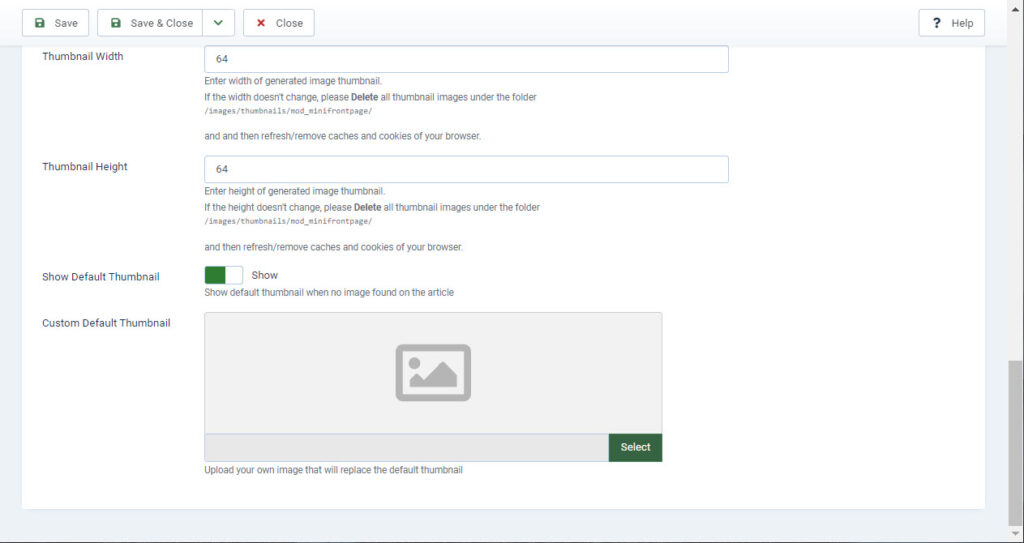
Thumbnail Width and Thumbnail Height – this is the size of the graphic being pulled in from the article to be displayed. You can manually set the size that will be used.
Show Default thumbnail – if there is no graphic associated with the article, then this will be the graphic that is displayed. You can choose to hide or show this image. You can also create a custom one and upload it.
Menu Assignment Tab
This tab is very important as it does determine where the module will be displayed. If you don’t select a page or pages for it displayed, then it may appear that the extension is not working. Here you can see all of the options that you can select:
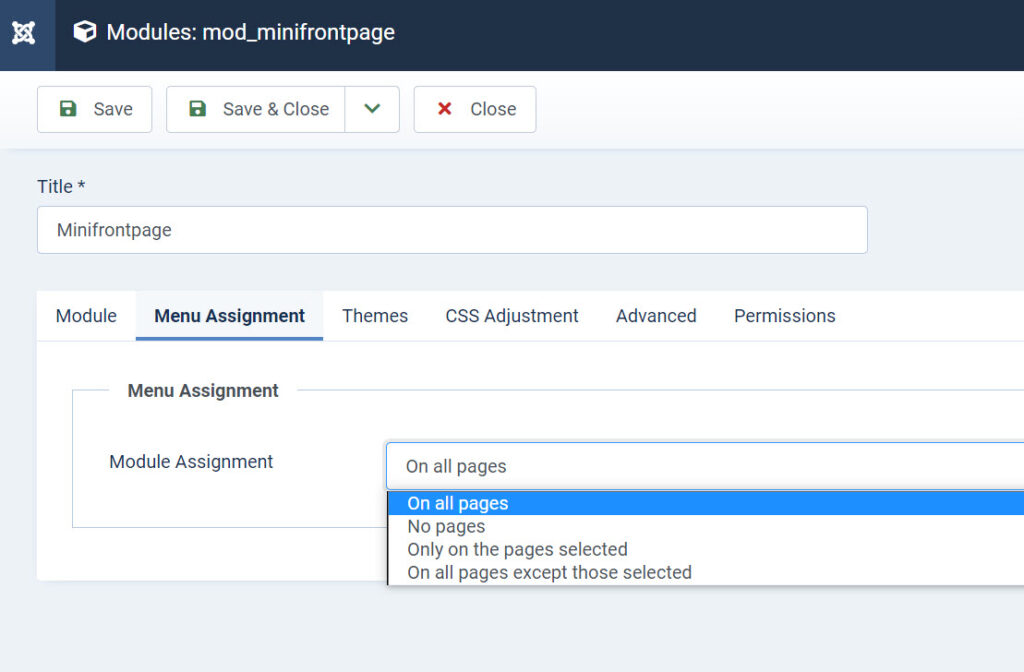
The options for menu assignment for the Mini Frontpage include: On all pages, No pages, Only on the pages selected, and On all pages except those selected.
CSS Adjustment
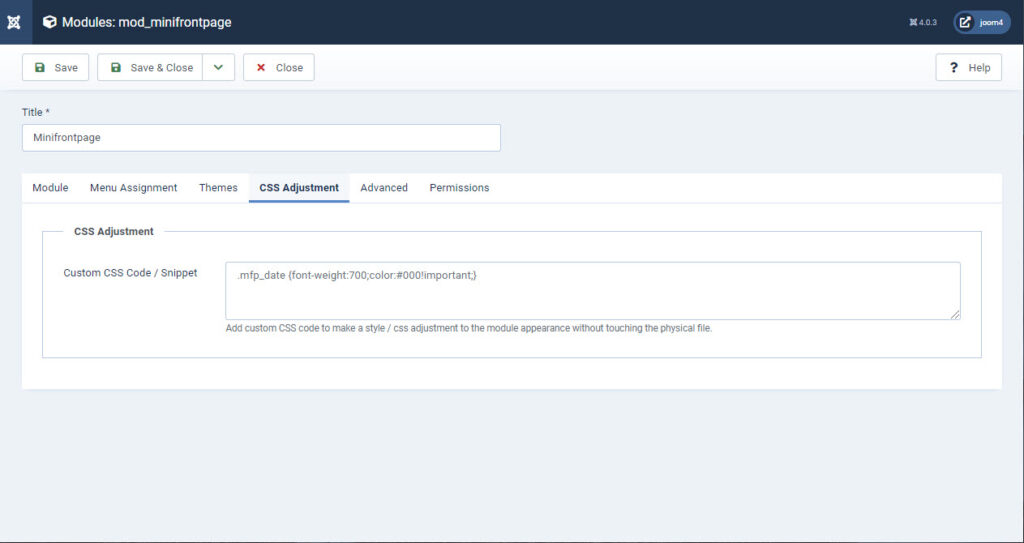
This section allows you to add CSS code or Snippets that allow you to modify how the module will appear on your site.
Advanced
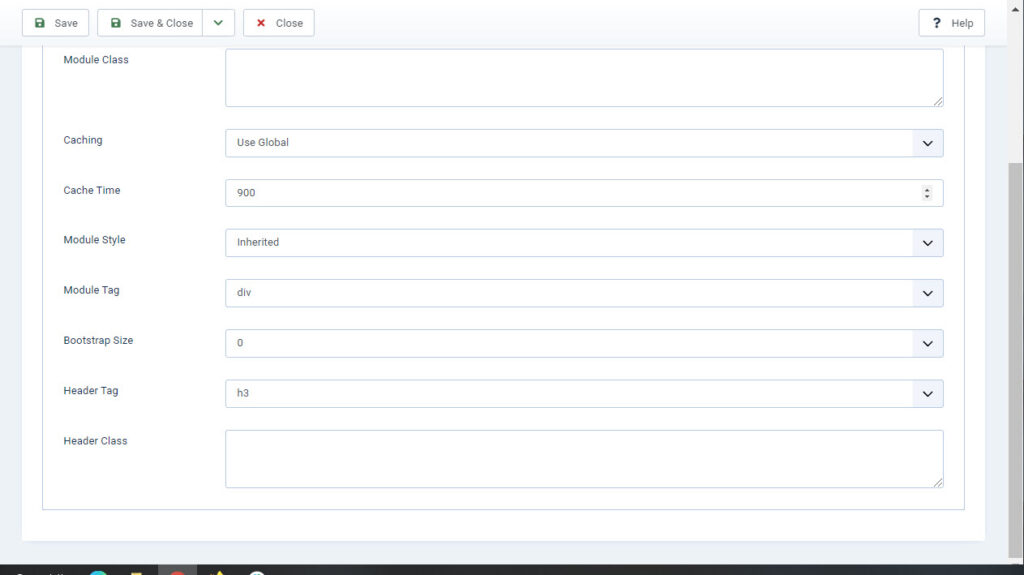
The advanced tab includes options for specifying module class, caching, module style, bootstrap size, header tag (size), and header class. If you are not familiar with these settings, you may want to speak with an experienced Joomla developer to make sure that the settings you use will help your site.
Permissions
The permissions tab lets you set who has access and who can make changes to this module. Typically, the Super User has all of the rights for full access. The Manager (Administrator) will have almost the same rights but will not be able to edit the front-end settings. Leave this set to default if you want only the original administrator(s) (with superuser rights) the permissions to make any changes. You can find more about access control and user permissions in our article about access control.
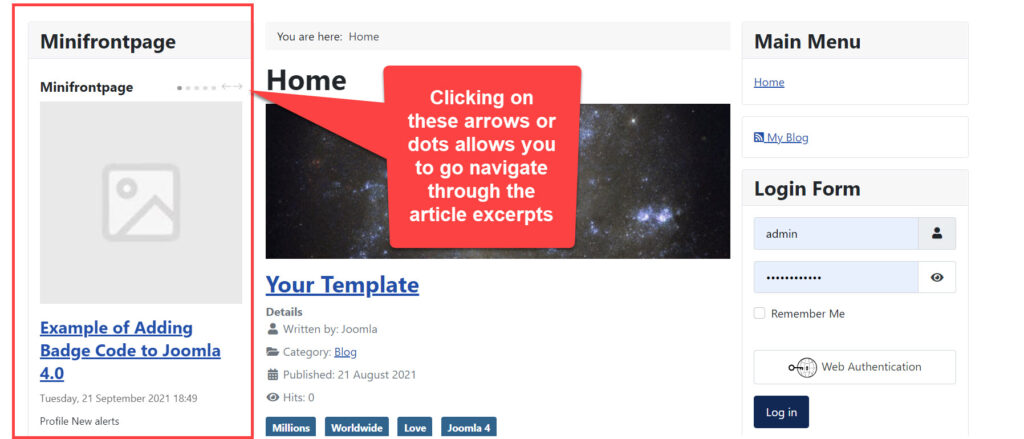
This concludes our tutorial on using the Mini Frontpage extension with a Joomla 4.0 site. Here’s an example where I specified the position to be the left sidebar, with 1 column showing all the articles (the arrow allows users to see an excerpt of articles as they click on it).
Enjoy high-performance, lightning-fast servers with increased security and maximum up-time with our Secure VPS Hosting!
Linux VPS
cPanel or Control Web Panel
Scalable
Website Migration Assistance
