As you start to customize your newly installed Magento web store, you’ll probably want to change the logo that displays in the top right section of the header on each page. This can be easily accomplished in the Magento Admin Panel at any time.
Uploading Your Logo to Magento
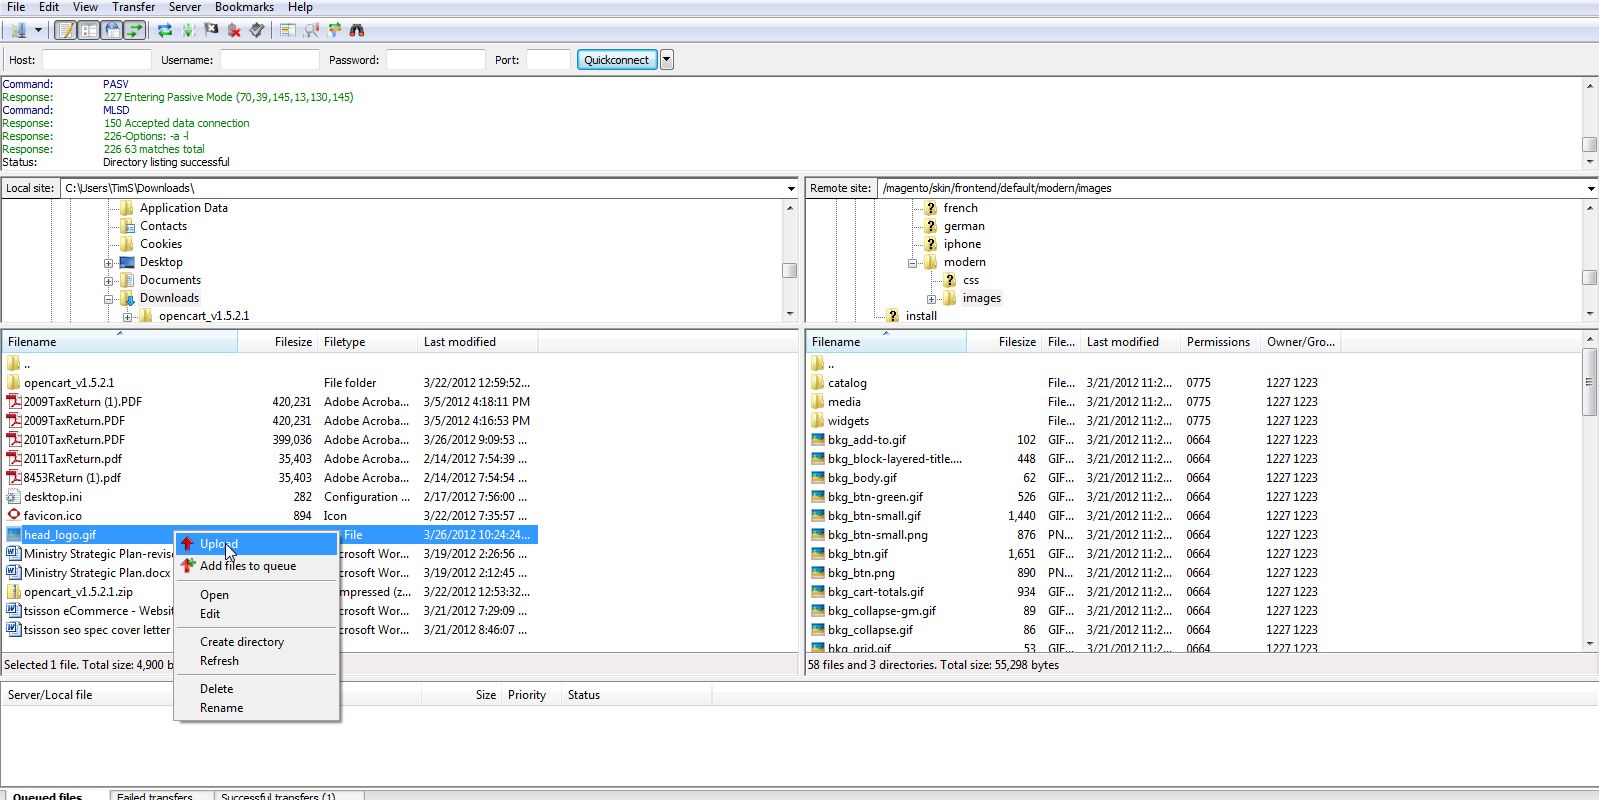
In Magento, to change the logo you simply have to specify a new URL path to the logo. If you want to place the logo in the same folder as the default one, you’ll have to use cPanel’s File Manager or FTP into your Magento Hosting account. Each logo is relative to the template you are using. If you change the theme on your website, you’ll have to upload the new image.
While this may sound complicated, it keeps the files and folders of Magento organized.
- With your FTP program (in this example we’ll use FileZilla), go to the root folder of Magento.
- Go to skin/frontend/default.
- From here you’ll need to select the template you are using. Currently we’re using the “modern” template so we’ll click on that folder.
- Now, click on the images folder.
- Select the logo file, and upload the file.

Setting the Path to the Logo in Magento
Now, that you have uploaded the image of your logo to Magento, we’ll need to tell Magento where it is. Changing the file path or URL to your logo in Magento is easily accomplished in the Magento Admin backend.
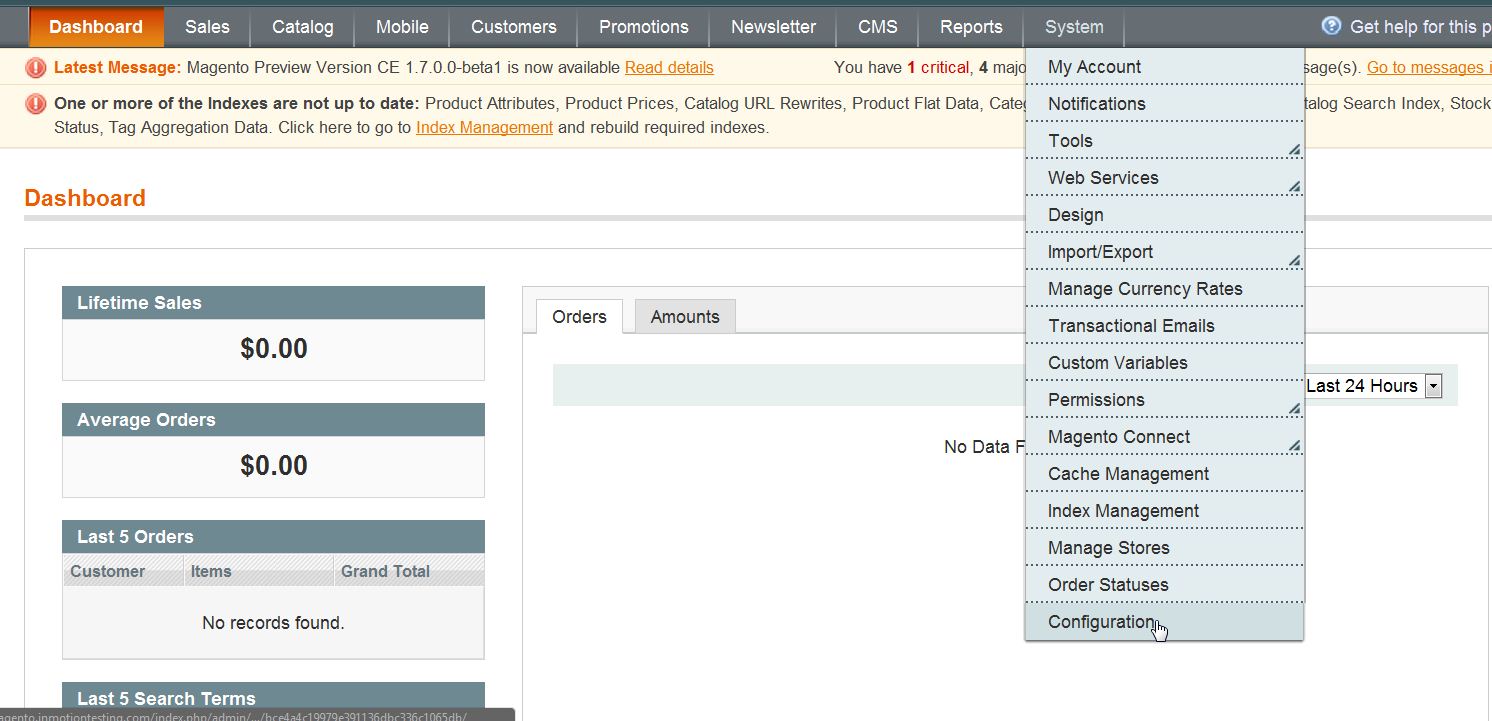
- Log into your Magento Admin Panel.
- Go to System ->> Configuration.

- Click on “Design” in the left side menu pane.
- Open the “Header” section.
- Change the file name in the “Logo Image Src” to the file name you just uploaded. Leave the images/prefix alone.

- Click “Save Config“
Now, when you visit your website, your new logo should be displayed in the upper left of the header of the paghe
| BEFORE: | AFTER: |
|---|---|

|

|


