Setting Up Google Analytics on Mambo
Get your Google Analytics Tracking Code
- Login and/or setup your Google Analytics account for your Mambo website.
- Obtain the tracking code snippet. Usually, this will be immediately presented during the creation of your account. However, if you need to find it later, you can go to the Account list, select your website, and click on the tab labeled TRACKING INFO. You will see the Code snippet towards the bottom of the screen. Leave this window open so that you can reference it when you are in your Mambo interface. Typically, the code is fairly short and should look something like this:<script type=”text/javascript”>
var _gaq = _gaq || [];
_gaq.push([‘_setAccount’, ‘UA-1234578-1’]);
_gaq.push([‘_trackPageview’]);(function() {
var ga = document.createElement(‘script’); ga.type = ‘text/javascript’; ga.async = true;
ga.src = (‘https:’ == document.location.protocol ? ‘https://ssl’ : ‘https://www’) + ‘.google-analytics.com/ga.js’;
var s = document.getElementsByTagName(‘script’)[0]; s.parentNode.insertBefore(ga, s);
})();</script>
Edit the Template Index file
- Login to the Mambo Administration back end.
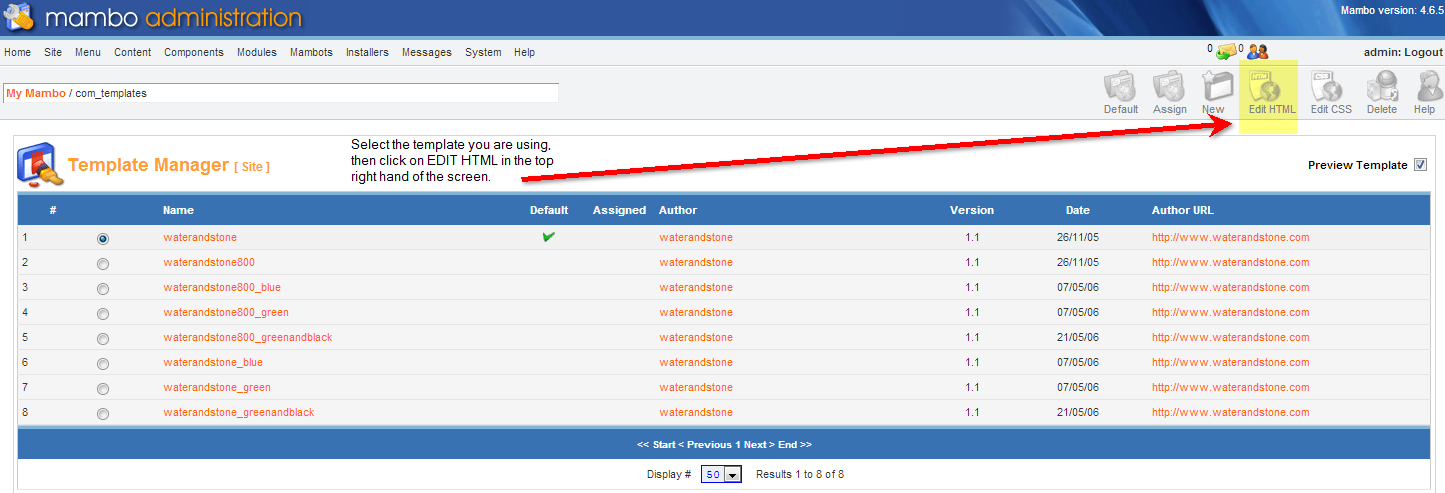
- Hover over the SITE menu item, then click on TEMPLATE MANAGER>Site Templates when the drop-down menu appears.

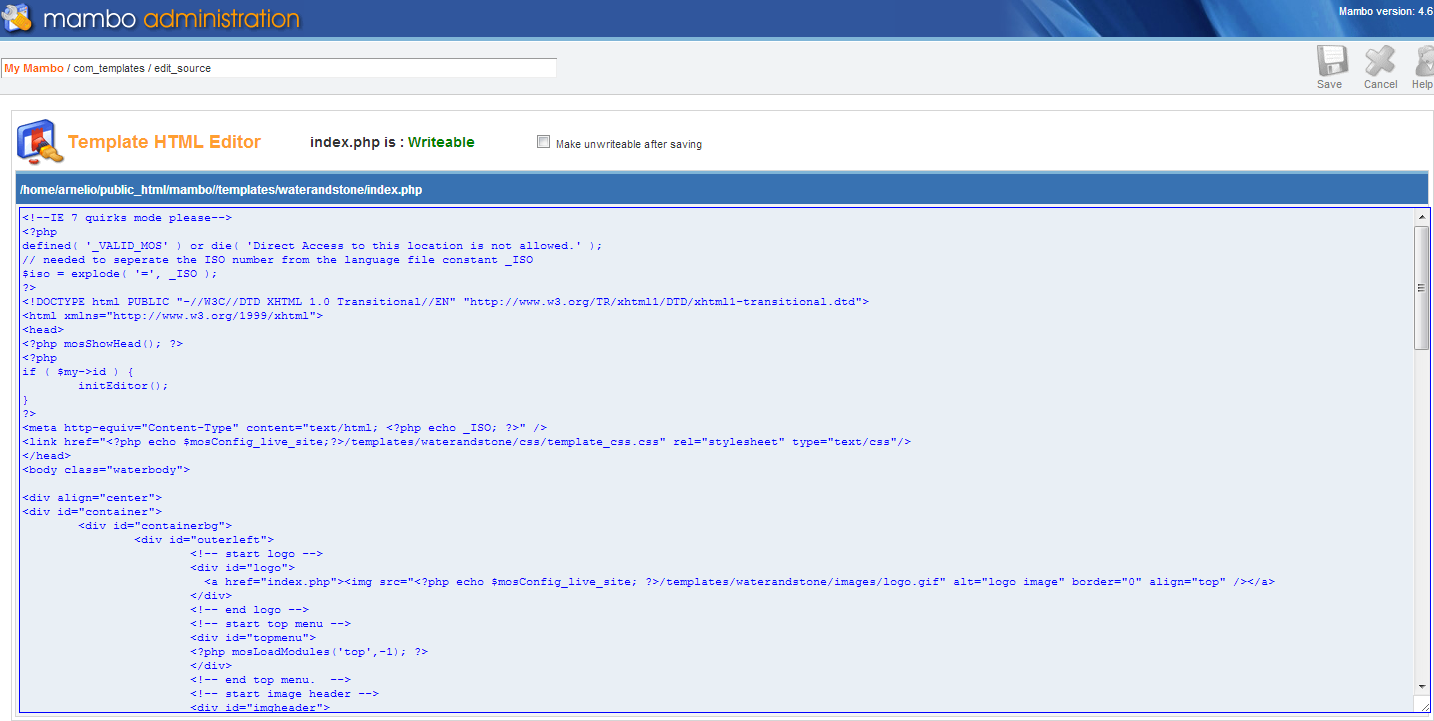
Click on the radial button for the template that you are using in your Mambo front end, then click on EDIT HTML in the top right hand corner. You will be editing the INDEX.PHP file of the template. You can verify this by looking at the file name immediately above the code edit window.

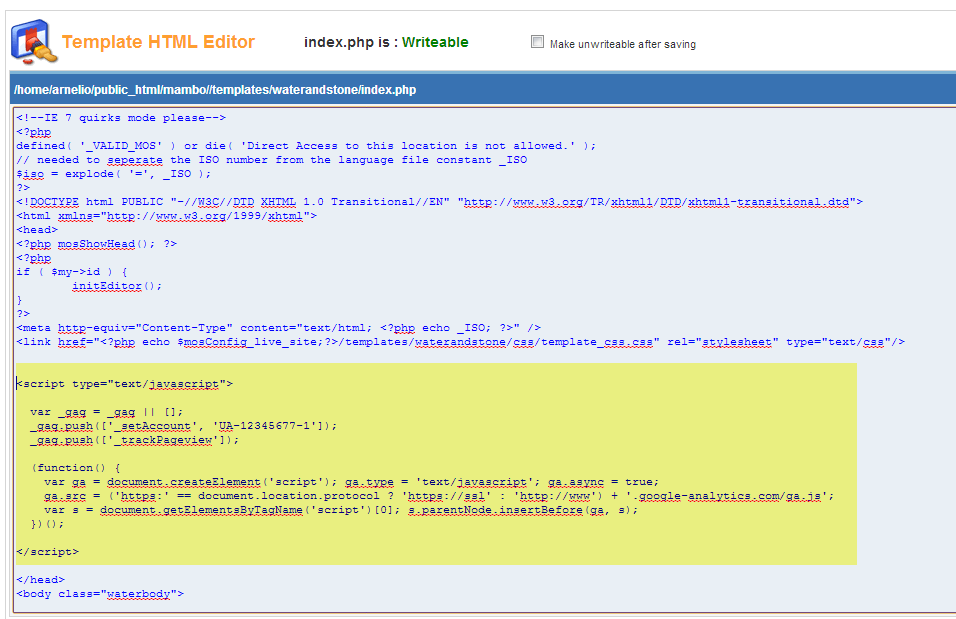
Find the “</head>” tag within the code, click in the edit window so that your cursor is blinking in front of this tag, then click on your enter key a few times to add an empty space in the code.

Retrieve the Google Analytics code from the first part of this tutorial. And paste it into the space you created. The code should be pasted BEFORE the “</head>” tag.
- Click on SAVE in the top right hand corner.


