Table of Contents
In MediaWiki, you can have multiple images fade or slide in an image slider. There are a few steps to do this, which involves editing source code files. Before we get started, you will need to obtain the “Extension:JavascriptSlideshow“. The Extension can be obtained at the following URL.
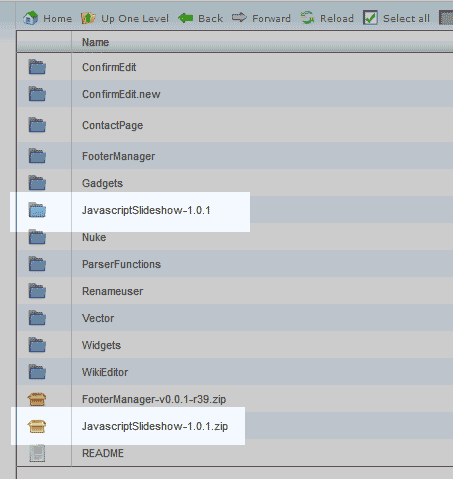
Download the JavascriptSlideshow-1.0.1.zip file to your local computer. Once you have the extension, follow the steps below to get the image slider extension working.
Steps to install the Extension:JavascriptSlideshow

Upload and Extract the files in a directory called “JavascriptSlideshow” in your “extensions/” folder located in the root directory of your MediaWiki directory.

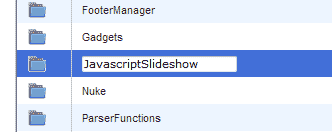
Rename the folder to the following:

Add the following code to the bottom of your LocalSettings.php file found in the root directory of your MediaWiki installation.
Save the file.

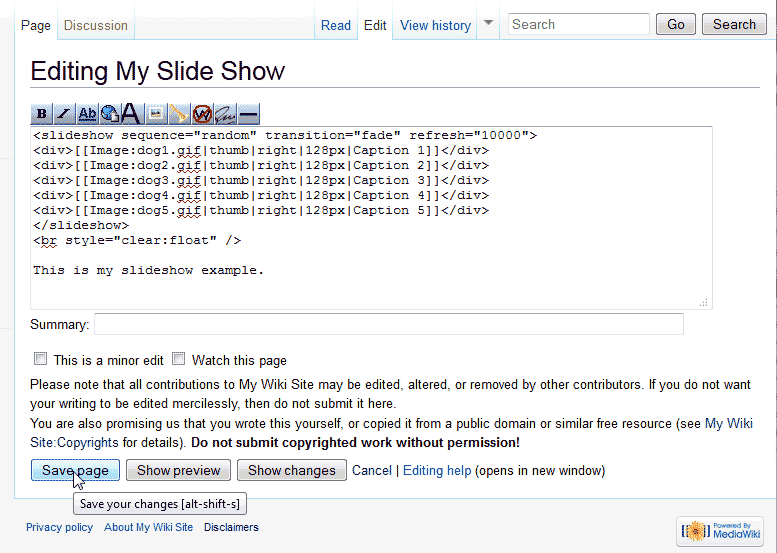
Now that you have the line of code in your LocalSettings.php, you can add the code to your MediaWiki page that shows the images. Log into MediaWiki and edit the pagethat you want to put the slider in and add the following:
Important! You will need to upload your images to your MediaWiki site and change the image names in the code to your image names that you uploaded.
You can also control the image slider functions by adding the following to your MediaWiki page that has the slideshow in it.

In order for the slide show to position correctly, the JavaScript and CSS files will need to be edited. Navigate to the following location and change the “parent.style.position” to “relative“.
Change the following line:
To the following:
Save the file.

Now navigate to the CSS file in your MediaWiki Skin. In this example we are editing the “Vector” skin screen.cssfile. The path is the following location:
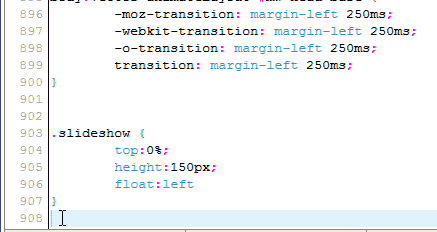
Add the following code to the bottom of your CSS file.
Save the changes.
Important! You will want to customize the height in the CSS to fit your specific image size.
Now you will see your image slider working like the snapshot to the right.
Optional parameters in the Slideshow plugin
Below are the available settings for configuring the behaviors in the Extension:JavascriptSlideshow plugin.
| Slide show parameters | |
|---|---|
| id | Allows the slideshow to have CSS style applied using the id.. |
| refresh | This will transition each image milliseconds. 1000 milliseconds is one second. |
| sequence | The following values will order the image sequence:
|
| transition | The following values transition the images:
|


