Table of Contents
In the event that MediaWiki cannot be installed through a program like Softaculous or Fantastico, the MediaWiki software will need to be installed manually to the server. MediaWiki can be Downloaded from the Mediawiki site at the following link.
The Version that will be installed is MediaWiki 1.20.2. Make sure the file that is downloaded is named:
mediawiki-1.20.2.tar.gz
Manually Installing MediaWiki
- First, Create a subdomain in the cPanel Domains section.
- Create a database and database user. Add the database user to the database and save the Username, Password, and Database name in a notepad or other editor to reference it later. This will be needed to set up the Mediawiki program.
- Upload the mediawiki-1.20.2.tar.gz file through the cPanel and extract the file to the server, or upload the contents of the mediawiki-1.20.2 folder, that is extracted to your local computer, to the directory for the subdomain using ftp.

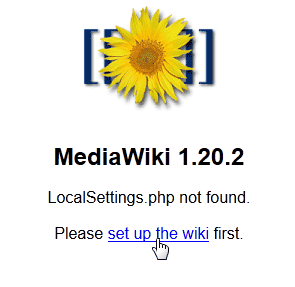
Visit the subdomain in your web browser. Initially the MediaWiki 1.20.2 screen should load.
Click set up the wiki

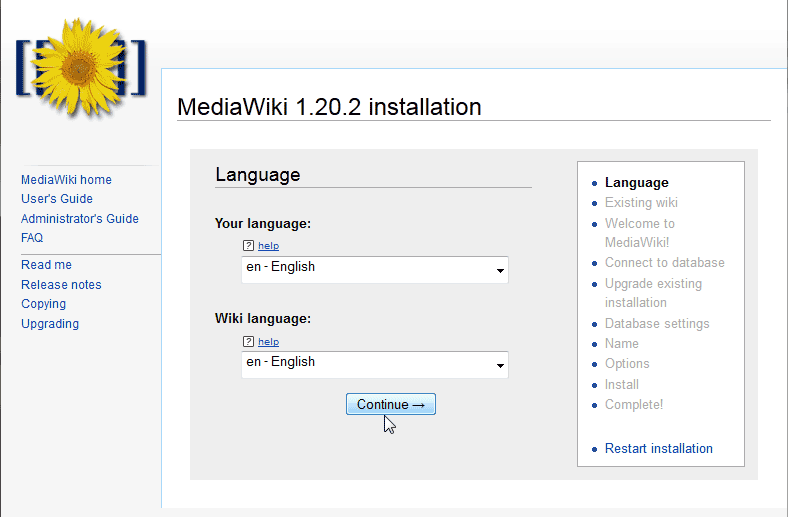
Next, the MediaWiki 1.20.2 installation screen will load. Select the language for the site and click Continue.

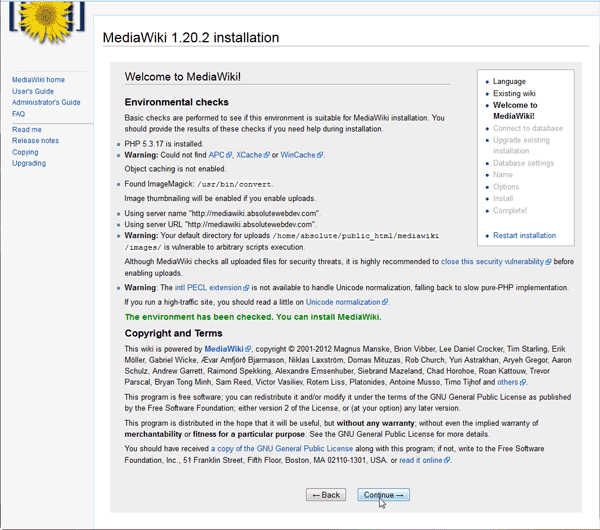
On the Welcome to MediaWiki page, there may be some warnings on the set up. For example the following error may display:
Warning: Could not find APC, XCache or WinCache.
Object caching is not enabled.Ignore the warnings. The APC warning is a caching for PHP on the server. Shared servers do not have this. If you are an a VPS or dedicated server, you can have your server set up to run APC. At this point this is not critical.
As long as the installation says “The environment has been checked. You can install MediaWiki” in Green, you can continue with the installation.
Click Continue.

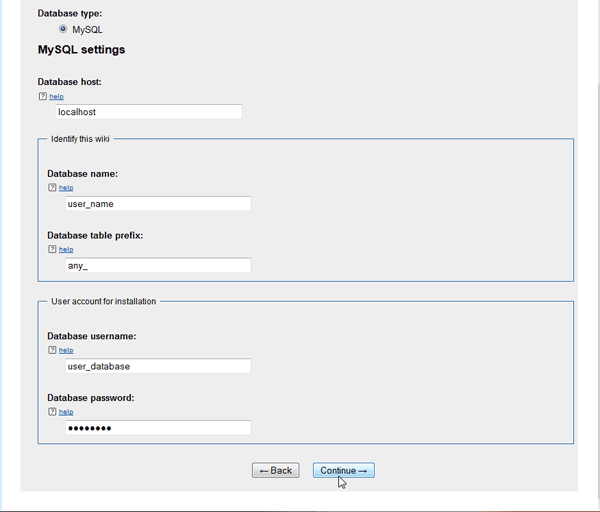
Next the page for configuring the database will display. Here is where you will enter the database information that you saved when setting up the database in your cPanel. Enter the database connection settings. For example:
Database host: localhost
Database name: cpaneluser_databasename
Database table Prefix: This can be left blank or set to anything. ( ie. mw_ or wiki_ )
Database username: cpaneluser_username
Database password: The password you set when creating the user in cPanelClick Continue.

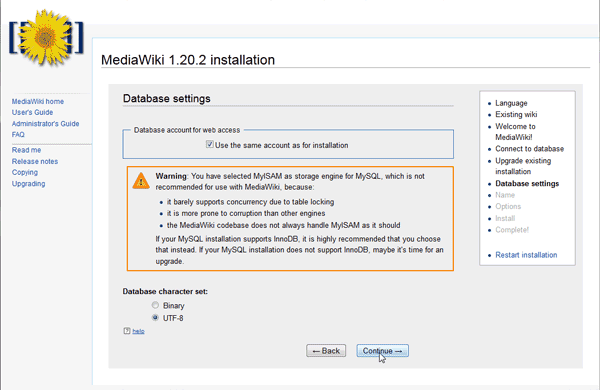
Next, The Database settings page will show. Select InnoDB and Binary.
If there is any InnoDB issues the site will show the error in the snapshot stating,
“Warning you selected MyISAM as a storage engine for MySQL, which is not recommended for use with MediaWiki”. If this occurs, contact your host to fix InnoDB on your server.
InnoDB is recommended by MediWiki. MyISAM is discouraged to to stability problems.
Binary mode allows mediawiki to use the full range of Unicode characters, whereas UTF-8 mode will only store basic language encoding’s. MediaWiki recommends binary mode.
Click Continue.

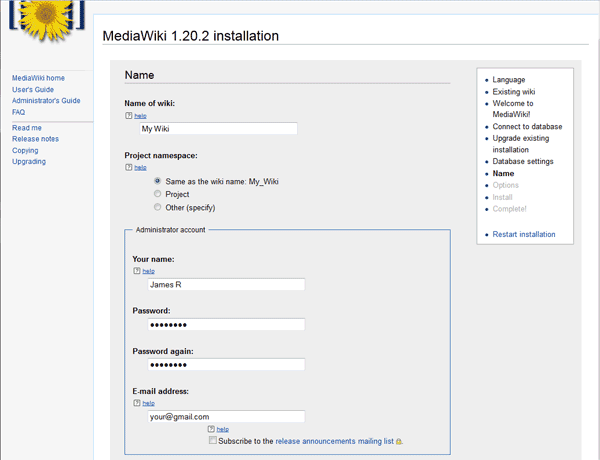
The Name page will load, requiring the basic Wiki admin login and Site name set up. Fill in the fields for the administrator account.
VERY IMPORTANT! The “Your Name” Field is actually the user name for logging into MediaWiki. It is VERY CRITICAL that the username for the login is correct. After setting up MediaWiki, it is VERY difficult to change the username for the Admin login.
Select the I’m bored already, just install the wiki radio button and click Continue.

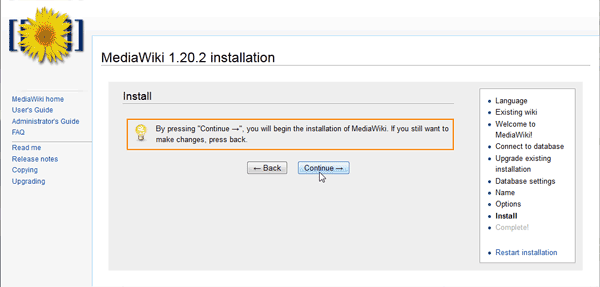
Confirm the installation by clicking Continue.

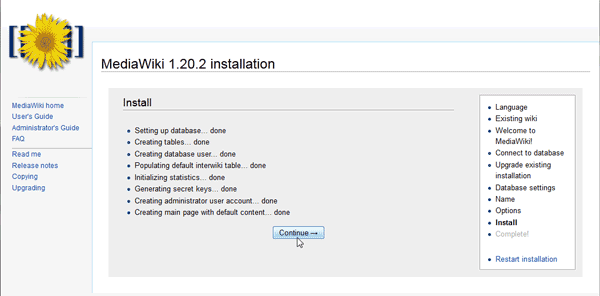
The install screen will load next verifying that the files were installed correctly. Click Continue.

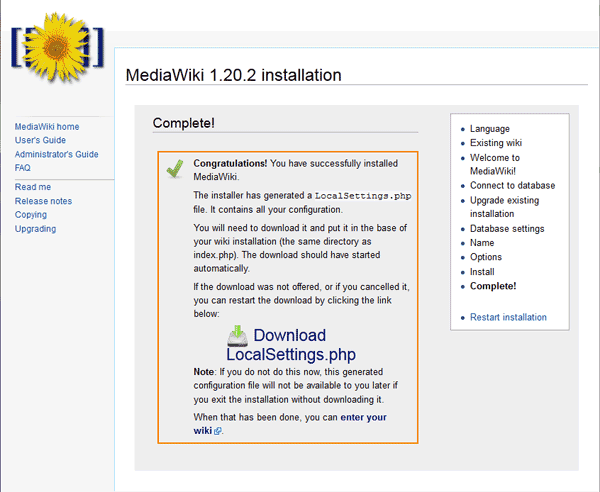
When the Complete! screen pops up, you will be prompted to save the LocalSettings.php page for uploading to your server. This file is required for the MediaWiki site to function. Save the LocalSettings.php file and upload it to your MediaWiki directory.
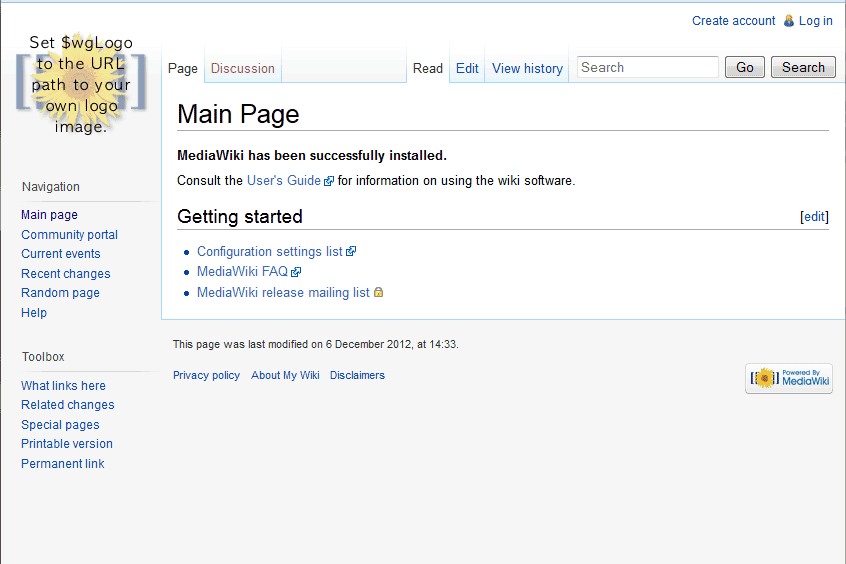
Congratulations, you have installed MediaWiki successfully.
This concludes the tutorial on How to manually install MediaWiki.
