After adding an activity or resource to a course in Moodle, new users can be set up for accessing the Moodle site. The most important factor in setting up a Moodle site other than creating courses is to create users for logging in and taking courses. In this article, we will outline how to create users in Moodle.
Topics Include
- Creating Users in Moodle
Add more students to your Moodle courses to get the most out of your Dedicated Hosting experience.
Create Users in Moodle
1. Log into the Moodle Dashboard
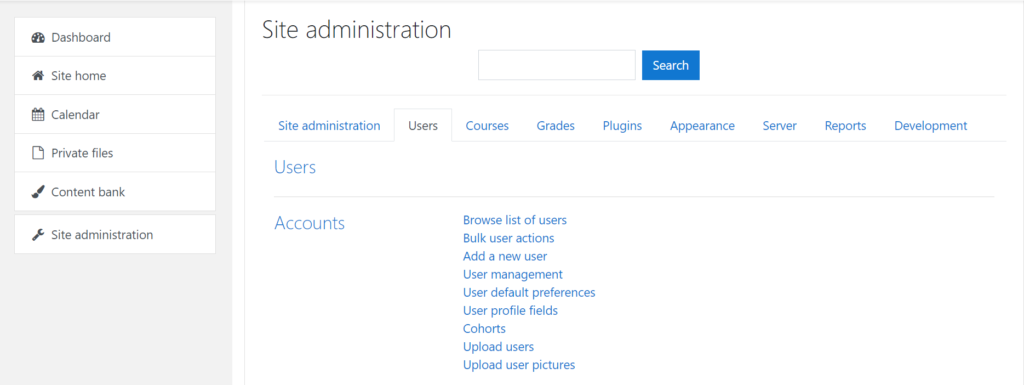
2. In the Site Administration section on the left in the Settings section, navigate to Users > Accounts, click Add a new user.
Important! Keep in mind that editing must be turned on in the Settings section in order to edit any of these options.

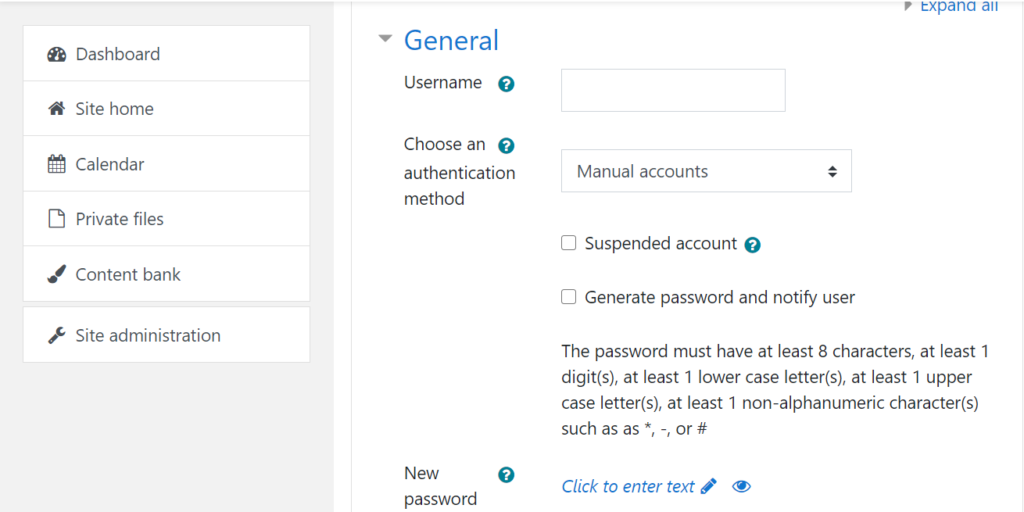
3. On the next page, fill out the required fields. The required fields show in red and are the username, new password, first name, surname and E-mail address. See below for a brief description of what each section contains. Once these values are set, click Create User.

General: The general settings contain the basic information for the user like the username, password, address and email, and other login information. The Choose an authentication method drop box determines how users are authenticated when logging in. With this setting, the authentication method must be available in order for the method to work. In most cases, the Manual Account will be selected. To prevent users from logging in, the method can be set to No Login.
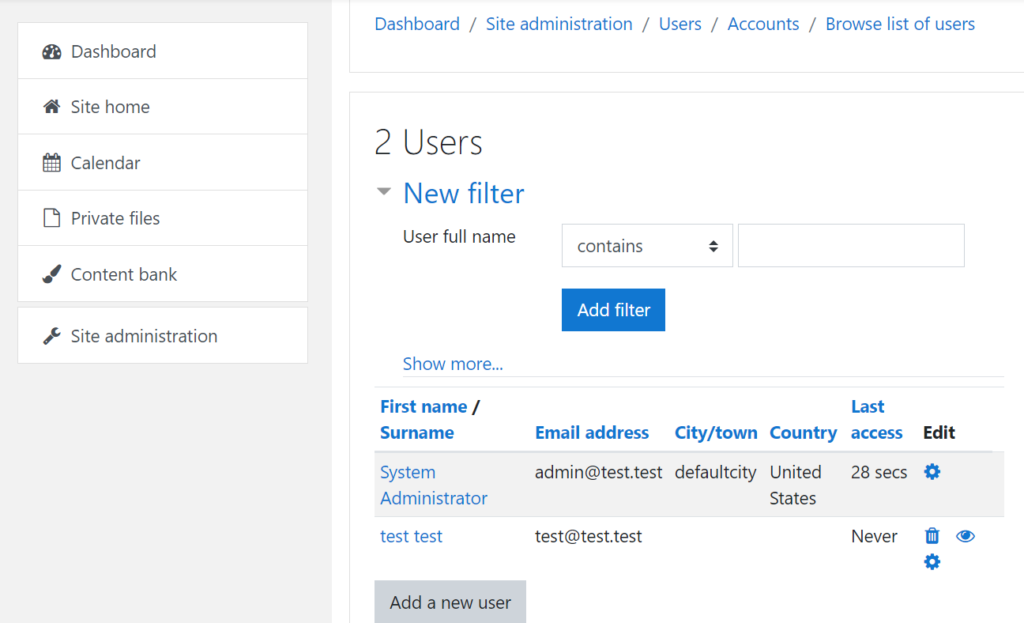
4. After the clicking Create User, the users list will appear with the users in the Moodle database. If the user list does not show, click in the Settings section to the left, Site administration > Users > Accounts > Browse list of users to view the User list.

This concludes the tutorial on Adding new users to the Moodle User Accounts in Moodle 2.3. Please check the next article on Editing User profile fields in Moodle. For more information on this Education Channel please visit Managing users and roles in Moodle.
