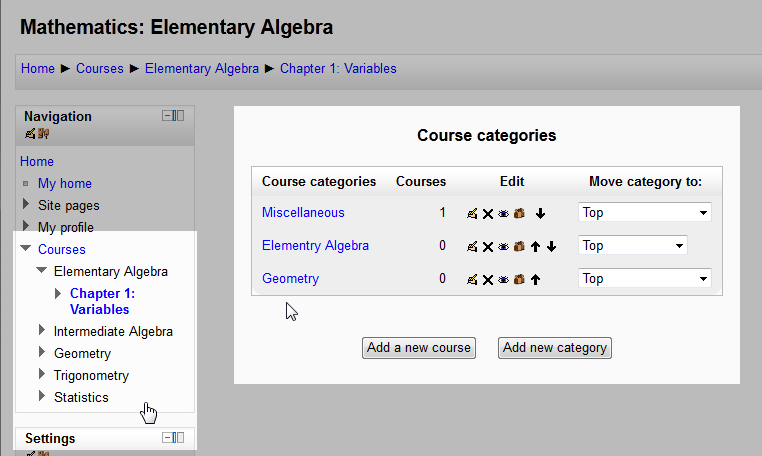
Once you have a firm grasp of previous article Changing the Course defaults in Moodle, the courses can be organized according to categories. This tutorial will outline how to create and edit categories in Moodle. Moodle version 2.3.2. was used for tutorial.
Creating and Editing Categories in Moodle
- log into the Moodle Dashboard
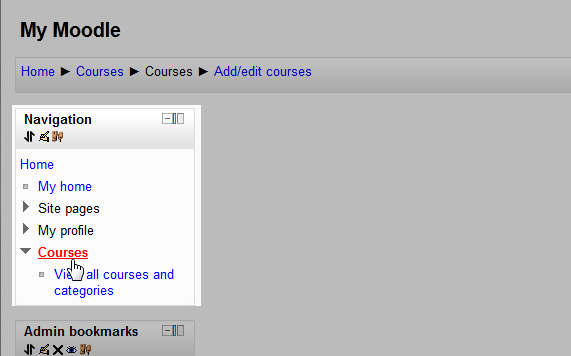
Click Courses on the left in the Navigationsection.
Important! Keep in mind that Editing must be turned on in the Settings section inorder to edit any of these options.

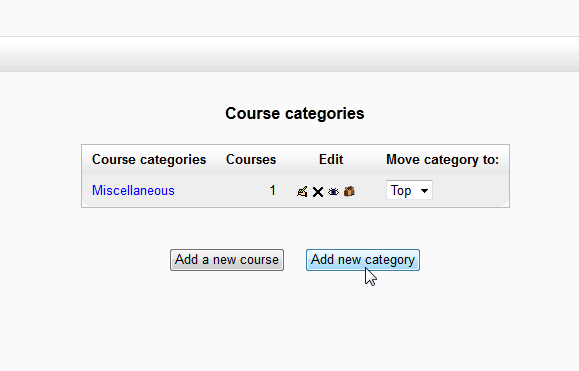
Click Add New Category.

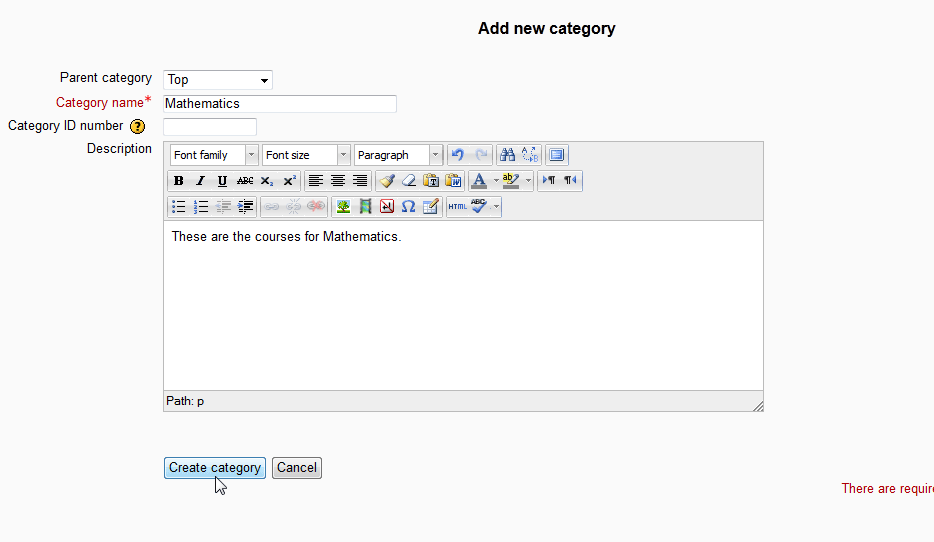
On the Add New Category page, add the Category Name, Category ID (If the ID is not required leave blank), and Description. Sub Categories can be set in the Parent category drop box. This is if the category is a sub category of an existing Category. When finished click Create Category

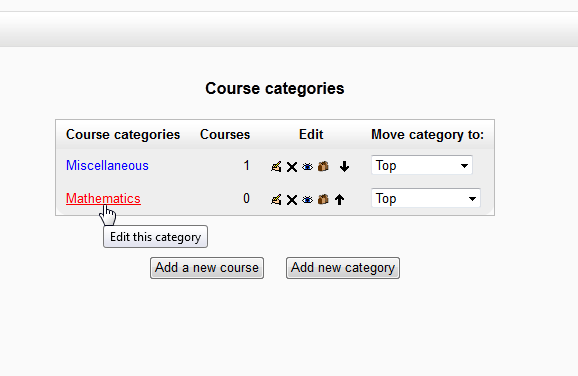
Click Courses and the New category will appear in the Course CategoriesList. If a mistake was made, Click the course name. This will bring up the page for selecting a category to edit.

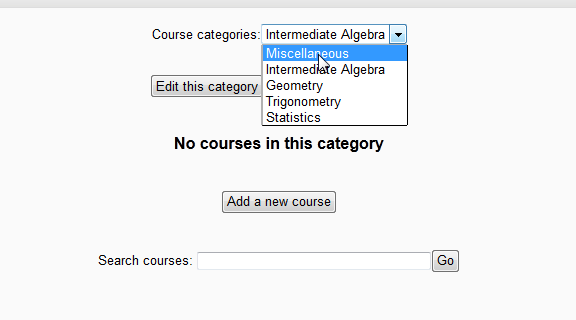
The course can be selected in the Course categories drop box. Click the Edit this Category button to go to the Edit category settings section for editing the existing category. When done click Save Changes.

After the Categories are set, the Courses can be set for the categories. The Categories will appear similar to the following snapshots.
Once the Categories are set up, the courses can have content placed in them. The following tutorial will explain How to set a Course to a specific Category. For more information creating courses, please visit our education channel on Creating Courses in Moodle.
