Table of Contents
Once you have the theme changed to your satisfaction, you can add a background image, footer image, and more. In this article, we will learn how to change the background in your osCommerce website.
Create a background image
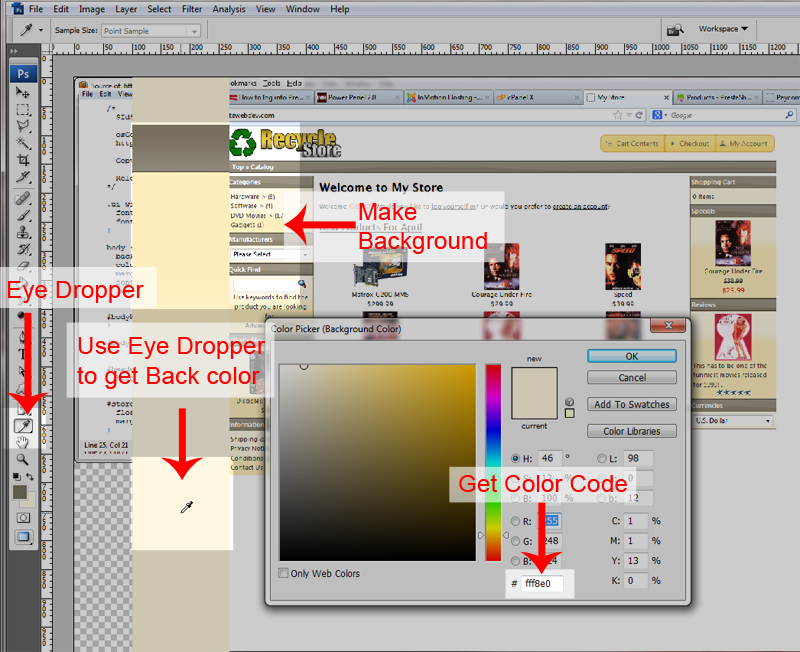
- Take a snapshot of your osCommerce site and open it with a Photo editor. In this tutorial we are using PhotoShop.

Use the tools in your Photo Editor to create a background image. The background we will make will be a very narrow image that will duplicate across the screen.
1: Create the background image
2: Use the Eye Dropper to get the Color for the background
3: Copy the color code for the background (In this case the code is fff8e0).

Crop your Background image so it looks like the image to the right. (You will need to click the image to see the full size)
Save the image as:
Steps to Change your osCommerce background
- Login into your cPanel.
- Go to the File Manager. Select your osCommerce installation directory and click Go.

Upload your background.png background image to the images folder in your osCommerce installation directory.

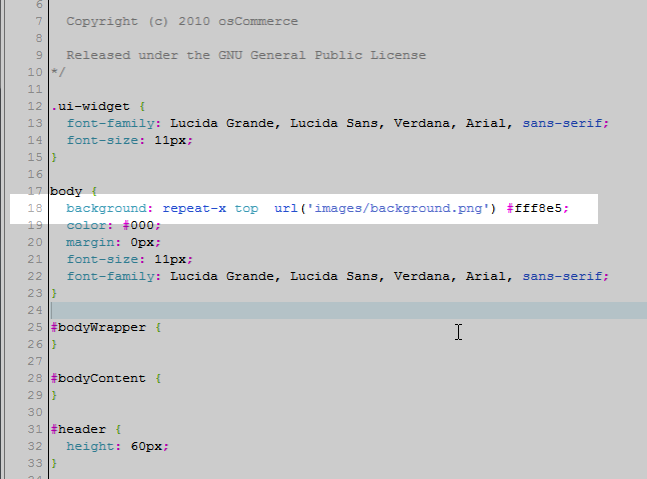
Edit the stylesheet.css file in your osCommerce root directory.

Now we will add the code to the CSS that will display the background image and change the background color to #fff8e5. The “body” CSS code is what will be edited. (See image to the right)
Change the following code:
To the following code:
Save the file.
Now visit your website and see the changes. You should see the site look like the image to the right.


