Taxes are often a necessary part of your online business. osCommerce has tax section in the Administration back end that allows you to setup taxes from most anywhere in the world, and if it’s not listed, you can also create new zone. The following tutorial shows how find then setup a tax within the osCommerce Administrator dashboard.
Adding Tax Rates in osCommerce
Taxes will differ from state to state and in different countries so you will need to research each location and setup the tax zones based on where your customers are accessing and purchasing. A good general for taxes around the world is here: List of Countries by tax rates. This page includes the the sales tax VAT (Value Added Taxes) that you will often need to set. Additionally, you will find links to the official sources for the appropriate tax rates. To insure that you are not violating tax laws, please research the necessary tax laws for the areas where you will selling your product.
How to Setup Tax Zones
- Login to the osCommerce Administrator dashboard.

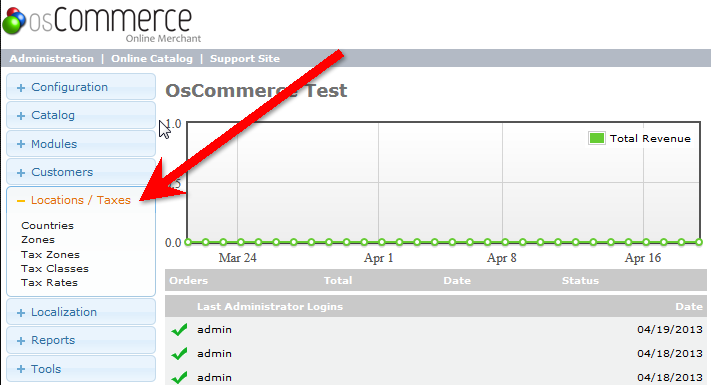
Scroll down the menu on the left and click on Locations/Taxes from the menu, then click Tax Zones when it appears in the list.

Look to the right of the screen and click on the INSERT button. Under the New Zone menu enter the Zone Name that you wish to use. You can also a Descriptionbut it is not required. Note that the screenshot at right shows Florida which is added by default.
- Click the SAVE button in order to save your entry. You will see the new Tax Zone listed after you save it.

Double-click on the new zone you just created in order to select it and open it.

Click on the INSERT button and you will see option on the far right select the Country and Zone where you need to specify the tax.

Click on the drop-down arrow for the Country and the drop-down arrow for the Zone in order to set the proper region that you want to set the tax. In the screenshots, I have created the Tax Zone called Virginia, so I specify that region in the Zone menu.
- Click on SAVE in order to save your selections.
Create a new Tax Rates:
- If necessary, log back into the Administrator back end. Scroll down the menu on the left again and click onLocations/Taxes. Click on Tax Rates to proceed.
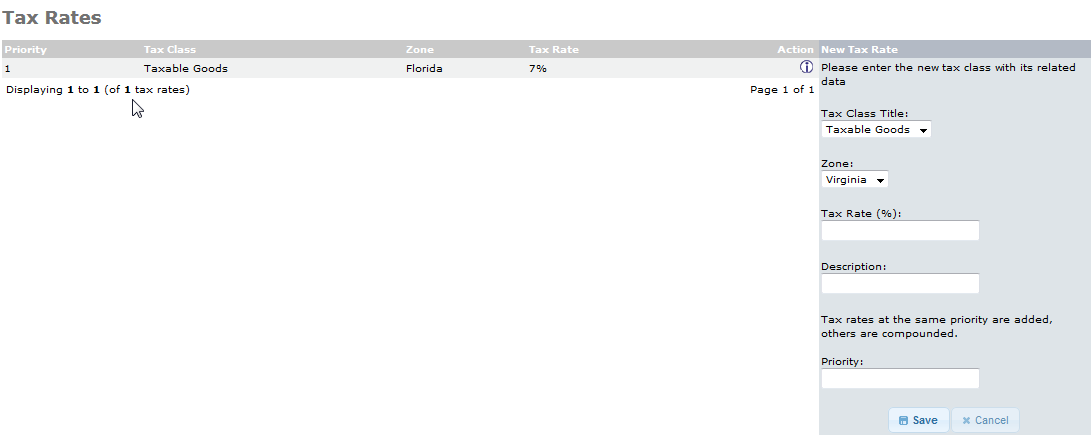
- On the Tax Rates page look to the right and click on the NEW TAX RATE button. A New Tax Rate menu will appear. There will be a new tax rate dialog box that appears on the right.

Click on the drop-down error for the appropriate Tax Class Title. You may also need to select the proper Zone. Remember that you need to show extra care and double-check your entries for the tax rate used.

Click on the Priority field in order to add the priority in which the tax will be applied. Note that if two taxes with the same priority apply to the customer, then the taxes will be applied to the total before tax, then added together. If they are set with different priorities, then they will be compounded, the first tax (with the lower priority number) will be added to the total, then that sum will be taxed with the next tax.
- Click the SAVE button in order to save your changes or additions.
Taxes are very often a necessity for your business, but osCommerce makes it easy to enter tax rates for any location through the Administrator dashboard. Always carefully review your tax needs for any particular area or location.


