Table of Contents
Using the Banner Manager within osCommerce allows an administrator to manage existing banners, add new banners or delete unwanted ones. The managing portion of the interface includes being able to view the banners outside of the store interface, view existing banner statistics and edit the details of the saved banner. The following tutorial describes these sections and how to use or view them in the osCommerce Administrator dashboard.
Viewing and Editing Banners in osCommerce
Editing banners in osCommerce allows you to change organizational information or change HTML text if the banner consists of text entered within the Banner Manager interface. The edit option does not allow you to edit the graphical appearance of a banner. You would need to edit the graphic file in a graphics program to accomplish that type of edit.
Using the Edit Option in the Banner Manager
- Log into your osCommerce Admin dashboard.

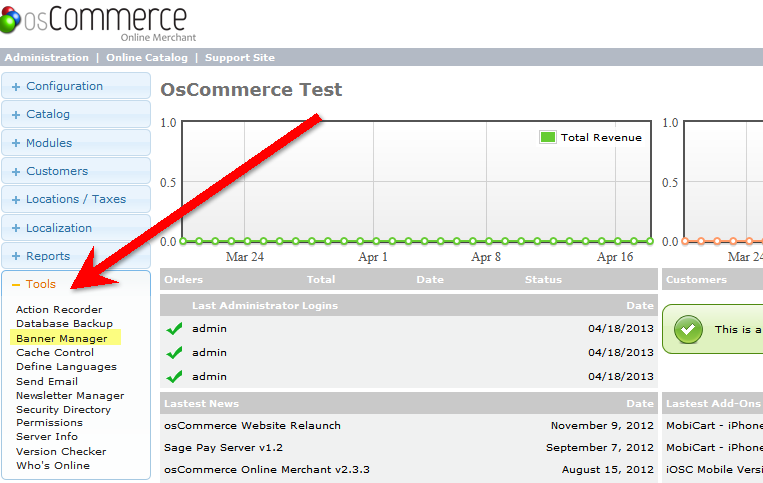
Move your mouse pointer to the left side of the screen and then scroll down until you find the TOOLS button. Click on this button and the menu will expand.
- Click on the BANNER MANAGER to open the interface.

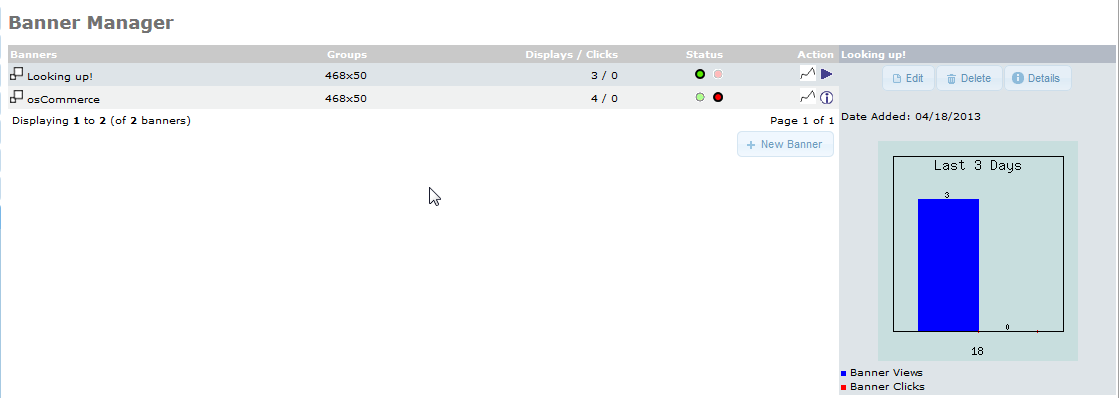
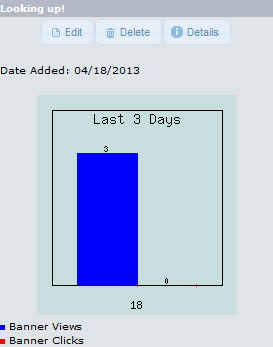
When you click on the Banner Manager option in the menu, you will see the table listing any existing any banners. Note that to the right of the table you will see a bar graph indicating the active banner’s views and banner clicks. Click on the row for a banner that you wish to view/manage.
- After you select the row for the banner you wish to edit, look over to the far right of the table and click on the EDIT button.

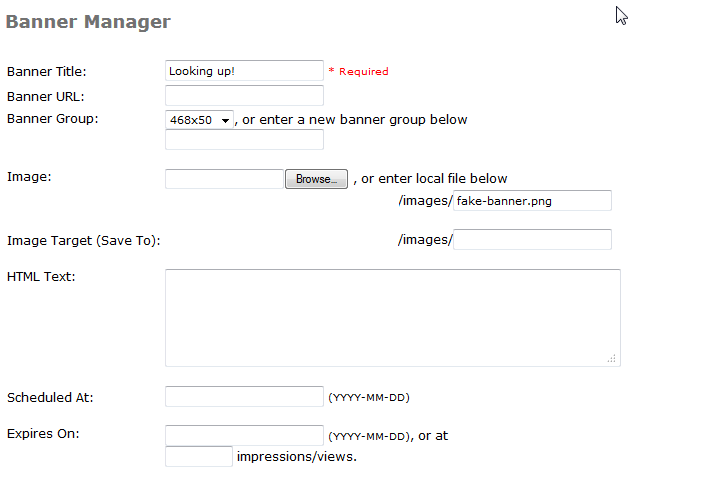
Clicking on EDIT will bring up the same options displayed when you add a new banner. They include the fields for Banner Title, Banner URL, Banner Group, Image, Image Target (Save to), HTMl Text, Schedule At, and Expires On. Each of these options are detailed in the table below:
Option Description Banner Title Add banner name here – this is a required field Banner URL URL used if the banner is clicked by a website visitor Banner Group Select an existing group, or create banner groups to organize multiple banners Image Click the Browse to use this interface to upload a banner image. You can also use a URL location for the image Image Target (Save To) Define where the banner file will be saved HTML Text You can use text instead of a graphic file for the banner. The banner can also be formatted using HTML. Note that if you have text defined here, it will override an existing image as the text has priority. Scheduled At Schedule when a banner appears by placing a date here. Expires On You can also define when a banner expires by scheduling it in this field. - Click on SAVE in the bottom right hand corner if you need to save any changes. Click on this option now in order to return to the main edit view. Note that a green bar will appear in the top of the screen confirming the save. Next we will focus on viewing the banner and the statistics available with the interface.
Viewing the Banner and Banner Statistics

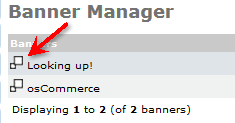
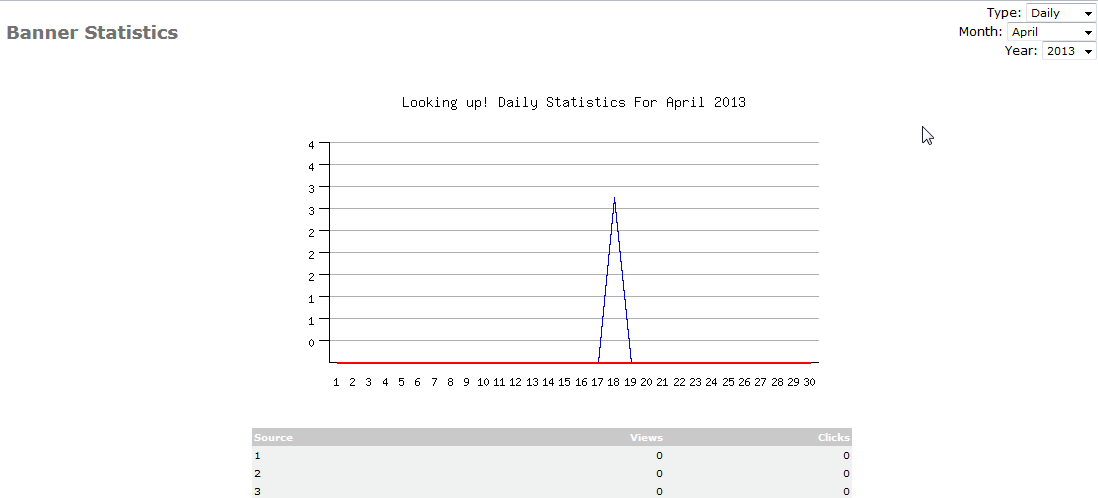
Click on the button to the left of the banner name in the table (see screenshot at right). This will display the banner by itself without the storefront interface. Notice that the banner is displayed in a separate window. Additionally, this button displays the line graph and chart for the banner viewing statistics. The options to get to this view of the statistics information are redundant because it can also be accessed in the DETAILS button at the far right as well as the left icon in the ACTION column of the title. Close the window displaying the banner by itself, then click on the back button in your browser to return to the previous menu. Or, go the menu on the left and return to the Banner Manager in the Tools section.

Scroll over to the ACTION column in the table listing the banners. Click on the right icon for another banner. This will enable the display of the bar graph for that banner on the far right. If you have only one banner then it will already be showing the banner views and clicks in the bar graph at right. The bar graph will also be titled with your banner name. The triangular icon indicates that the banner is displayed at right (the icon is pointing to the right). The other icon resembles a lower case ‘i’ inside a circle. Click on DETAILS to go back to the line graph displayed earlier.

Note that when you are viewing the daily statistics you can change the type, month and year in the top right corner. The Type includes daily, monthly, and yearly views of the data. The chart below it shows the data per month in terms of views and clicks.
- Click on the BACK button in the bottom right hand corner to return to the Banner Manager view.
This concludes the tutorial on managing banners using the Banner Manager interface. If you are looking for information on adding a new banner or deleting/disabling banners in osCommerce, please go to the following articles:
