Table of Contents
osCommerce is a free open-source for creating an online store. There are two ways to install this program into your hosting account, either manually, or via the softaculous installation tool. This article will guide you on the method of installing osCommerce with the Softaculous tool.
Installing osCommerce via Softaculous
- Log into your cPanel interface.

From the main cPanel screen, look for the Softaware/Services and click on the Softaculous icon.

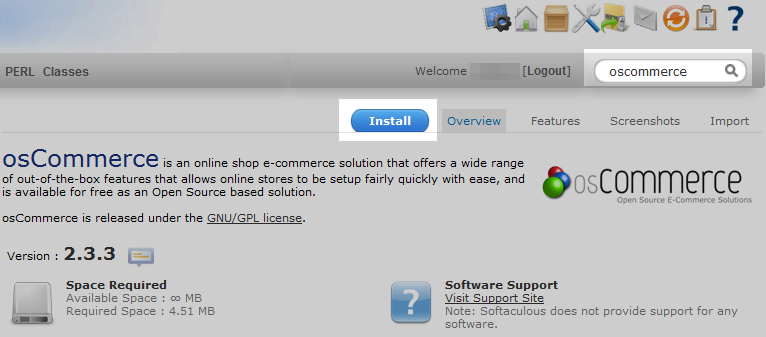
Once on the Softaculous main screen, do a search for oscommerce. The osCommerce overview page will appear. Click the blue Install button to begin.
- A settings screen will appear for you to customize your installation. Below is a table of the different options and their descriptions:
Setting Description Choose Protocol Select the protocol for the domain. If you do not have an SSL certificate installed for this domain on your hosting account, choose one of the https:// protocols. It is usually best to leave this as it is. Choose Domain Select the domain name to which you are wanting to install the program. The Primary domain, subdomains, and any addon and parked domains on the account will be listed in the dropdown. In Directory If you want to install the program into a subfolder for the chosen domain, enter it here. Leaving it blank will allow the program to install at the root folder for your chosen domain. Database Name A random database name is entered here. You may change it if you wish. Store Name Give your store a name. This can be changed later at any time. Store Owner Assign a store owner to your program. This can be changed later at any time. Store Address Give a physical address for your store. This can be changed later at any time. Admin Username Give your admin account a name. It is HIGHLY recommended that you do not use the default name admin or another variation such as administrator. Choose something unique. Admin Password Give the admin account a password. As with the admin name, It is HIGHLY recommended that you do not use the default password password or any variation (pass,pass123,password123,p@55w0rd,etc). Admin email Assign an email address for the admin account, this can be changed at a later date. Email installation details to If you wish to have installation details emailed to you, enter a valid email address here. 
Once you have entered your desired data into the fields, click on the Install button located at the bottom of the page.
