Table of Contents
In this article we’ll review how to install phpList manually onto your php website hosting. phpList is used for easy web based email marketing, and allows you to do direct email marketing to your users.
If you’ve been looking for a great way to send out email blasts, for opt in email marketing, phpList is among one of the simplest email marketing software packages that you can use.
If you’re already a customer of InMotion Hosting, I’d recommend using our guide on how to install phpList with Softaculous. That’s because the Softaculous installer that we use can complete a phpList installation with just a few clicks.
After you’ve completed a phpList installation, either manually, or with Softaculous, we’ll also cover how to configure and setup phpList in this education channel. This way you can take full advantage of this popular open source newsletter software.
To get started simply follow the steps below.
Download phpList from SourceForge

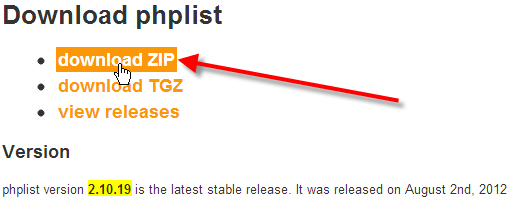
You’ll need to download phpList from phpList.com
Click on the download ZIP link.
The latest version of phpList was 2.10.19 at this time.

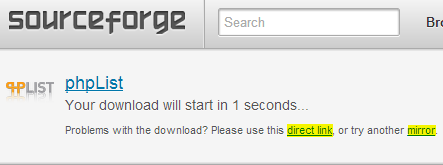
You will be taken to SourceForge to download the file.
Wait for the download count-down to complete, or you can click on either the direct link, or mirror links to begin the download.
- Extract the downloaded phplist-2.10.19.zip archive to a local folder on your computer.
Note the folder location as we’ll need to come back to these files in just a minute.
Create a MySQL database to store phpList settings
- First login to your cPanel.

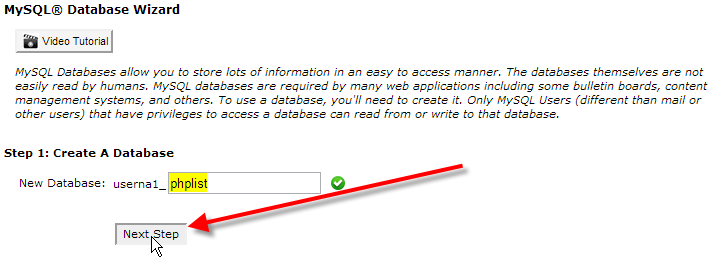
Under the Databases section, click on MySQL Database Wizard.

In the New Database field, give your database a name, in this example we’re using phplist. Then click on Next Step.

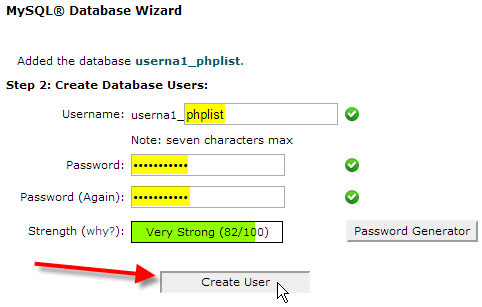
In the Username field, create a database username, in this example we’re using phplist. Then fill out and confirm the Password making sure that you’ve copied it down. Finally click on Create User.

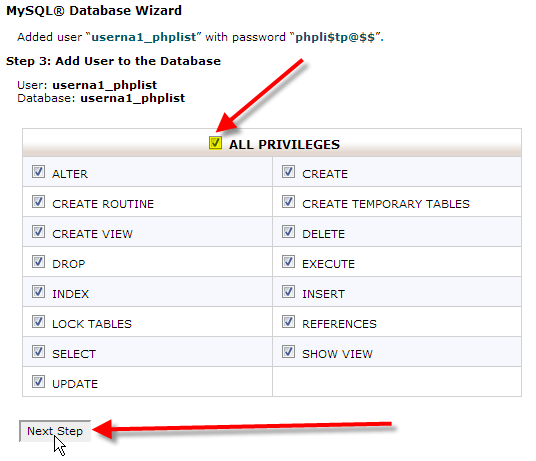
Finally place a check mark beside ALL PRIVELEGES, then click on Next Step.
- You should now simply see that your database user was added to your database.User “userna1_phplist” was added to the database “userna1_phplist”.
Upload phpList files via FTP to server
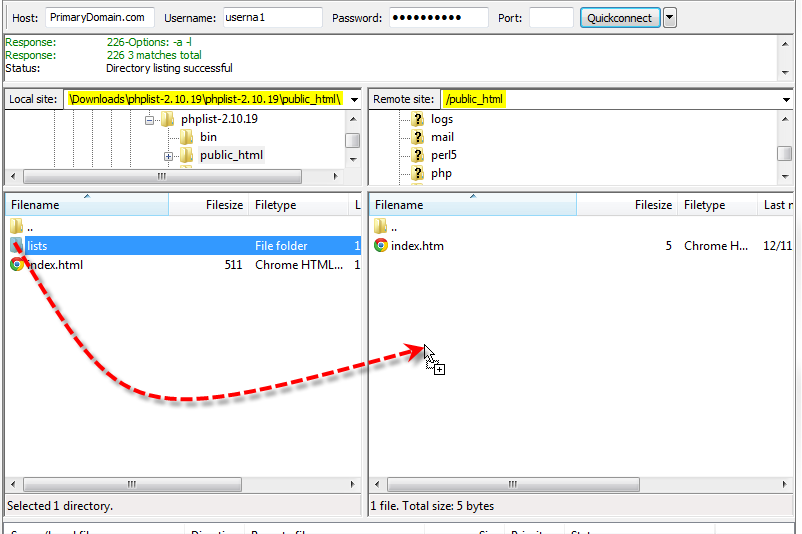
- Using your favorite FTP client, navigate to the local folder that you had extracted phpList to in the left pane, being sure to go into the public_html folder.
- Connect to your account on the server and in the right pane navigate to your /public_html/ directory.

Now drag the lists folder from your local computer, into the /public_html/ directory on the server.
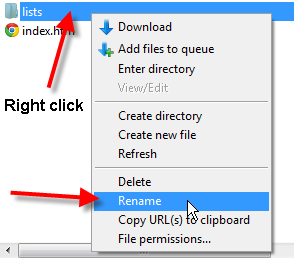
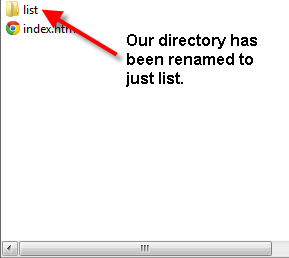
- You can right-click on the lists directory on the server, then select Rename if you want your phpList installation to be accessible from another location than the default. In this case I’ve chosen simply list.

Update phpList config.php to connect to your database
- Login to your cPanel.
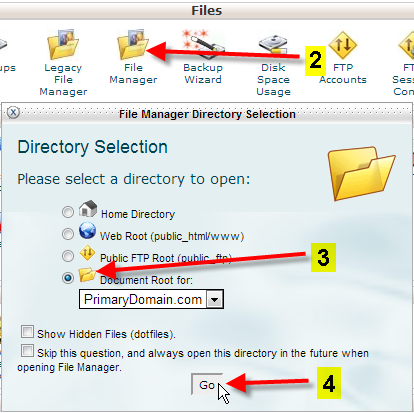
- Under the Files section, click on File Manager.
- Select the Document Root for: option, and choose your domain from the drop-down.
- Then click Go.

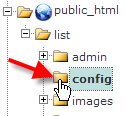
Navigate to the /public_html/list/config directory from the left-hand pane.

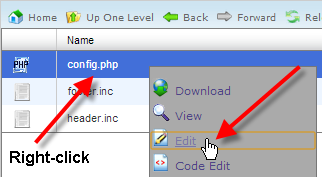
Now right-click on the config.php file, then click on Edit
- You might have a text editor encoding dialog box pop-up, you can simply click on Edit.
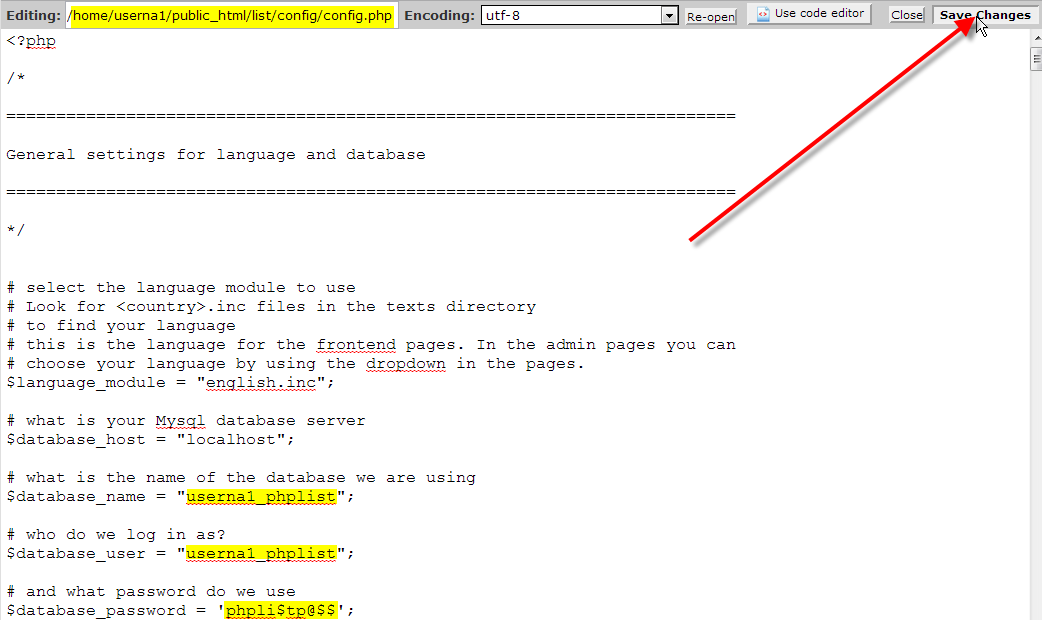
- Now you’ll want to enter in your database credentials that you setup earlier when creating your MySQL database. In our case this would be:
$database_name = "userna1_phplist";

$database_user = "userna1_phplist";

$database_password = "phpli$tp@$";
After making these edits, click on Save Changes at the top-right.
You should now have successfully installed the phpList newsletter management software manually onto your website. You can now continue on to my guide on how to complete phpList setup after manual install to finish setting up phpList.


Certainly appreciate your posting this to the web. I’m setting up PHPlist for some NGO’s in my area and you sure made it simple.
Very glad to hear that! Thanks for your feedback.
Hi Guys!
Great tutorial, but watch out because folder naming have changed, now you have yourdomain.com/lists/admin/ .
That little ‘s’ overther eaten 30 minutes of my life 🙂
Cheers! thanks for the help!
Man really!
You saved my day. After trying 3 hours of Installation your simple short guide saved my day.
Thanks a lot for this quick help!
Greetings from Germany