Table of Contents
Now, you are well on your way on building your website in Premium Web Builder, you are at the point in which you can add content to your webpages. There are four main parts we want to discuss when adding content:
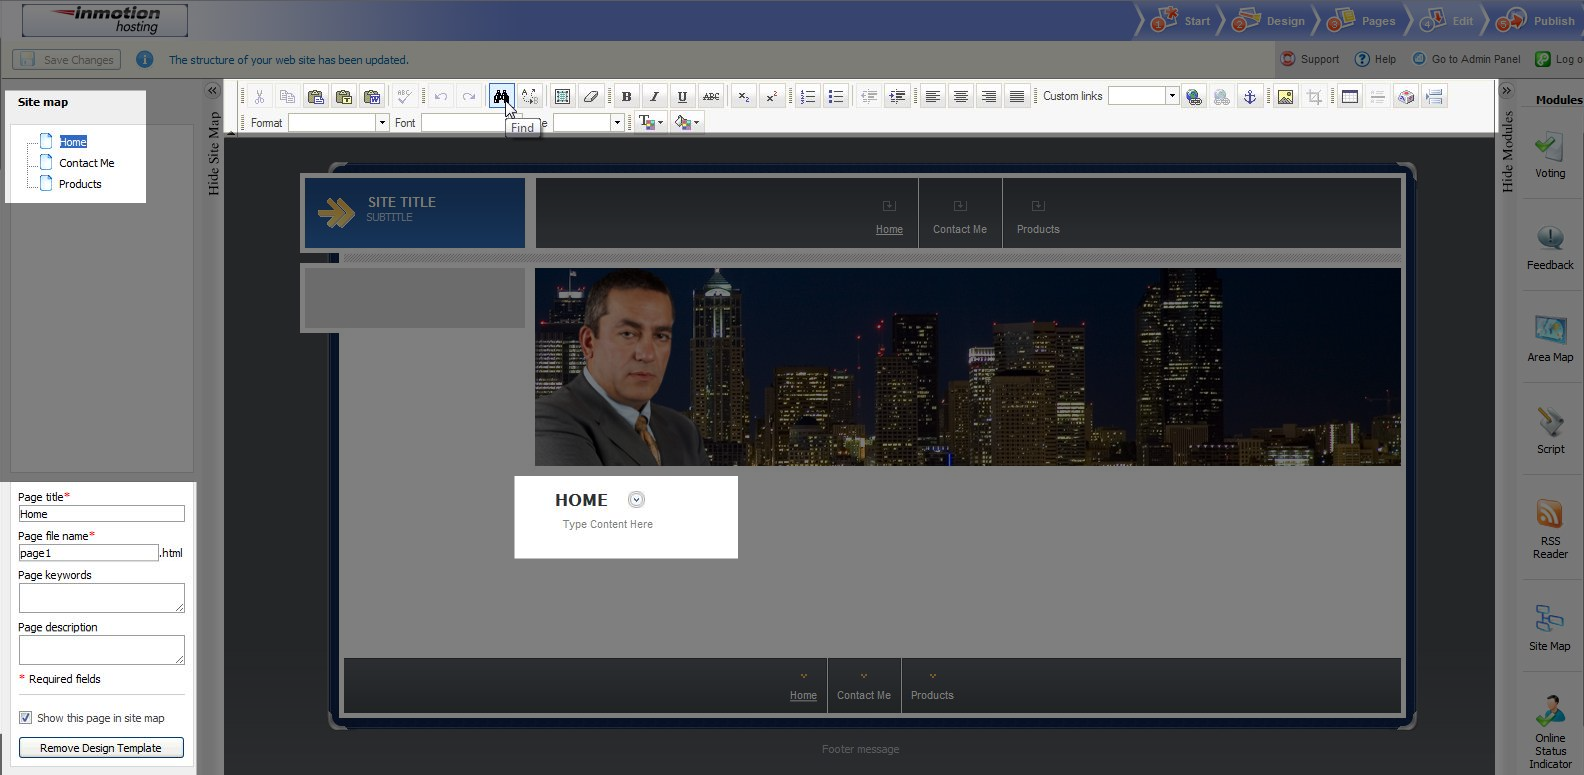
- The first part is the upper left, which is the Site Map. In the previous tutorial, you added pages to your website. All the pages you added to your website will be listed under your site map. If you select a page in the site map section, it will then load the page so you can add content to that page.
- Right below the site map section is another section, which adds meta tags to your pages, name the file, etc. Here you can set the page title, and decide on a file name.
- The third section is next to the site map. This is the editors tools. If you have ever used a word processing tool such as Open Office or Microsoft Word, it will look quite similar. This section is used to format your content.
- The last section highlighted is where you will actually be placing your content. This is where you will type.
Adding Text to the Webpage
Adding text to a webpage is simple. In the fourth section, where it is labeled “Type Content Here” just start typing. If you want to format particular words you will use the editing tools at the top. In this example, we’re going to make some type Bold.
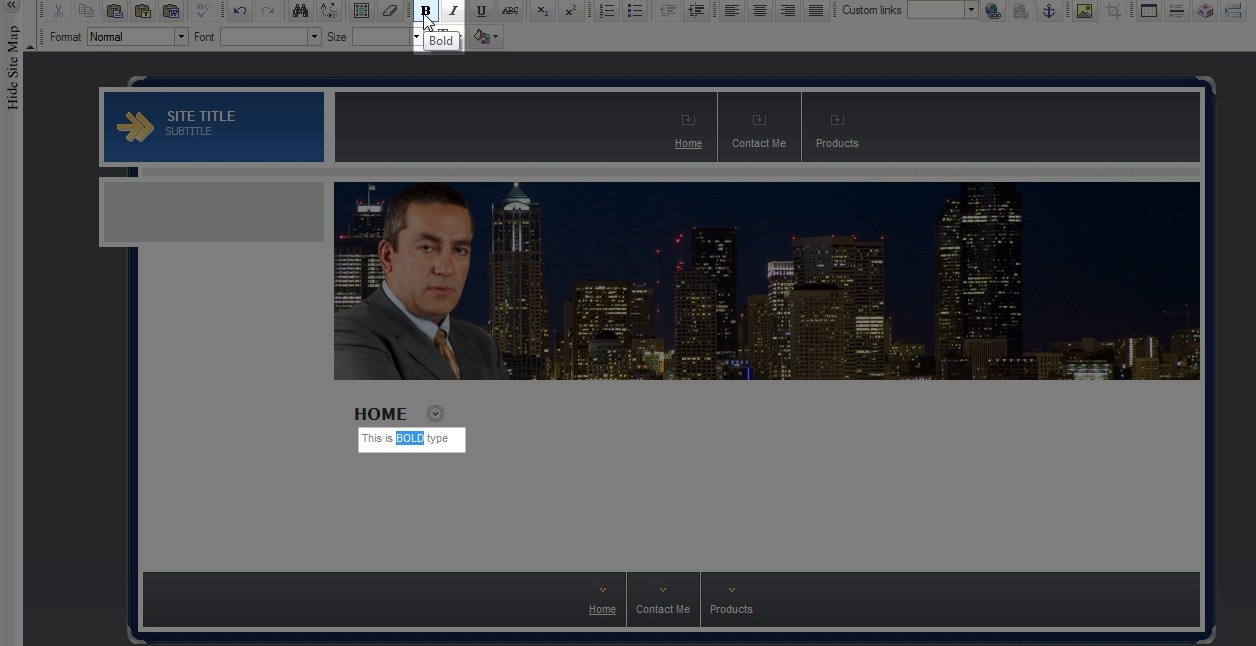
We type the text on the page and now I’ve highlighted the word I want to make bold. Next I go into the editing tools, find the B key (which stands for Bold). And press it. You’re done! You’ve now made the word “BOLD” bold on your page.

Adding Images To Webpages
Adding images to your webpages may seem cumbersome if you have never done it before however after the first few times it will get easier. First, click on the “Add Image” button in the editing tools after you place the cursor where you want to insert the image. Then click “Browse Server“
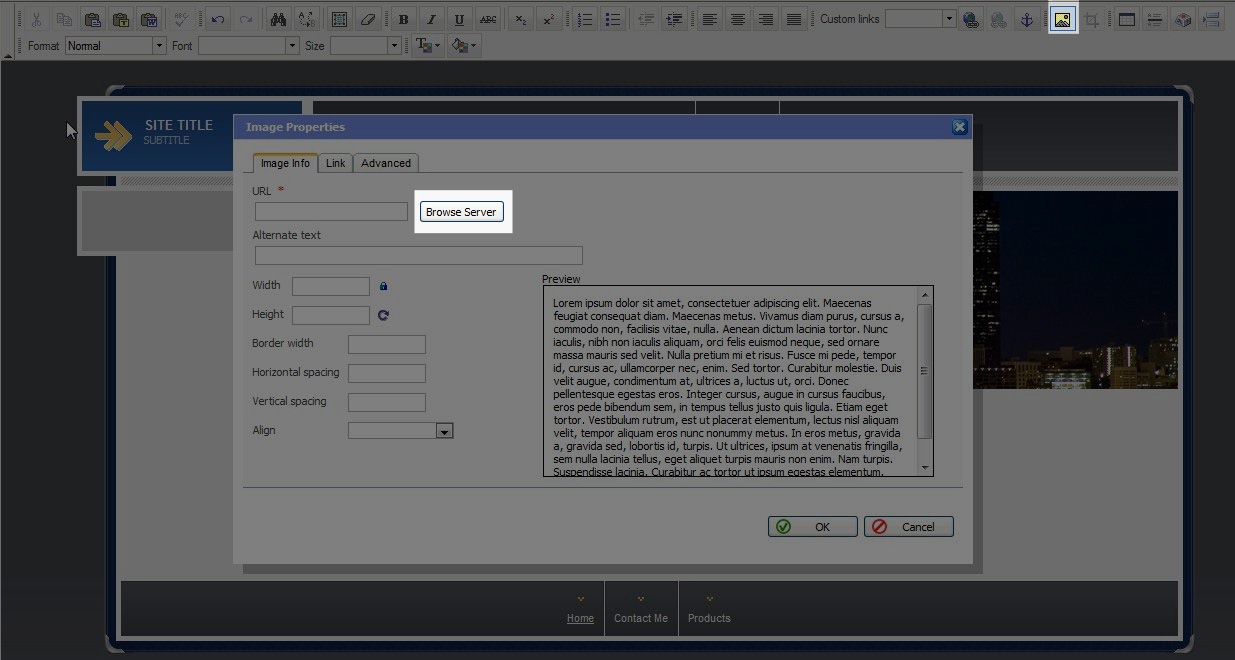
Next, you will notice a new popup window open. At the bottom of the page, click on the button “Choose File.” This will open a window so you can locate the file on your computer to upload. Select the file you wish to insert as an image.
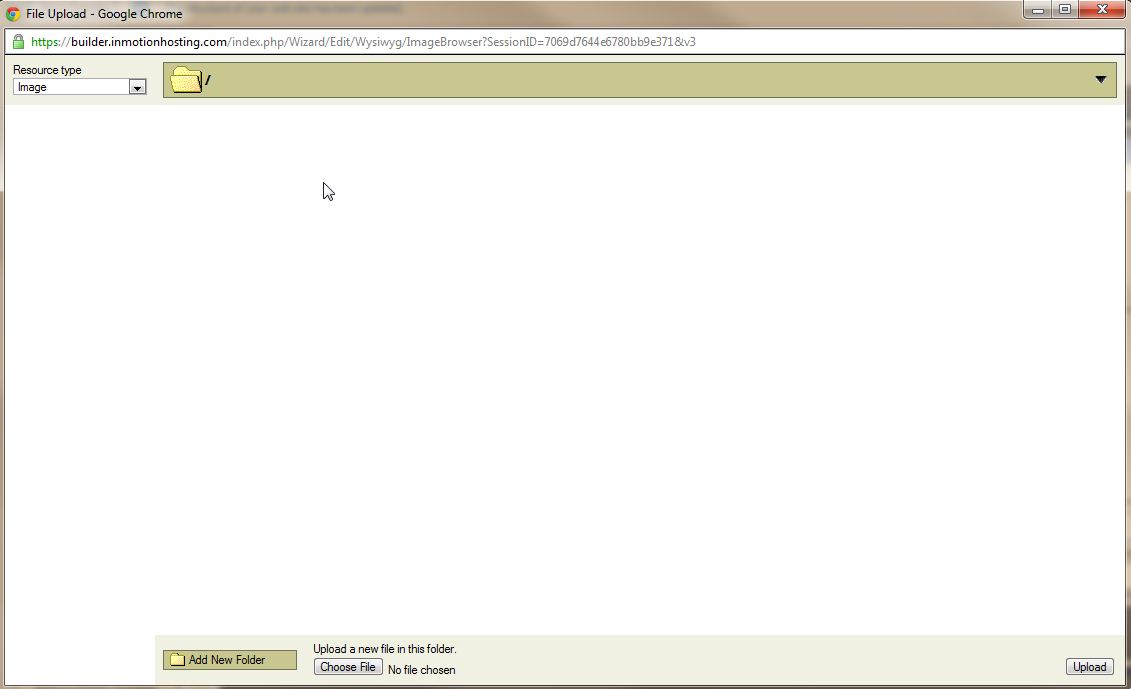
Select the image from the list of images in the center of the page. This will then take you back to the original popup where you can format the image.
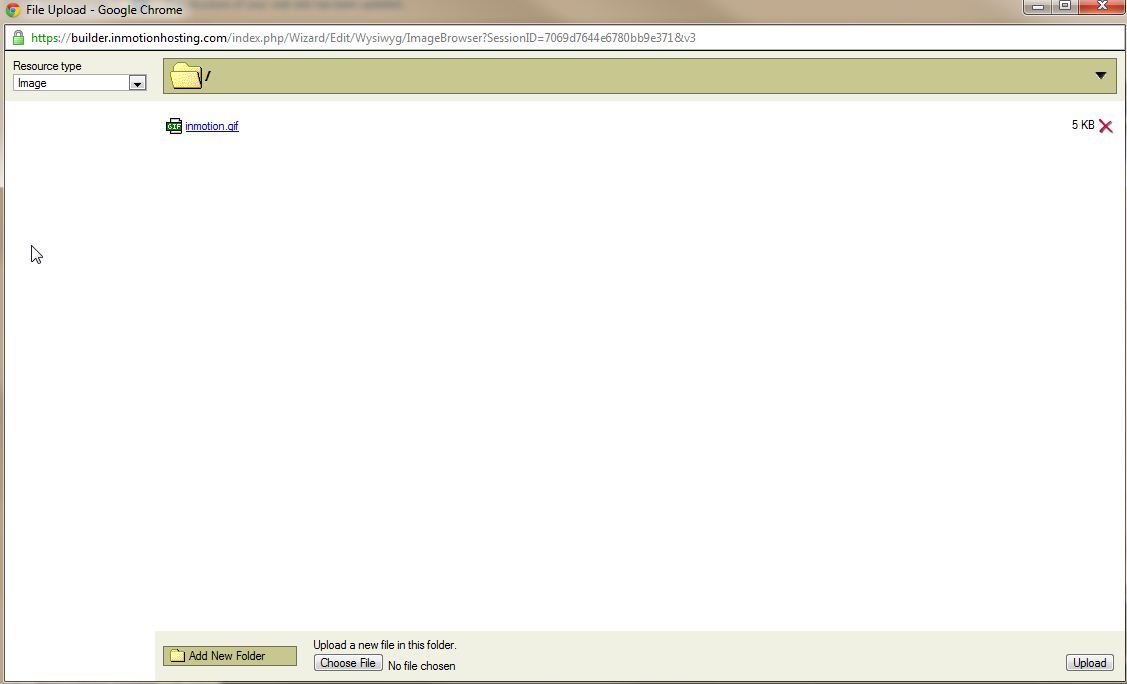
Below is a screenshot after the image is formatted.
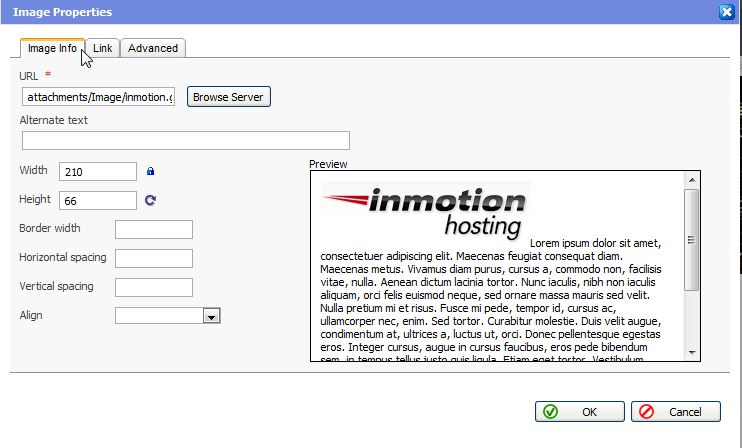
When you are satisified with the formatting, click “OK“
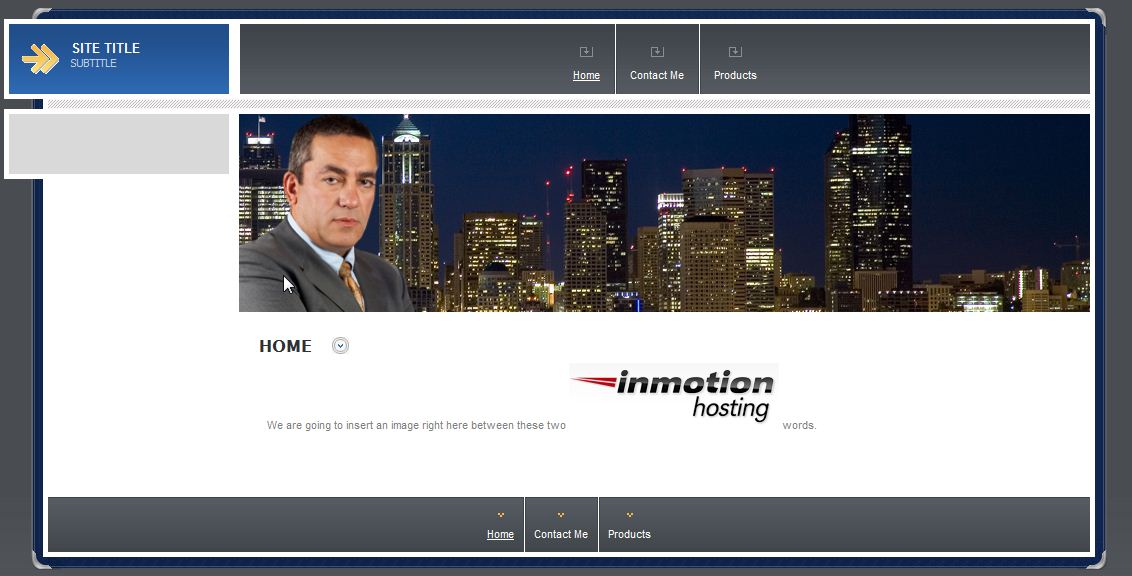
Congratulations! You just entered your first image into a webpage.
Please check the next article on Publishing your Website. If you missed our previous article, please see the Building your Website Layout tutorial. For more information on this course please visit Building a Website