Keeping in contact with your customers is very important for generating repeat sales. A good customer relationship will bring more repeat business and using tools such as a follow up form will help you offer discounts to your customers under specific conditions. This tutorial will explain how to install and configure the Customer Follow Up module for your PrestaShop 1.5 store.
How to install and configure the Customer Follow Up module in PrestaShop 1.5
- Log into your PrestaShop 1.5 dashboard.
- Using the top menu bar, hover over the Modules tab and select the Modules option.
- From the Modules list screen, scroll down until you find the module named Customer Follow Up. Click on the Install button located to the right of the module’s row.

- Once installed, you will see a successful installation message on the screen. From here click the link entitled Configure to continue to themodule configuration screen.

- You are now on the settings configuration screen for the module. This module allows you to set up four different categories of emails to be sent out.
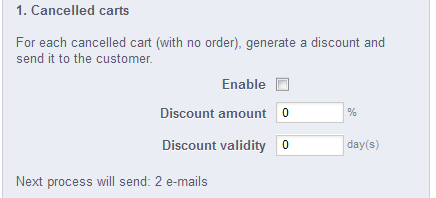
The first is Cancelled Carts. This is when a customer begins and order but does not complete the check out procedure.
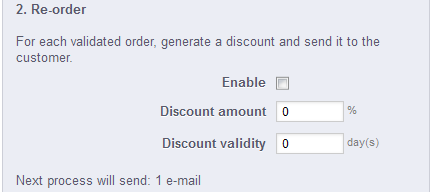
Enabled This determines whether a discount will be sent to customers that fall under this criteria. Discount Amount The percentage amount you will offer the customer, for example 10%. Discount Validity The number of days the discount is good for. The Re-ordercategory is for customers that did complete an order. This entices them to return soon to get a discount.
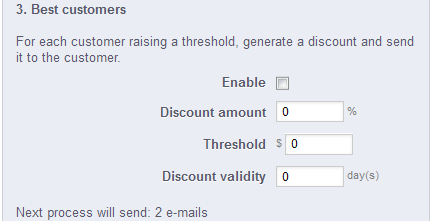
Enabled This determines whether a discount will be sent to customers that fall under this criteria. Discount Amount The percentage amount you will offer the customer, for example 10%. Discount Validity The number of days the discount is good for. The Best Customerscategory is for customers that have reached a certain amount of total sales with you. Sending them a discount as a reward can bring them back even quicker.
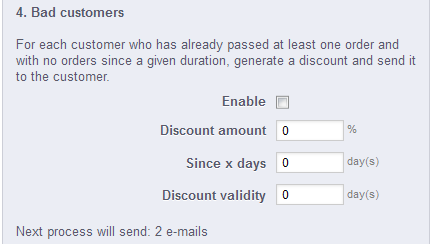
Enabled This determines whether a discount will be sent to customers that fall under this criteria. Discount Amount The percentage amount you will offer the customer, for example 10%. Threshold The dollar amount in purchases the customer must hit to receive this discount. Discount Validity The number of days the discount is good for. The Bad Customers category is for those who have passed at least one order and have not returned within a given time period. Sending them a discount may bring them back to your store to make a purchase.
Enabled This determines whether a discount will be sent to customers that fall under this criteria. Discount Amount The percentage amount you will offer the customer, for example 10%. Since X Days The number of days the customer must pass without returining to qualify for the discount. Discount Validity The number of days the discount is good for. - Once you have configured your settings, select the Save button at the bottom of the screen.
- To send the emails you can run the link found at the top of the page at your discretion, or you can add it to the CronTab to have it run at regular intervals.


