Adding the Product Tooltips module can be effective in helping a customer with their decision on product purchase. When enabled, information will appear briefly in a bubble on the screen. This information is configurable, so you get to choose what the customer sees. It can, however, show when the last time an item was purchased, ordered, or the number of people watching the item. Follow the instructions below to install and configure the Product Tooltips module in your PrestaShop 1.5 store.
How to install and configure the Product Tooltips module in PrestaShop 1.5
- Log into your PrestaShop 1.5 dashboard.
- Using the top menu bar, hover over the Modules tab and select the Modules option.
- From the Modules list screen, scroll down until you find the module named Product Tooltips. Click on the Install button located to the right of the module’s row.

- Once installed, you will see a successful installation message on the screen. From here click the link entitled Configure to continue to the module configuration screen.

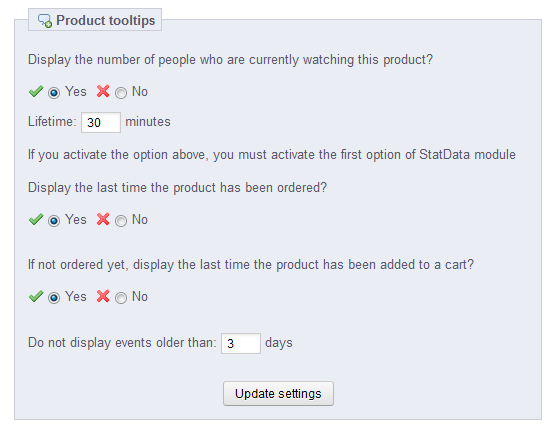
- You are taken to the settings screen where you can configure the module behavior. There are a few fields to configure with this module that affect what the customer will see when visiting the information page for a product.

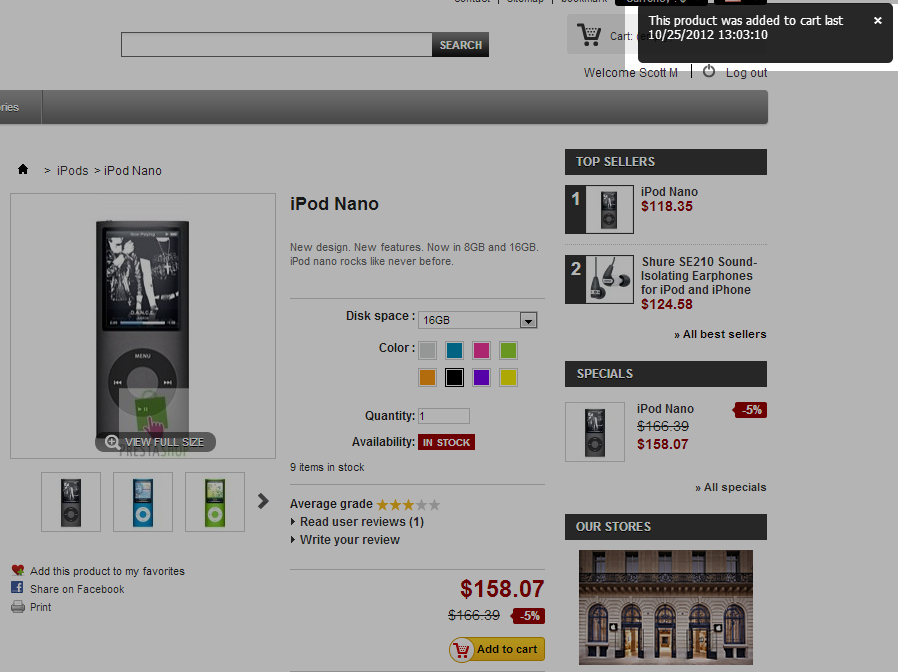
Display the number of people who are currently watching this product? Toggles whether to display this information. Lifetime The time frame that for the above setting. For example: 30 minutes means it records the people that have watched that product within the last 30 minutes. Display the last time the product has been ordered? Toggles whether to display this information. If not ordered yet, display the last time the product has been added to a cart? Toggles whether to display this information, but only if the product has not been ordered. Do not display events older than X days. The time frame restriction for data. For example, only use the above settings for the last 7 days. - Once you have configured the settings, be sure to click the Update Settings button to finalize and activate them. Below is a screenshot of a tooltip in action when visiting a product information page.


