You may want to have certain procedures run at regular intervals from your PrestaShop site. This is known as a cron job. Cron is a time-based job scheduler that is found on Unix servers. Other operating systems refer to a ‘cron job’ as a ‘scheduled task’. In essense it is a sript set to run at specific time intervals. This tutorial explains how to set up and configure the CronTab module, which allows you to be able to set cron jobs for your PrestaShop 1.5.
You will need to download the CronTab module for your shop to your local computer. You can find this module at the PrestShop website. Below is a set of instructions on how to add a Pinterest link to your products in PrestaShop 1.5. Note that the instructions assume you have already downloaded a Pinterest module to your local machine.
Setting up the CronTab module in PrestaShop 1.5
- Log into your PrestaShop 1.5 dashboard.
- Using the top menu bar, hover over the Modules tab and select the Modules option.
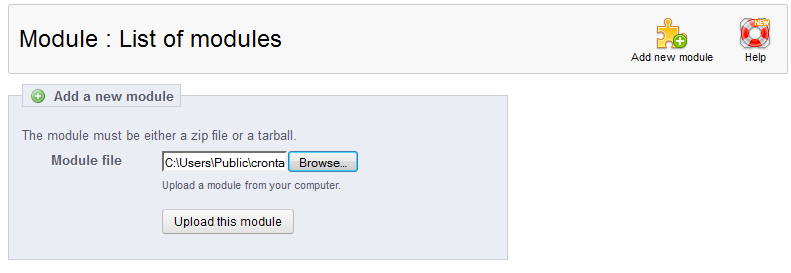
- From here you will see the the normal list of the available modules for your store. To upload your CronTab module, look to the upper right corner of the screen and click on the Add New Module button. This will reveal a small section just underneath for the purpose of uploading your module.

- Click the Upload this Module button to have it uploaded into your PrestaShop.
- After uploading the module, scroll down until you find the module named Crontab For PrestaShop in the module list. Click on the Install button located to the right of the module’s row.

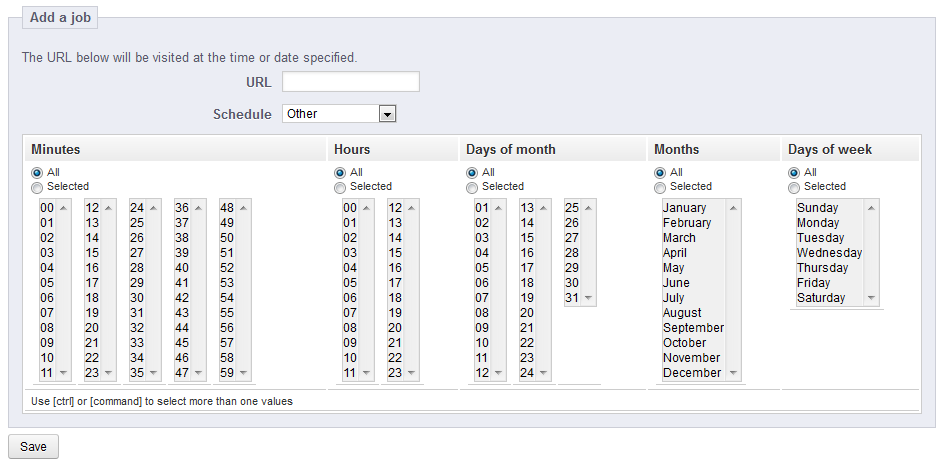
- Once installed, you will see a successful installation message on the screen. To continue to the settings area, click on the link named Configure. In the settings screen you will select the Method from the dropdown based on the descriptions given just below. Next, put the path for the cron script in the URL field. The Schedule dropdown allows you to choose from predetermined frequencies or create your own by selecting Other.

The Other setting will present you with a worksheet to construct the frequency the job should run.

- Click Save for all areas you have modified to finalize the settings for the module. Your script is now set to run at your specified intervals.


