After learning how to enable advanced stock management in our last article, our next article in the Advanced Stock Management course will go over adding a new warehouse. The warehouse tab allows you to track which warehouse a product and its various combinations are stored. Below are the instructions for adding a new warehouse in PrestaShop 1.5
How to add a new Warehouse in PrestaShop 1.5
- Log into your PrestaShop 1.5 dashboard.
- Using the top menu bar, hover over the Stock tab and click on the Warehouses option from the menu.
- This brings you to the Warehouses list page. The table in the center of the page will list all warehouses that you have created. As this will be our first warehouse, there are none in the list. Click on the green Add New button to continue to the warehouse creation screen.

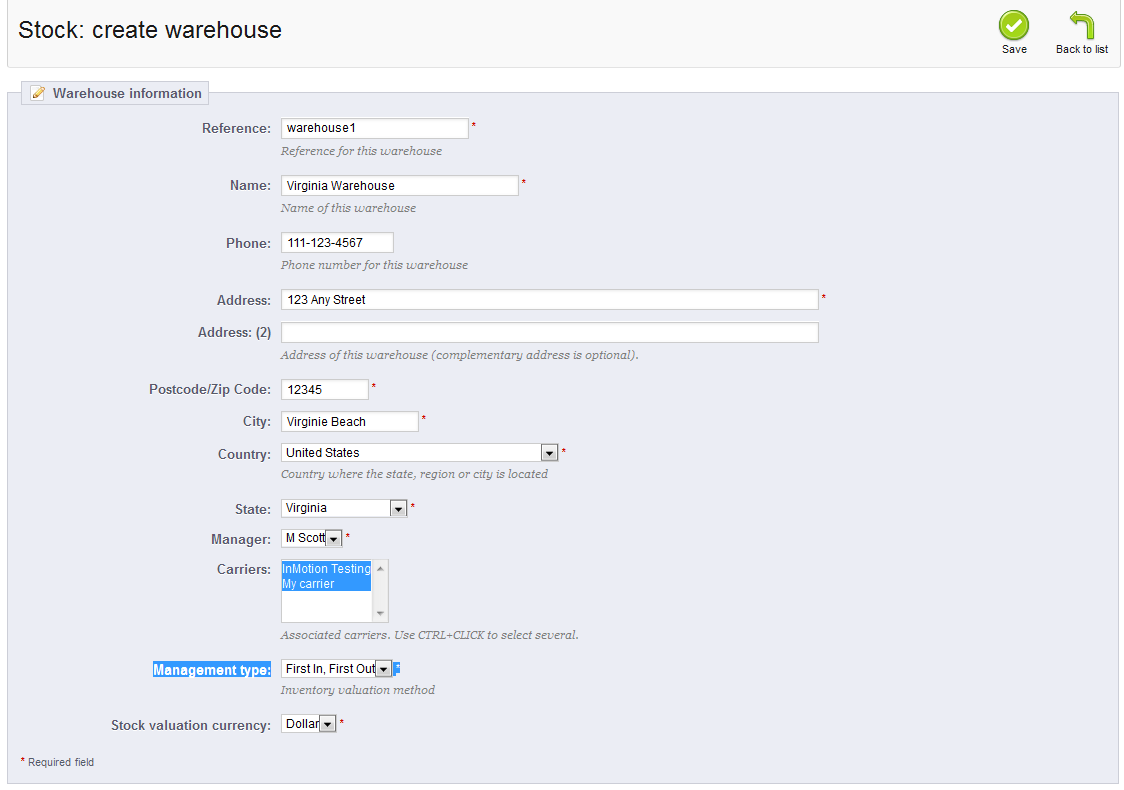
- You are now taken to the Warehouse creation screen. Here is where you enter all the data for the warehouse. Below is a list of all the available fields and descriptions of each.
Reference Unique identifier for your warehouse. This can be anything you want, but make it meaningful. Name The name of the warehouse. Again, it can be anything, but make it meaningful. Phone Phone number for the warehouse’s physical location Address Physical address of the warehouse’s location. Address(2) Continued from above. Postcode/Zip Code ZIP code for the warehouse’s physical location. City City where the warehouse is located. Country Country in which the warehouse is located. State State in which the warehouse is located. Manager The name of the person in charge of this warehouse. This list is populated from the employees of your store. Carriers The selection of carriers authorized for orders that ship from this warehouse. Management Type The accounting method used for this warehouse. CANNOT BE CHANGED LATER. Stock Valuation Currency The currency used for valuation of the stock in this warehouse. The list is populated by your list of currencies. CANNOT BE CHANGED LATER. - After you have filled out all the proper information for your warehouse, click the green Save button in the upper right corner of the screen to save it. The new warehouse will now appear in your Warehouse list screen.


