Creating an order for a customer in the PrestaShop 1.5 back office is an involved process. There are several steps along the way. You may want to create a manual order if you take a customer order over the phone or by email. The steps below will guide you on how to create a new order from within the PrestaShop 1.5 admin dashboard.
Generating a manual order in PrestaShop 1.5
- Log into your PrestaShop 1.5 admin dashboard.
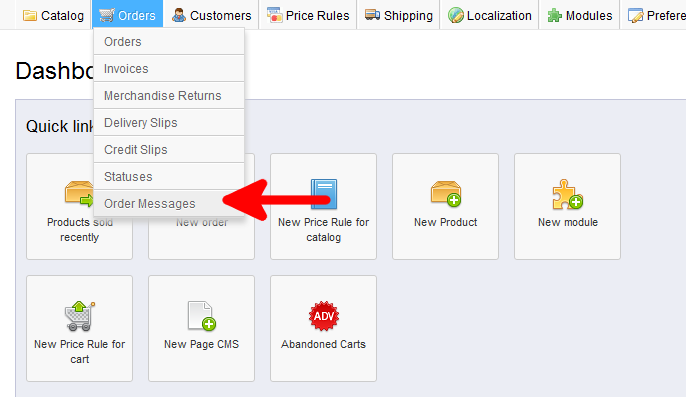
- Using the top menu bar, hover over the Orders tab and click on the Order option.

c
- You will now be at the Orders list which shows all current orders. To begin a new order, click on the green Add New button found in the upper right corner.
- Now you are on the actual order screen. Sections will appear on the screen as you step through the order. The first section is the customer section. If your customer is already registered, simply begin typing their name in the customer field. Matching names will appear below and you can select your customer from there by clicking the Choose button. If this is a new customer, you will need to click the Add New Customer button to enter the new customer data.

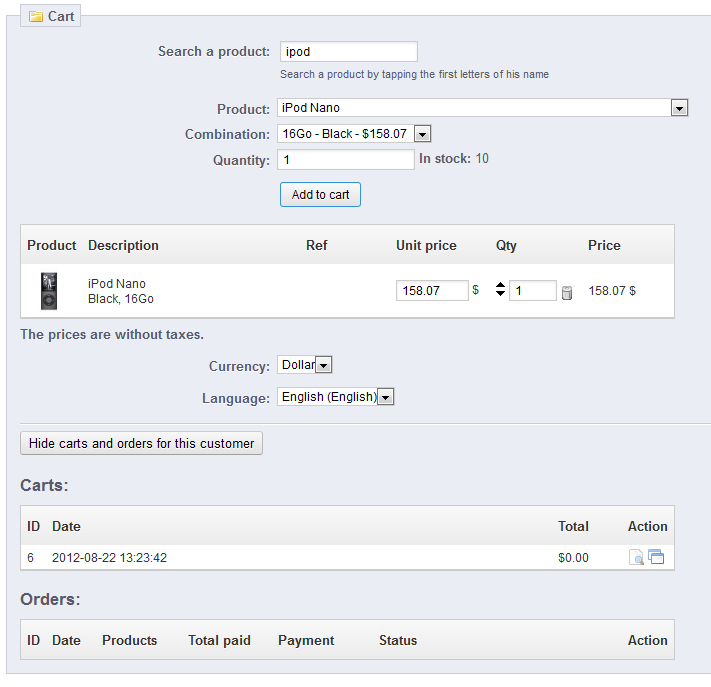
- Once your customer is confirmed, the Cart section appears. From here you will enter the products the customer is wanting to order. Entering the name of the product will cause information specific to that product to appear below. In our example, we chose the ipod. Several fields appeared that let us choose the correct product and quantity. Click the Add to Cart button to add the product. Repeat the step to add more products, if desired.
-
The cart information was generated when entering the screen. The newest cart will appear at the top and show the totals for any saved data. At this point, nothing is saved, so it shows a $0.00 total.

- The next step is to add any vouchers, or cart rules, under the Voucher section.

- After the vouchers, select the address to which the delivery will be made. The address will be selected from the dropdown.

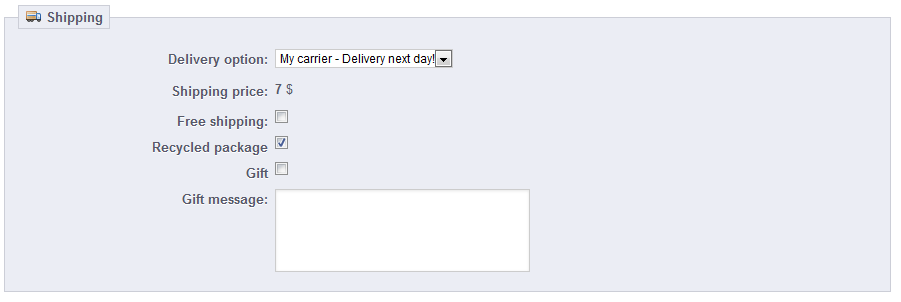
- Next is the shipping details. Enter any details that are different from the defaults.

- The remaining section is the Summary. This is where you review the totals, add any order messages, payment info, and order status. Once finished, click the Create the Order button to complete the order. This completes and saves the order and takes you to the edit screen for that order in case you want to make any changes.


